
The Visibility Layers in PhotoMirage allow you to see what you are working on more clearly by showing or hiding different elements of your project. In this tutorial we’ll explore the Visibility Layers for Animation Markers, crop area, mask area, and original image file. Learning how to use Visibility Layers will make editing your animations much easier, and turning them on and off won’t affect your animation project itself, just allow you to see the individual elements on their own.
Thanks for watching! We hope you found this tutorial helpful and we would love to hear your feedback in the Comments section at the bottom of the page. You will find a written version of this tutorial below, and a printable PDF copy to download on the Download Resources tab above.
Download your FREE 15-day trial of PhotoMirage and start creating stunning animations from your photos, digital designs and artwork in just a few simple steps.
Download these free resources:
Written Tutorial (PDF, 400.4 KB)
PhotoMirage resources
User Guide (PDF, 4 MB)
Keyboard shortcuts (PDF, 518 KB)
PhotoMirage Tutorials
Tools and resources
PhotoMirage animation software
With PhotoMirage you can effortlessly transform any image into a captivating animation in only a matter of minutes.

PhotoMirage free trial
Download your FREE 15-day trial of PhotoMirage and start creating stunning animations from your photos and images.

PhotoMirage gallery
Visit the PhotoMirage gallery and upload your animations. Browse the gallery for inspiration and see what other users are creating.
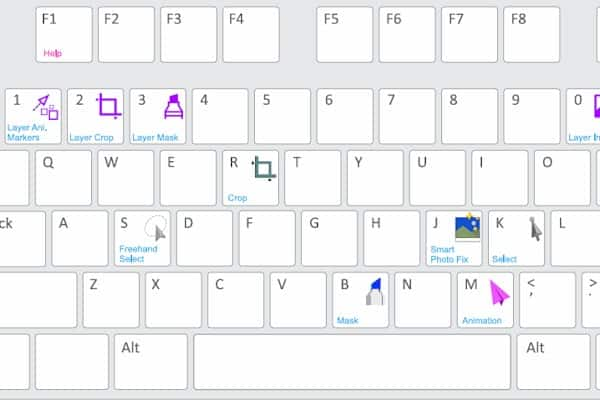
Keyboard shortcuts
Shave time off your most frequently performed tasks with this handy reference sheet for all the PhotoMirage keyboard commands.
How to Use Visibility Layers in PhotoMirage
Visibility layers can help you see what you are working on more clearly, by showing or hiding different elements of your photo animation project.
The Visibility Layers panel has 4 options:
- Animation Markers
- Crop
- Mask
- Image
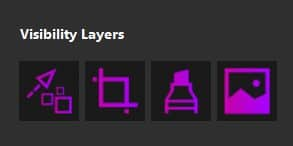
Click the Animation Markers button to toggle Motion Arrows and Anchor Point visibility on and off.
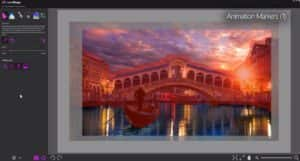
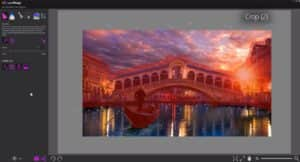
Click the Crop button to toggle the crop box visibility on and off, to better visualize your final image.
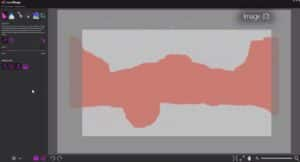
Click the Mask button to toggle on and off the visibility of the mask area.
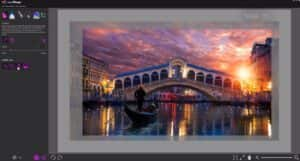
Click the Image button to toggle on and off the image itself.
Note that none of these settings affect the final animation, they are strictly visual aids for your editing process.
Download your FREE 15-day trial of PhotoMirage and start creating stunning animations from your photos, digital designs and artwork in just a few simple steps.

Comments (1)
Reader Interactions
Comments
Very helpful Information and Keep Sharing More.