
Learn how to use the Mask tool in PhotoMirage to define the areas in your image that you want to remain motionless. The Mask tool can be used alone or in combination with Anchor Points. In this tutorial we’ll show you how to apply a mask on your image, and how to add to, or remove from, the mask area. We’ll also explore different features of the Mask tool such as how to increase or decrease the brush size, how to change the shape of brush, and how to adjust the Hardness setting to change the feathering around the outside of your mask area from sharp to soft.
Thanks for watching! We hope you found this tutorial helpful and we would love to hear your feedback in the Comments section at the bottom of the page. You will find a written version of this tutorial below, and a printable PDF copy to download on the Download Resources tab above.
Download your FREE 15-day trial of PhotoMirage and start creating stunning animations from your photos, digital designs and artwork in just a few simple steps.
Download these free resources:
Written Tutorial (PDF, 290 KB)
PhotoMirage resources
User Guide (PDF, 4 MB)
Keyboard shortcuts (PDF, 518 KB)
PhotoMirage Tutorials
Tools and resources
PhotoMirage animation software
With PhotoMirage you can effortlessly transform any image into a captivating animation in only a matter of minutes.
PhotoMirage free trial
Download your FREE 15-day trial of PhotoMirage and start creating stunning animations from your photos and images.
PhotoMirage gallery
Visit the PhotoMirage gallery and upload your animations. Browse the gallery for inspiration and see what other users are creating.
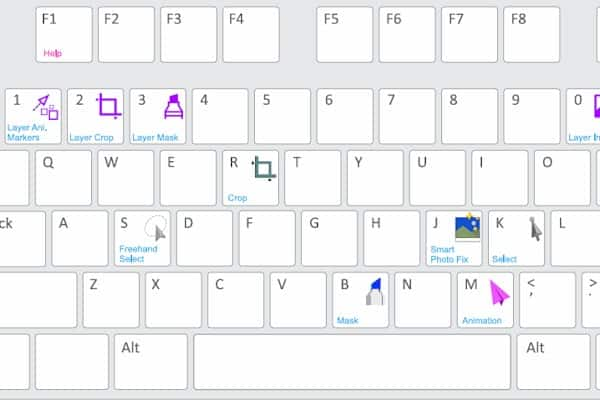
Keyboard shortcuts
Shave time off your most frequently performed tasks with this handy reference sheet for all the PhotoMirage keyboard commands.
How to Use the Mask Tool in PhotoMirage
The Mask tool is similar to anchor points, in that it is another way to control which parts of your image move, and which parts remain still.
Applying a Mask
Start by selecting the Mask tool icon on the left.
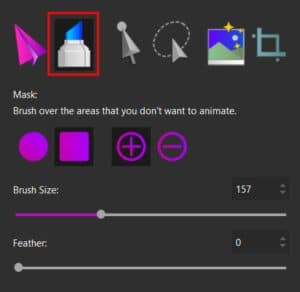
- Choose the brush shape, round or square
- Use the Brush Size slider or number field to increase or decrease the size of your brush as needed.
- Ensure the Add to Mask icon is selected.
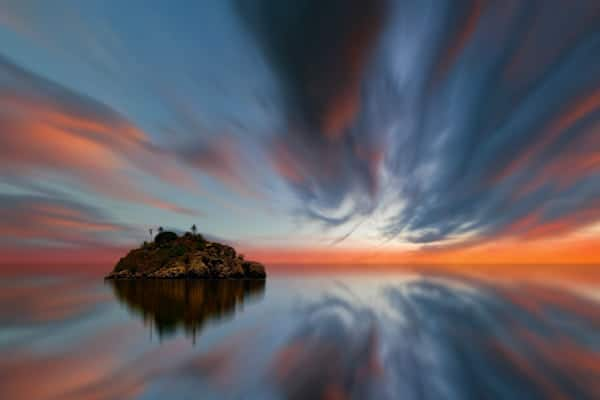
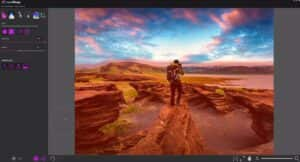
Using the mask brush, paint over the parts of your image that you want to stay still once your animation is applied. In this example, we want only the sky to be animated so we have masked out the hiker and mountains.
TIP: The easiest way to apply a large mask area is to do the edges with a smaller brush, and fill in the middle with a large brush.
Adjusting Masks
Once you have created a rough mask, there are some tools that you can use to refine the mask area.
- Use the Remove from Mask mode to clean up any overpainted areas of your mask.
- Switch back to Add to Mask mode to fill in any areas you missed, or removed by mistake.
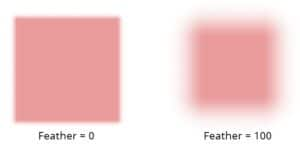
- Use the Feather slider to adjust the hardness of the mask edges, or how gradually the animation effect will fade in or out around the edge of your mask.
Testing Your Mask
Once you are happy with your mask, activate the Motion Arrows animation tool and click and drag to place arrows in the direction you want your animation to flow.
NOTE: For more information on using motion arrows, please see our tutorial earlier in this series titled How to Use Motion Arrows and Anchor Points.
With your motion arrows applied, press the Play icon in the bottom left to preview your animation.
Note any areas where the effect is imperfect, and press Stop in the bottom left to end the preview.
Tidy up your mask as required using the Remove/Add to Mask tools. You can also apply Anchor Points to the edge of your mask to help block out areas from the animation.
Download your FREE 15-day trial of PhotoMirage and start creating stunning animations from your photos, digital designs and artwork in just a few simple steps.
