Sharpener Pro 3 is the fifth plugin available from the Google Nik Collection. It’s very easy to integrate Sharpener Pro 3 into your editing workflow. This program simplifies complicated sharpening procedures down to very simple steps. Sharpener Pro 3 utilises two methods of sharpening images. The plugin contains a RAW Presharpener as well as an Output Sharpening procedure. Each section of the plugin accomplishes different results. It is possible to utilise Sharpener Pro to process photos using a technique called Multi-Pass sharpening. This advanced technique of sharpening allows the user the ability to sharpen an image during the RAW stages, to creatively sharpen an image and also to sharpen an image with specifications that suit each type of output.
RAW Presharpener
This section of the plugin allows users to be selective sharpen a RAW image. It is possible to sharpen edges or to utilise adaptive sharpening to sharpen whole areas of an image. The Presharpener allows you to make finite adjustments to areas of the image. The workspace is very simple to use. There are two options for using this plugin. The first is to apply sharpening to the whole image using the sliders at the top of the panel.
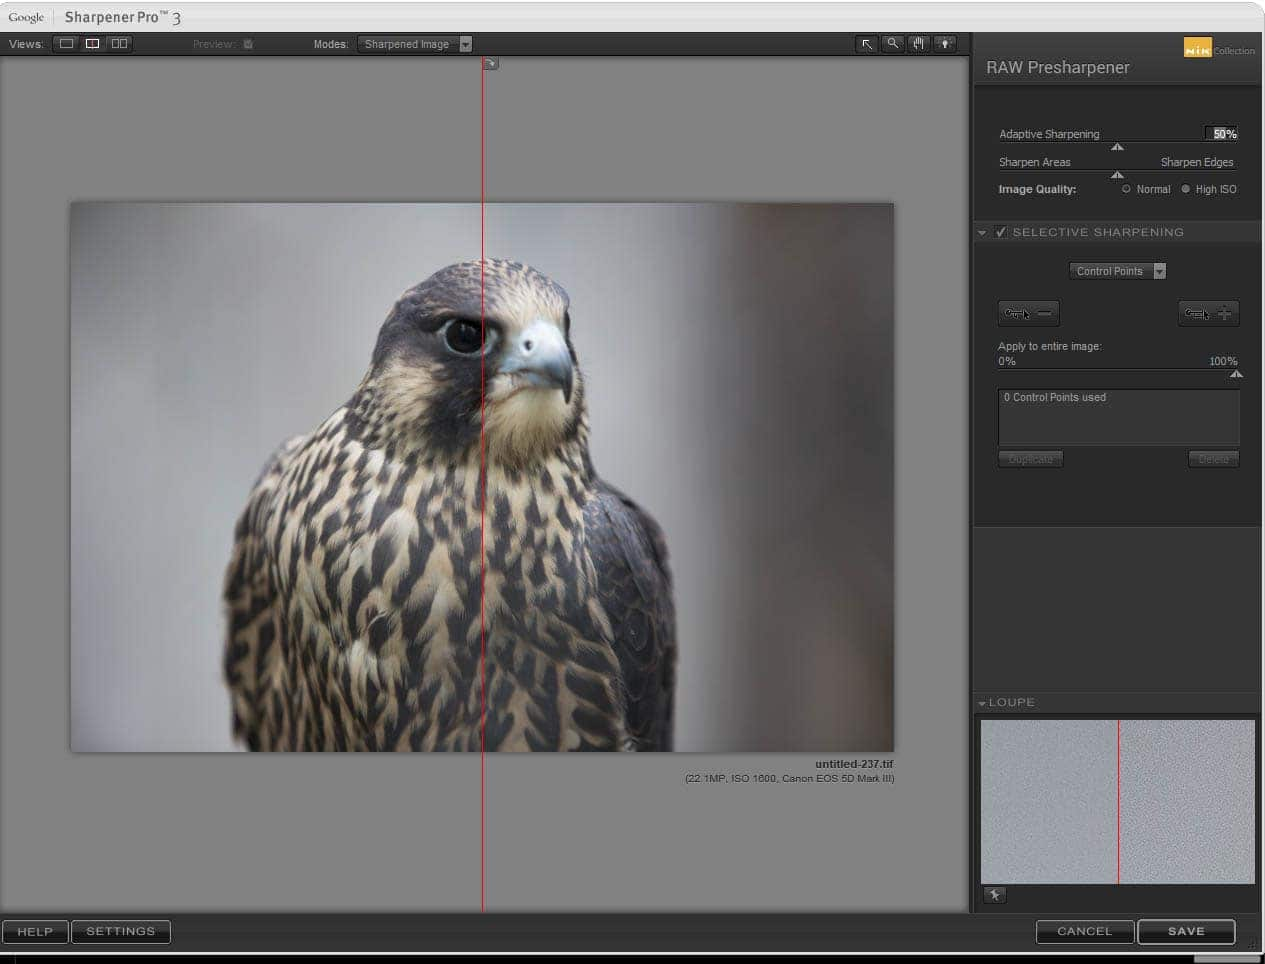
In the above image, you can see the simple interface and also the slider which allows you to compare the effect of your adjustments on the image. The slider is a great tool for seeing the changes you have made to the image.
Sharpening is a fine art, and it’s important to effectively sharpen images without creating halos that are the result of oversharpening an image. Always use the zoom tool located on the top right of the panel to view your images at least 100% to ensure that your sharpening adjustments remain effective.
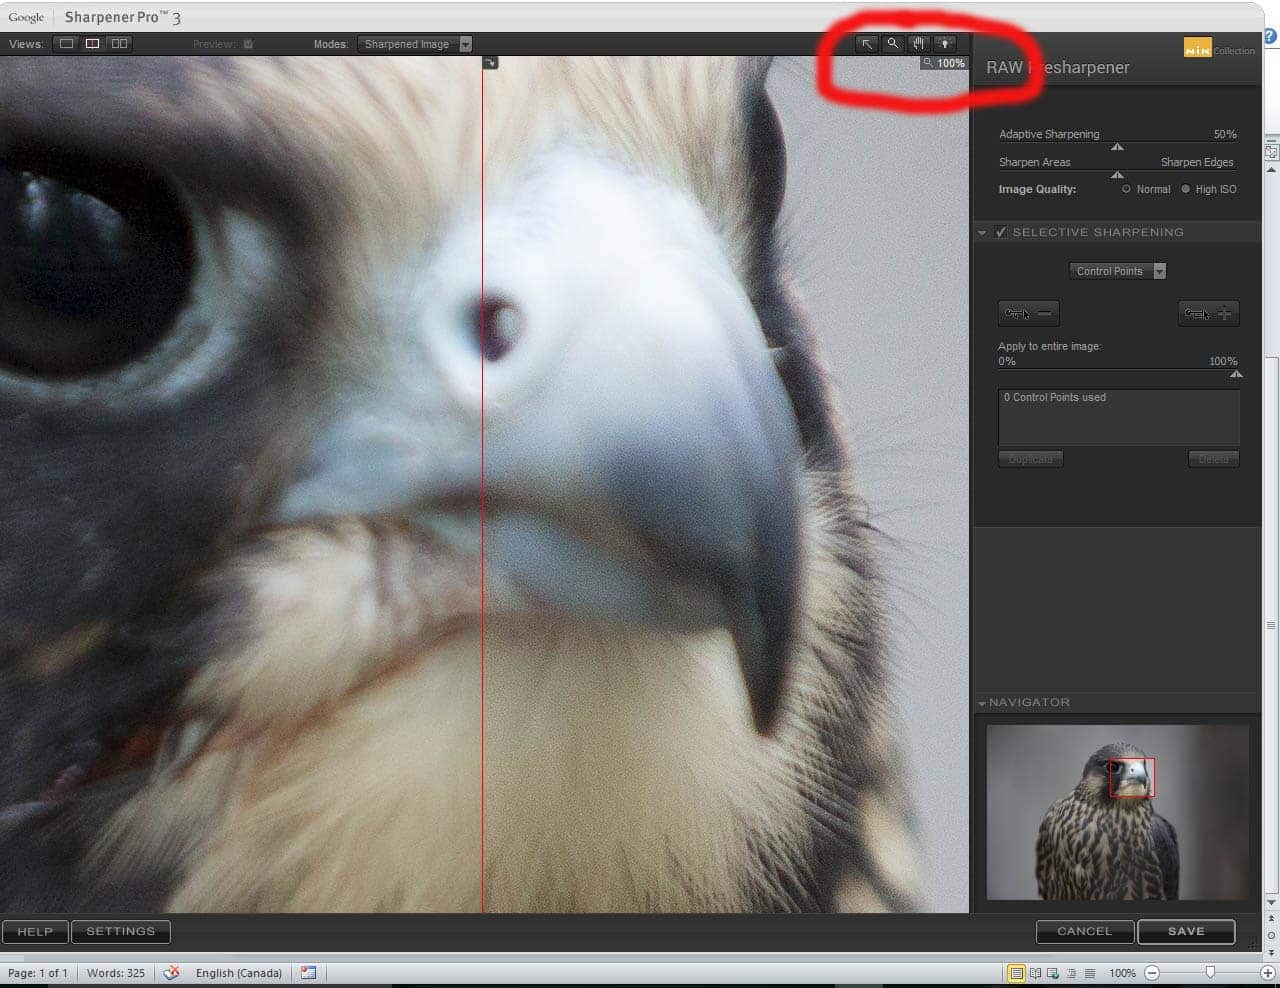
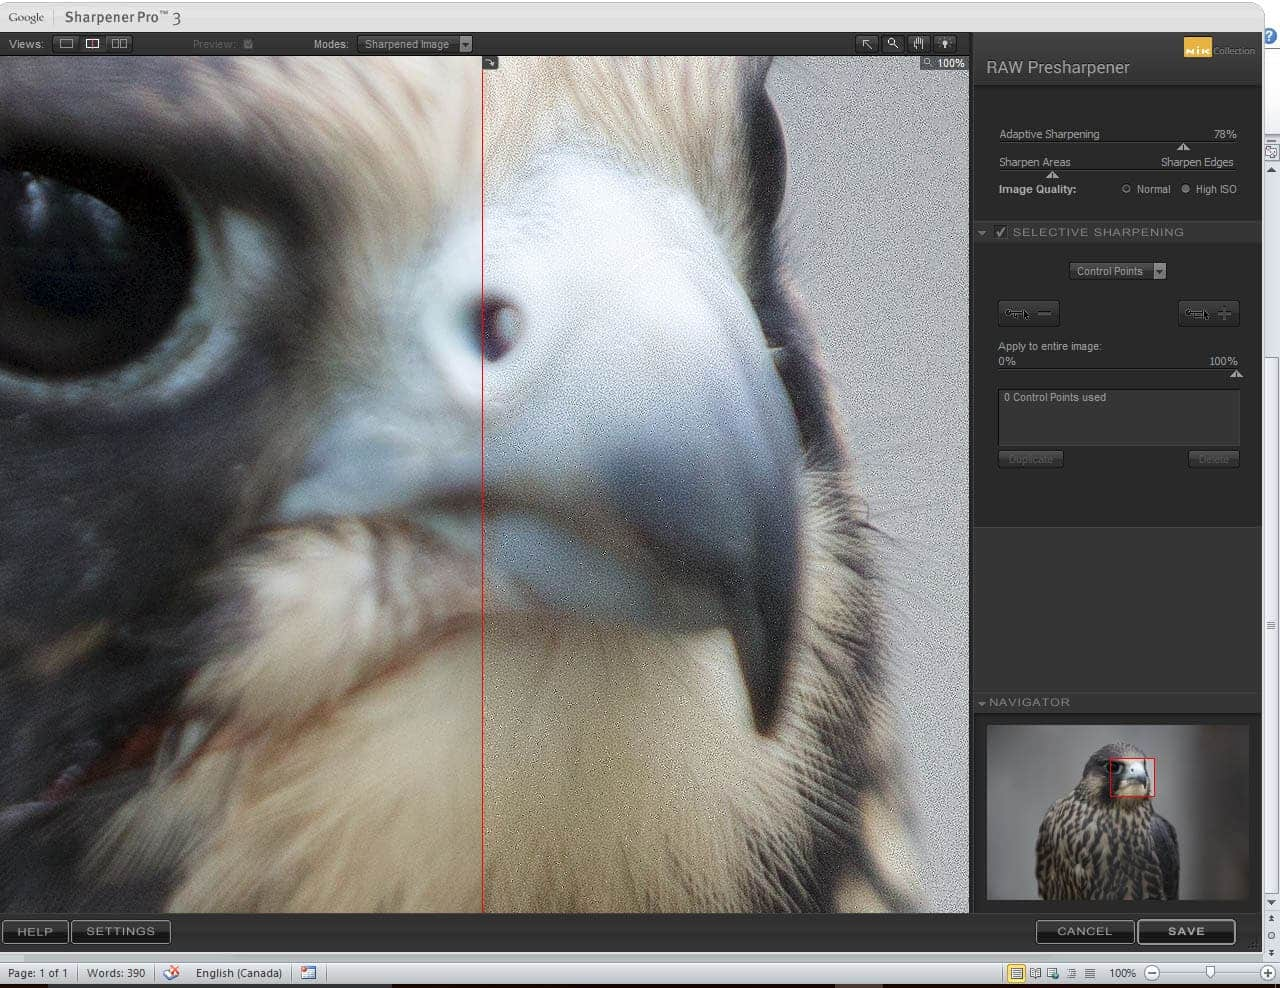
You can see how the changes you make will affect the overall look of the image. Oversharpened images will often appear extremely grainy and unattractive when printed. At 100% you will be able to see when the adjustments you make creates small halos around the edges of the image. In the image below you can see the effects of oversharpening an image. This is an extreme example, but you can see how there is such a thing as too much.
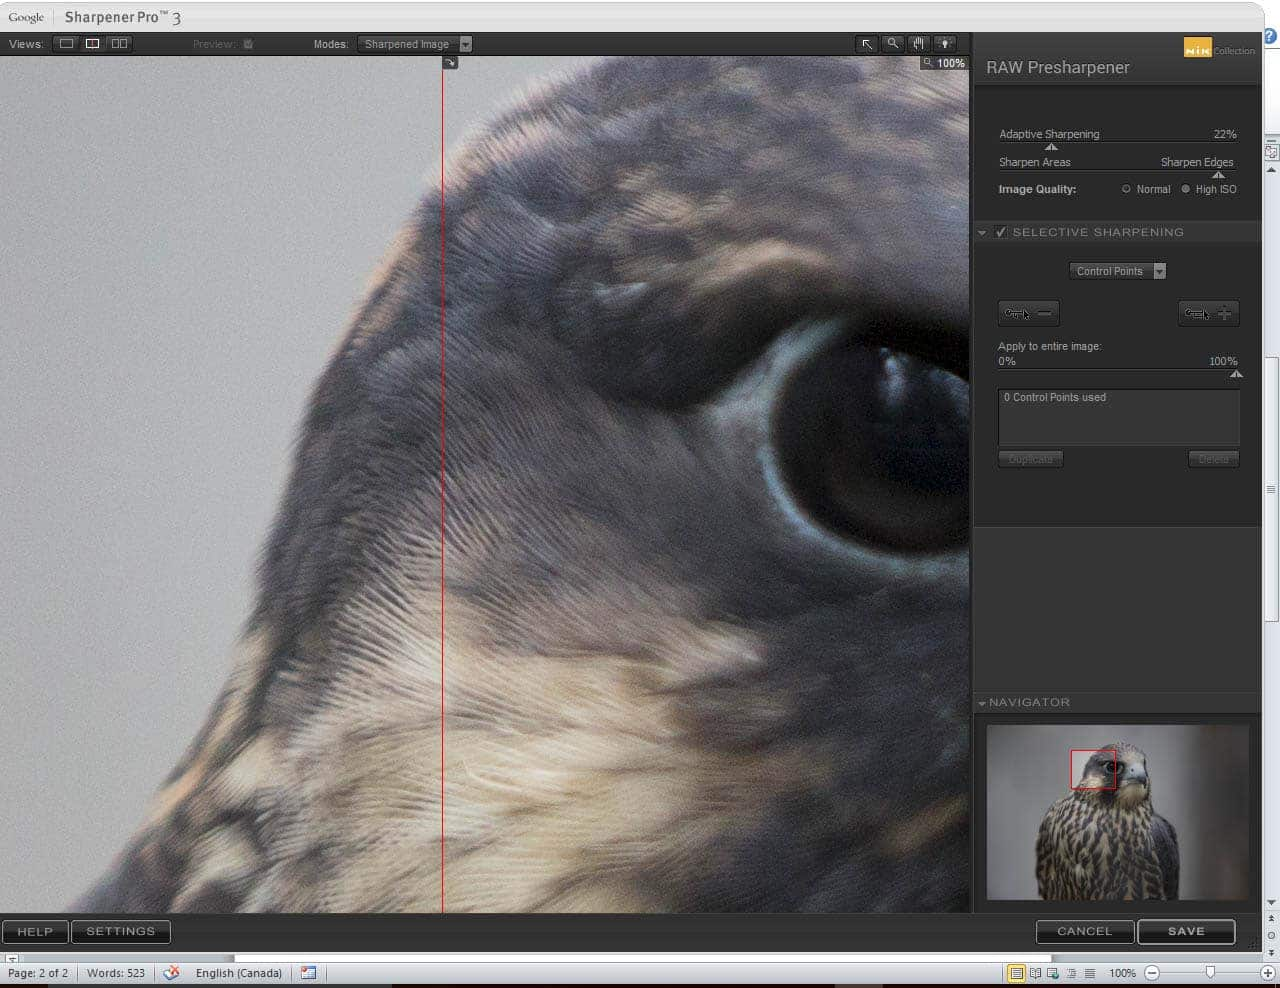
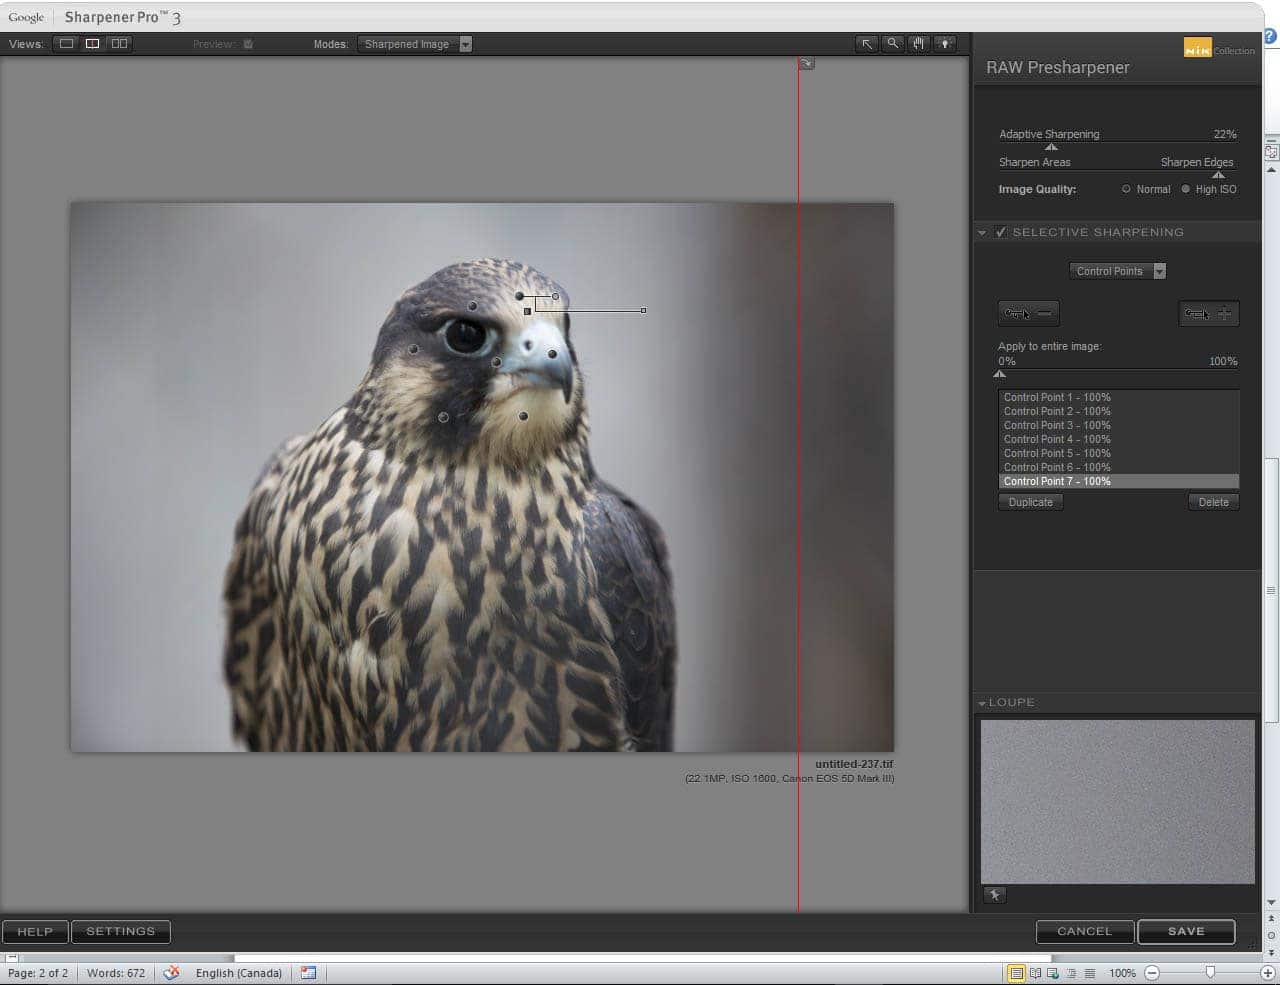
It is recommended in the RAW sharpening stage of the editing process that you focus on sharpening the edges of the image rather than the areas. The goal is to create a subtle difference in the image. You want to add a little more edge to your photograph. Please note that no amount of sharpening can rescue an image that is seriously out of focus. In the screenshot below you can see the adjustments created. You will also be able to see the before and after effects of this sharpening. The difference is very subtle, but the goal is to crisp up the edges just a little bit. Look carefully at the feathers on the bird. You will see that the edges are just a little more defined than previously.
In the case of this image, there is a fairly shallow depth of field. It’s important to remember that RAW sharpening should be applied to the parts of the image that are supposed to be sharp. In the case of this image, some parts should remain out of focus. Sharpener Pro allows you to use “Control Points” to apply selective sharpening to the image. This means that you will have more control over the final look of the image.
Since “Control Points” select the tones within each circle that are similar and apply sharpening to these tones it’s important to pepper the image with control points that will select and sharpen all the different tones within the areas you want sharp.
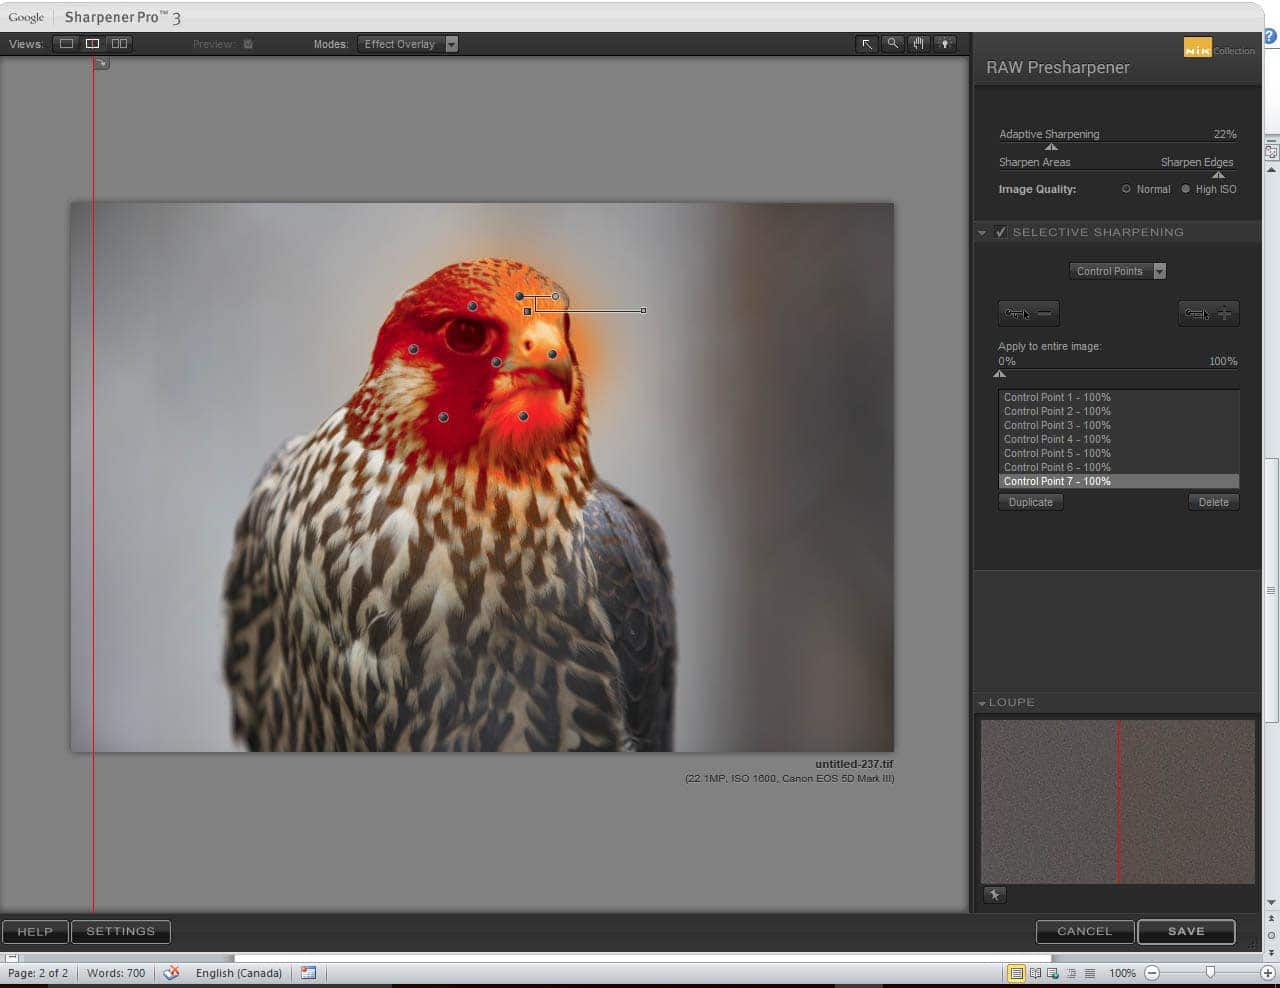
The program also allows you to view the parts to which the sharpening is applied by clicking on the mask overlay tools at the top of the interface.
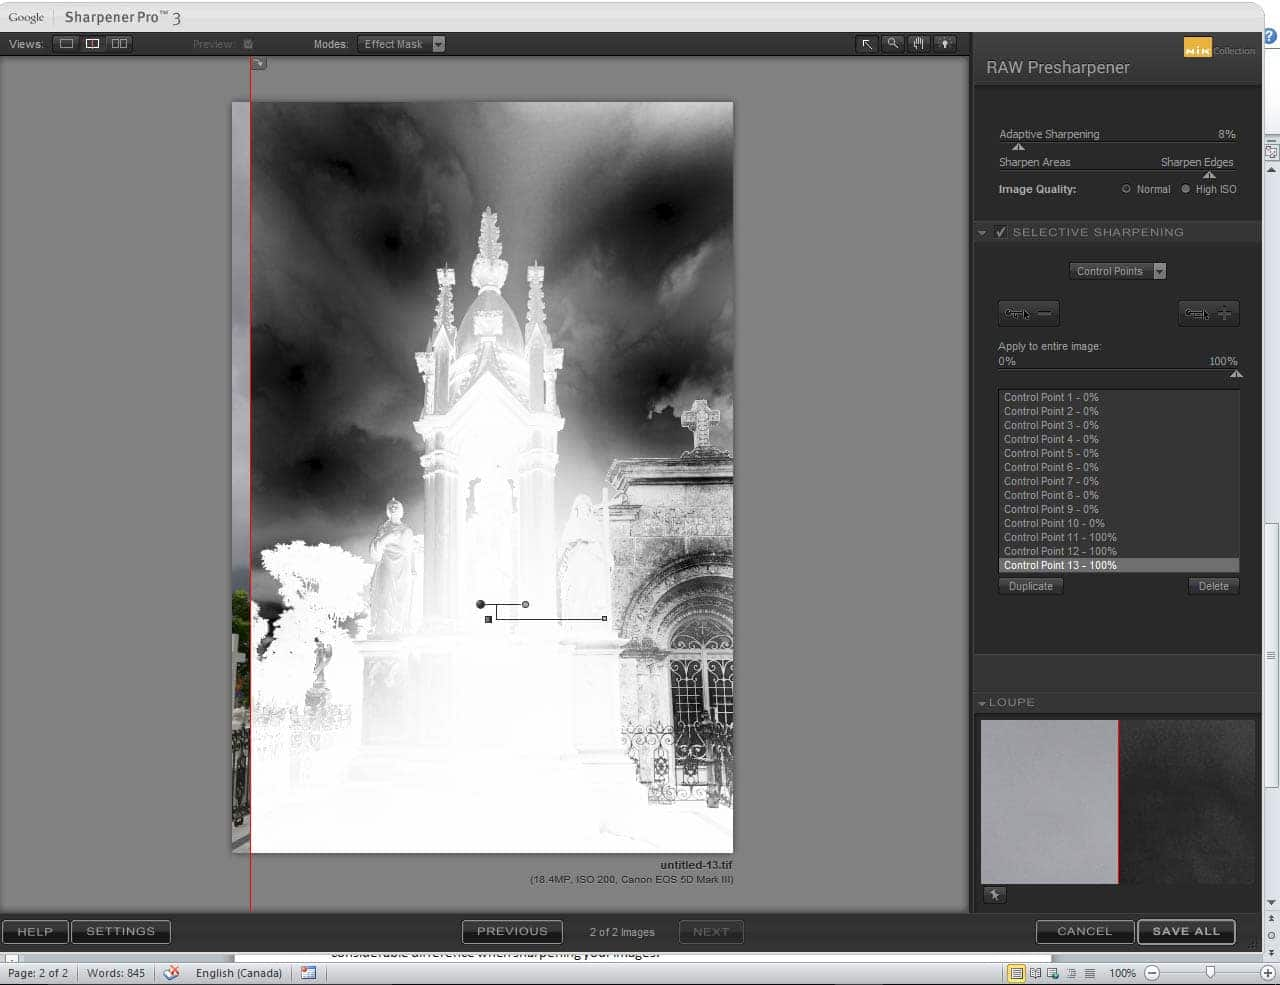
You can also use the control points to remove sharpening from an image. This is one of the ways that you can apply your creativity to the overall look of your images. In this case, the – control points have been used to unsharpen the background and to help keep the viewers focus on the main statue. This type of editing can be considered a part of the “Creative Sharpening” process. You can use control points or use the brush tool to apply “unsharpening” to select areas of the image.
Once you have completed all your adjustments, it’s easy to return to PaintShop and to continue editing your image. It’s a very easy plugin, and you should always remember that subtle adjustments can make a considerable difference when sharpening your images.
Output Sharpening
The second phase of the plugin is designed to apply Output sharpening. This means that you can choose the amount of sharpening applied to an image as it is converted from a RAW file to a Jpeg. In this case, you are going to apply some more sharpening to an image to ensure that final file looks its best. You should note that the amount of sharpening applied to an image that will be printed is different from the amount of sharpening applied to an image uploaded to the web.
The interface in this part of the plugin contains different features from those found in the RAW Presharpener. Here you have Creative sharpening sliders that you can utilise to adjust structure, contrast and focus.
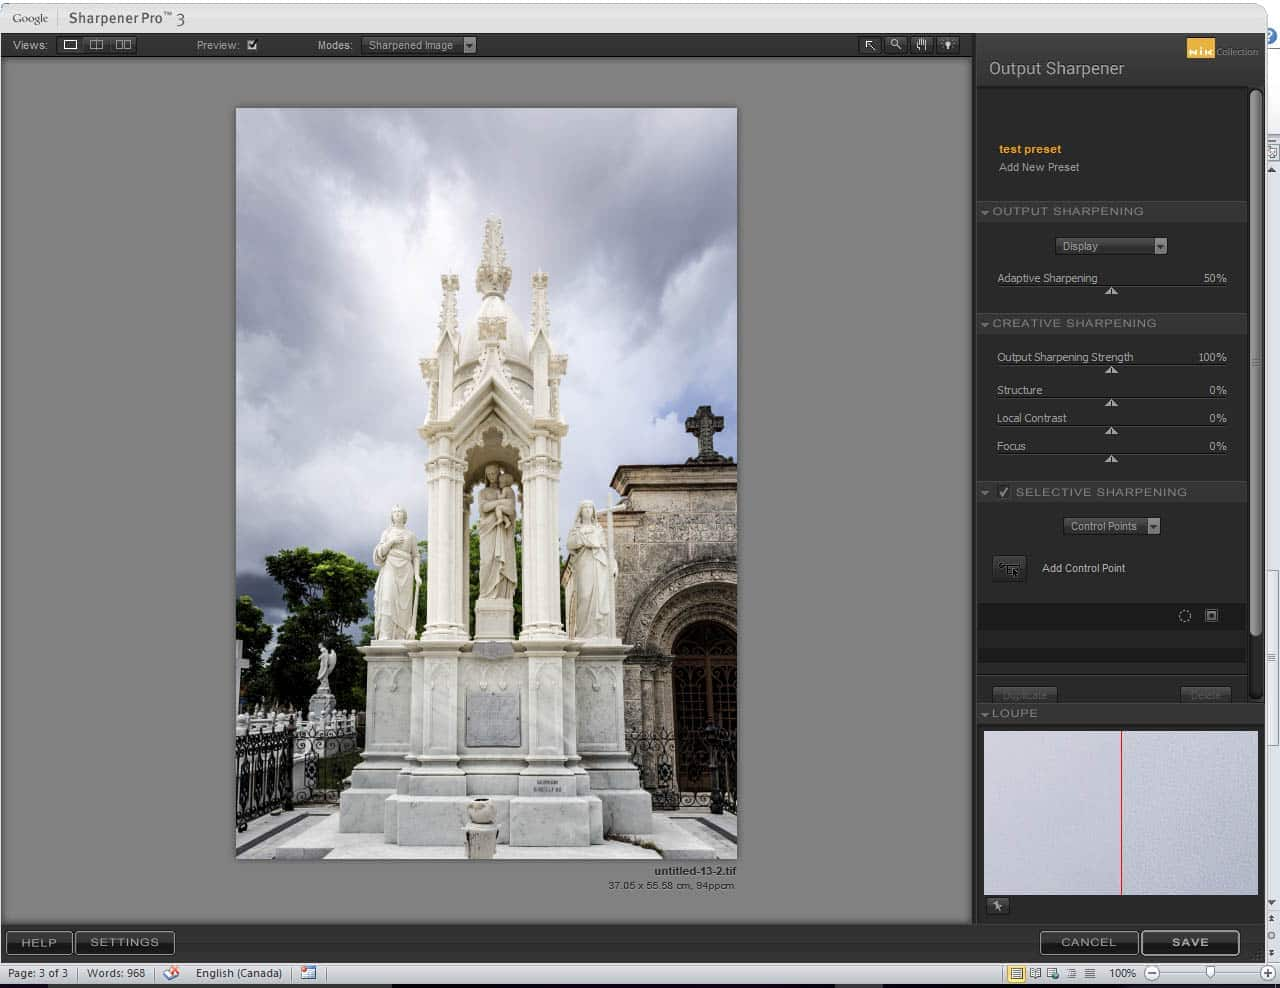
The program allows you to create presets for different purposes, but you can also use the premade settings. Here you can see the different options available for output sharpening.
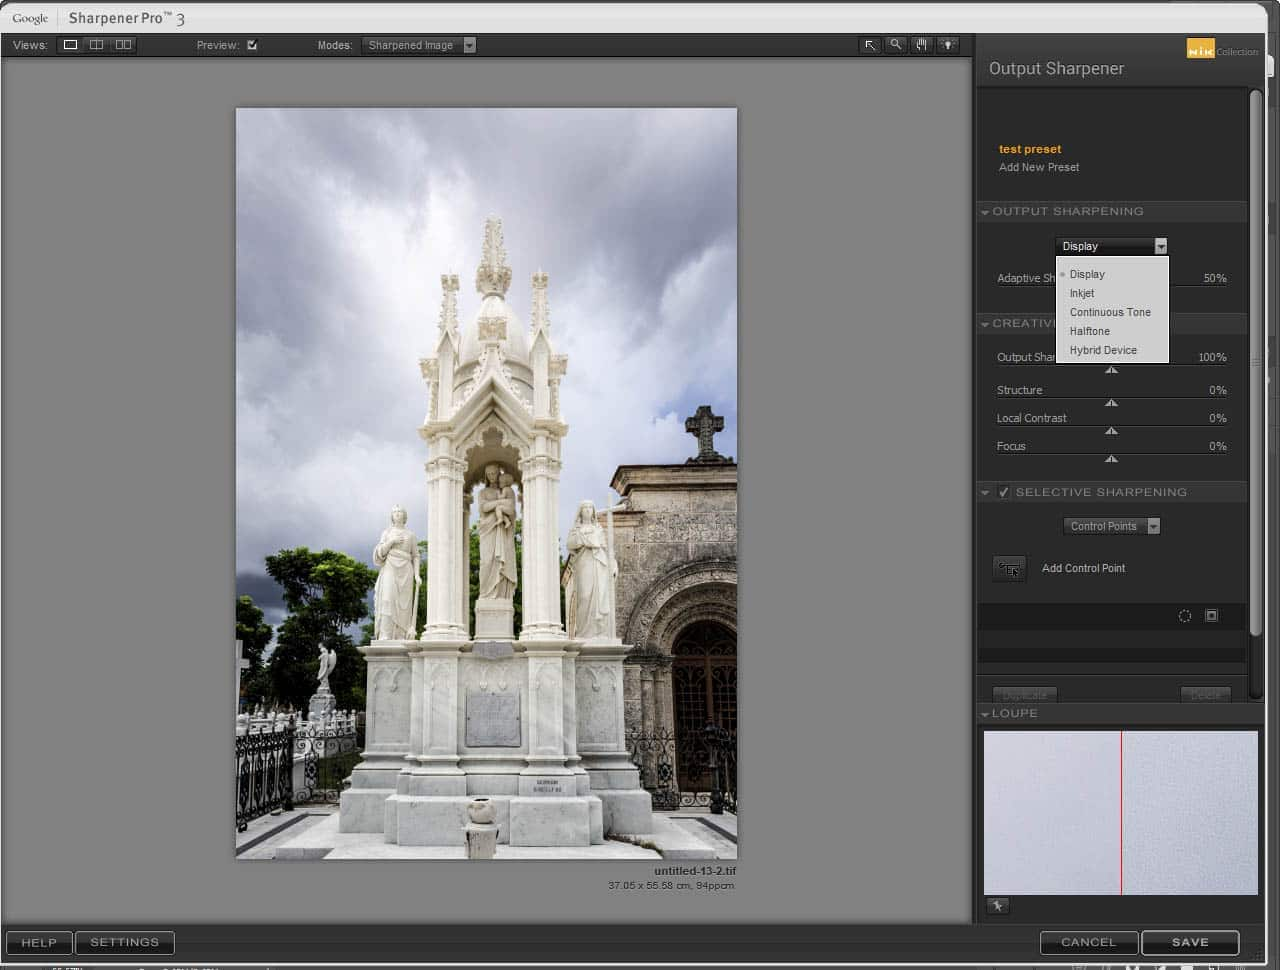
This part of the plugin contains similar features. You can utilize control points to apply sharpening to selective parts of the image. Remember, just as in the presharpening stage it’s important to use sharpening subtly. Don’t over-sharpen your images.
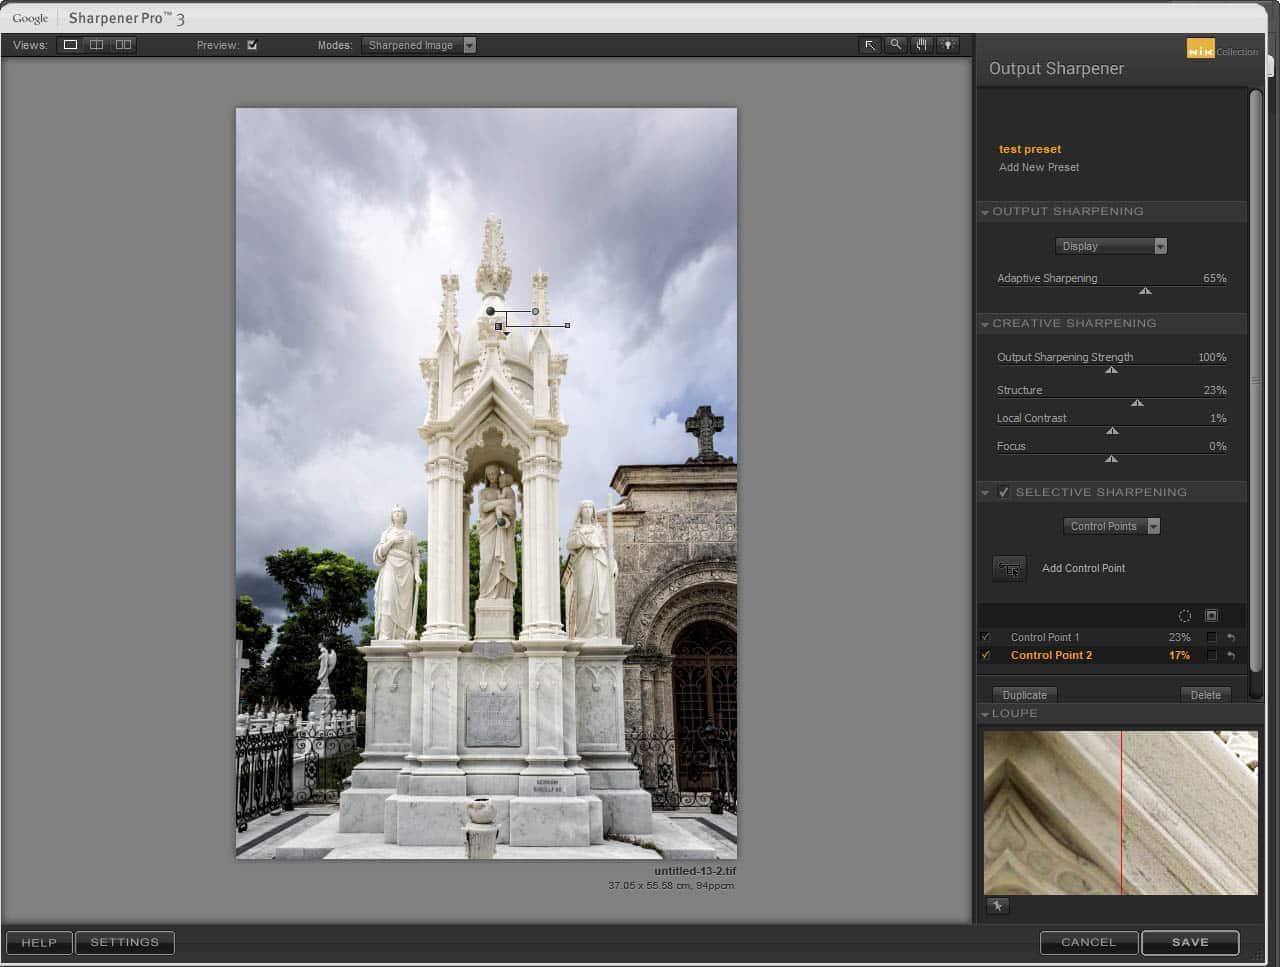
Sharpener Pro 3 is an extremely versatile and easy to use plugin that works seamlessly with PaintShop Pro. It’s available for free from the Google Nik Collection. Download it today and get processing your images in an efficient and highly effective program.
Exploring the Google Nik Collection
How to Use Plugins in PaintShop Pro
Using Analog Efex Pro to Get the Look of a Classic Film Camera
Using Viveza Pro to Adjust Color and Tonality
Using Silver Efex Pro to Create Black and White Images
Using Color Efex Pro to Correct Color, Retouch and Create Effects
Using Dfine to Control Color Noise


0 Comments