
Google Nik Collection is a free collection of plug-ins compatible with PaintShop Pro. The seven different plug-ins enhance the functionality of PaintShop Pro and allow users to edit images using presets and tools designed to create specific looks.
The first plug-in in the collection is Analog Efex Pro. As the name implies, Analog Efex Pro allows you to explore and create images that look and feel as if the photographer used a classic film camera. The program is a favorite with most professional photographers.
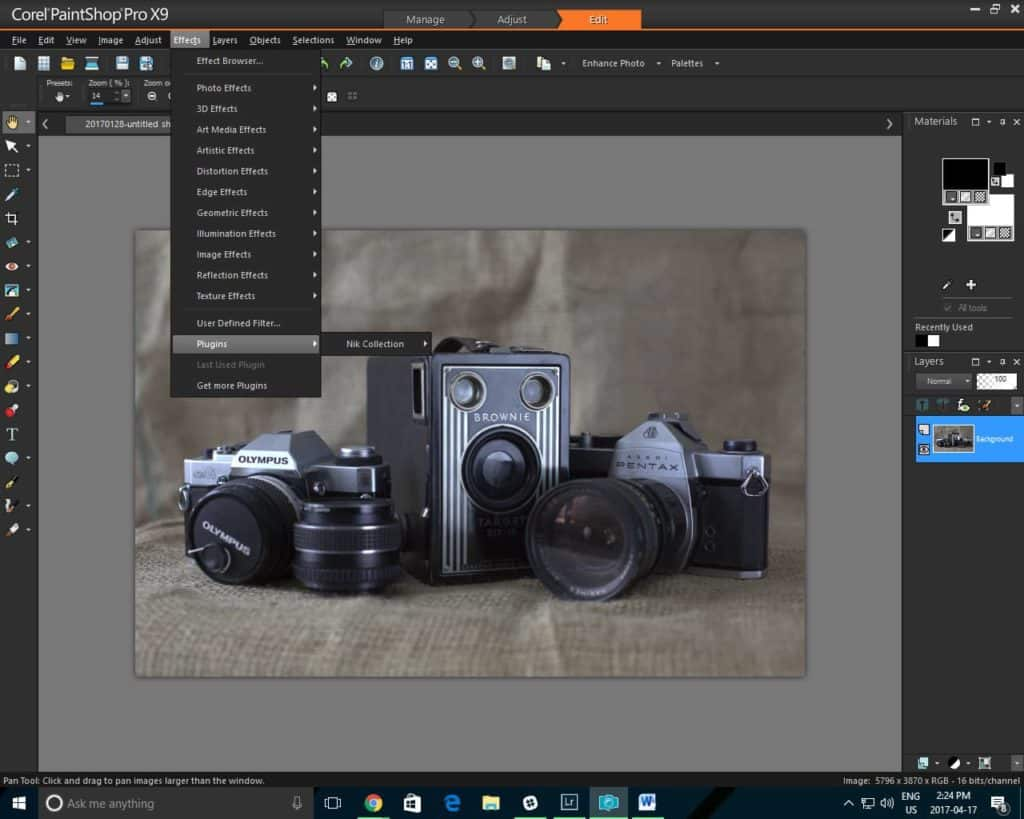
To get started simply choose the “Effects” menu at the top of the Edit workspace in PaintShop Pro. Then hover the mouse over the Plug-ins option. If you have installed the Nik Collection, the plug-ins will appear, and you can then click on Analog Efex. The program will launch immediately and open up the Analog interface. The interface is easy to maneuver and utilize.
How Do I Use Analog Efex?
One of the easiest ways to become familiar with Analog Efex is to begin playing around the different presets already created for you. On the left-hand side of the screen, Analog Efex offers you presets under the title “Cameras”. Clicking on the different options will help you to learn about the types of adjustments you can make to your images. Clicking on the “Cameras” title will allow you to see the many different options you have available. Start by viewing how your image looks in the different “Tool Combinations” sections. Try playing with the “Toy Camera” effects and the “Wet Plate” looks. It’s a lot of fun to experiment with all the different options available here.
Now That You’re Comfortable
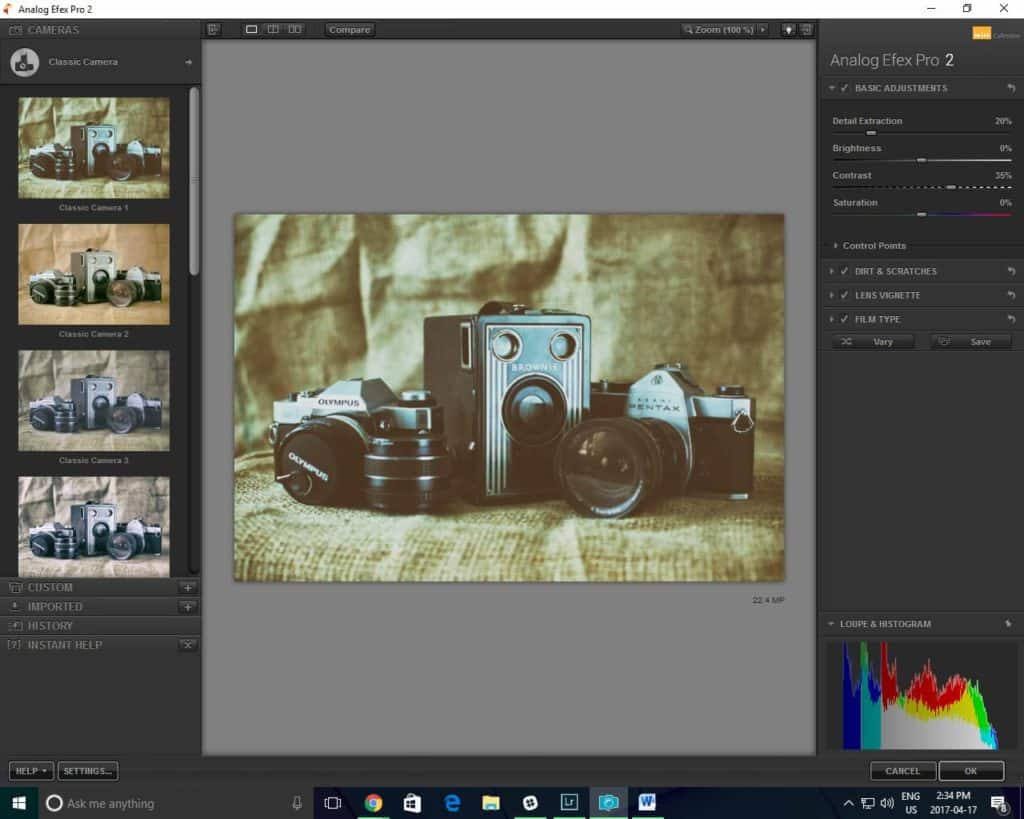
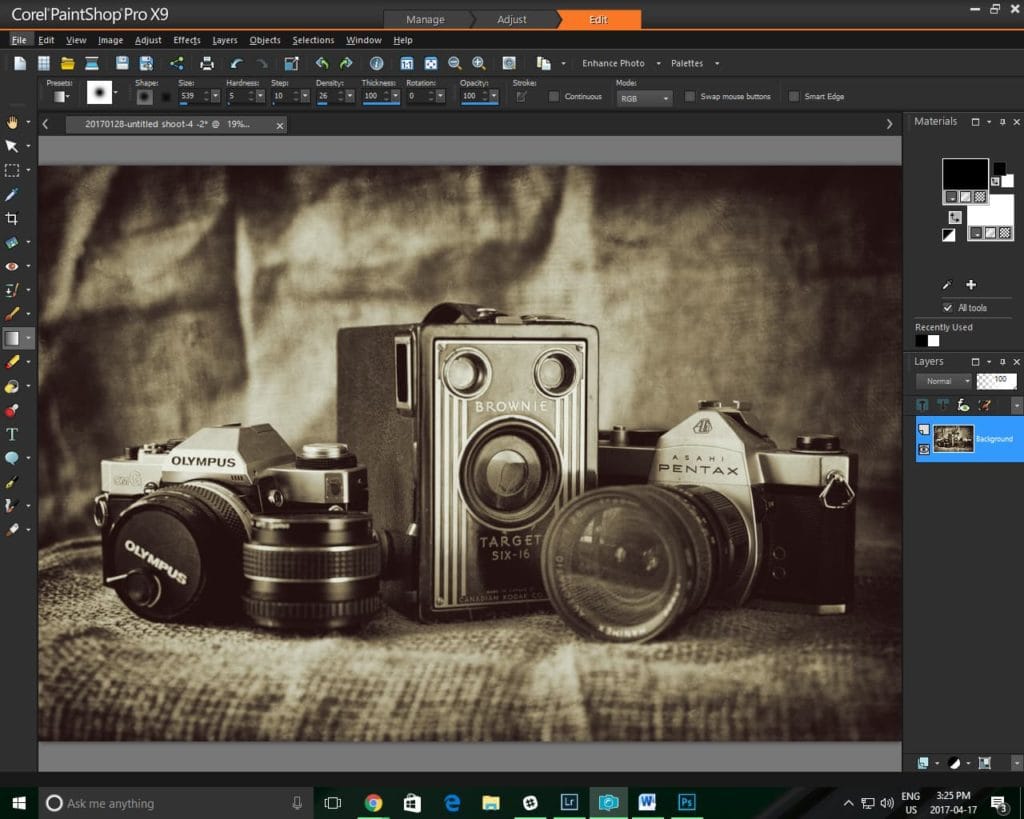
It’s time to start to customize these presets and dig into the program. You can adjust your images and customize the presets until you are satisfied with the look. For this tutorial, I’ve chosen to use a still life image I created on some vintage cameras. The content of the image seems to suit the style of editing we are going to utilize. The first step was to click on the different preset options and find the look I thought suited the feel of the image I wished to create.
Once that was completed it was time to start customizing the image. On the right-hand side of the screen, you will find the panel that allows you to adjust the different effects so that you can create an image that suits your tastes. In this case, I adjusted the Bokeh to better fit my image.
I also added a few control points in the basic adjustment section that allows me to adjust the brightness, contrast, detail and saturation of specific parts of the image. For this quick edit, I added two control points that evened out the lighting in specific areas of the image.
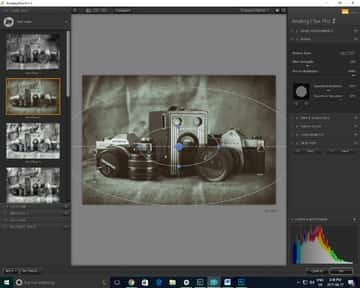
Similarly, I adjusted the type of “Dirt and Scratches” textures that appeared in the image. The pre-selected texture did not add anything positive to the look of the image, so it was adjusted. You can choose from a variety of different textures and also position the texture over the image. It is also possible to adjust the strength of the texture. You can choose to make the texture effect very subtle if you wish. Film type and Vignette strength can also be adjusted to suit your needs.
Be Creative! Have Fun! Explore the Program!
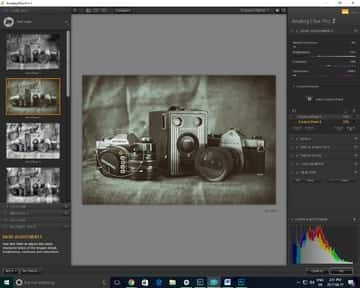
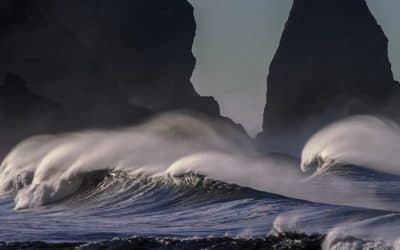
The options available in Analog Efex Pro are endless. You can create an infinite number of different looks that all mimic the effects of classic cameras. Once you have become familiar with the different controls, it will be time to start to create your “camera” effects. It’s time to take advantage of all the controls Analog Efex has to offer. You can choose specific filters to apply to the image and adjust each in a fully customizable application. For the image below I selected the following filters to create the look you see here.
Basic Adjustments – enhanced detail extraction and brightness but used a control point to less the brightness and reflections found in the lens
Bokeh – created bokeh blur for the outside edges of the image
Light Leaks – added a light leak to the top left of the image (it’s subtle) but it was done to balance out the brightness of the glass on the lens
Vignette – a slightly rectangular vignette was added to create more depth in the image
Film Type – I used a warm film tone for this image
It’s your Turn!
As you can see using this plug-in can be a lot of fun. So download this free plug-in today and give it a try. Experiment with all the different options and see how it can open creative doors for you. It’s easy to install with Corel PaintShop Pro. Just follow the instructions we’ve included in this blog post. Experiment with your images and share your creations with us here.
Don’t already own PaintShop Pro? Try it free for 30 days to experiment with this popular collection of plugins.
Exploring the Google Nik Collection
How to Use Plugins in PaintShop Pro
Using Color Efex Pro to Correct Color, Retouch and Create Effects
Using Dfine to Control Color Noise
Using Sharpener Pro to Bring out Hidden Detail


0 Comments