How to Make a Video with Pictures and Music
Need to make a video with pictures and music?
Try VideoStudio
Discover just how simple it is to make a video with pictures and music with our award winning video editor.
A 30-day free trial. No credit card required. The trial is designed to deliver access to the video editing software so that you may try it before you decide to buy it. The trial is limited in functionality and does not offer complete file support, features, and third-party effects.
How to Make a Video with Pictures and Music
No video clips? No problem. You can make a film even with still images and music. VideoStudio equips you with all the tools you need to add some movement and effects to your still images to create something way more than just a presentation. Create the perfect visual scrapbook with VideoStudio.
1. Install VideoStudio
To install a 30-day free trial of VideoStudio video editing software on your PC, download and run the installation file. Continue following on-screen instructions to complete the setup process.
2. Add pictures to the timeline
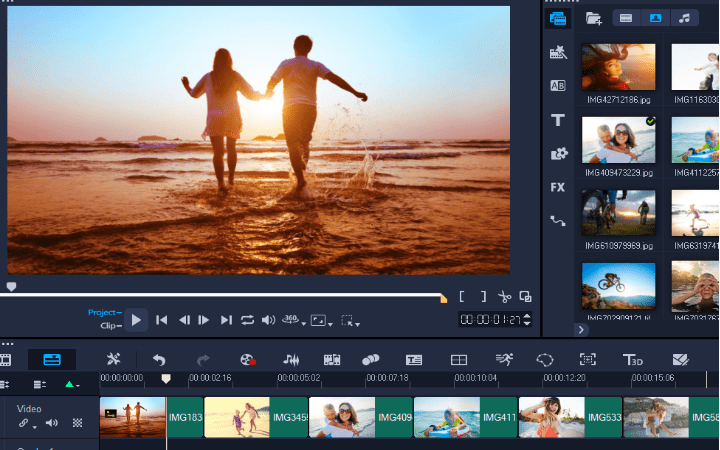
Add your pictures to the library or choose from the library if they are already added. Next, drag them to the timeline and position them in the order you wish them to appear in your video.
3. Apply transitions between photos
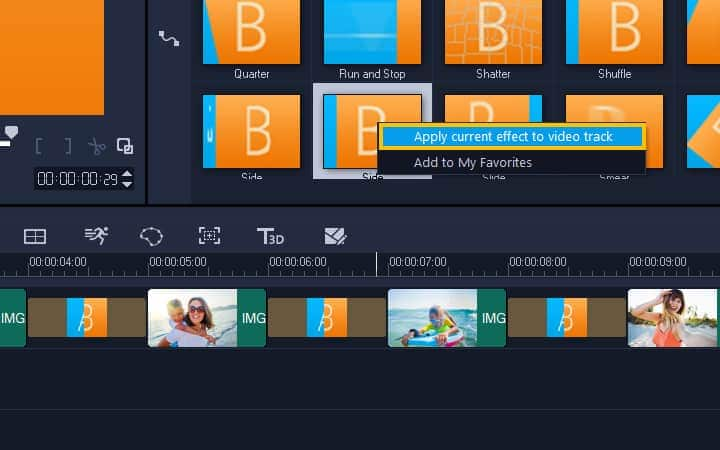
To make a great photo slideshow, adding transition between photos is a must. To open the transitions library, click the Transition icon. Choose a transition from there and move it between two pictures on the timeline. If you want, you can apply the same transition on all pictures. Just right-click on the transition and from the menu choose Apply current effect to video track. If you want different transition for your pictures, apply unique transitions between them. Alternatively, you can apply the Random transition, which will automatically apply a unique transition between each pictures.
Want to learn more? Watch our video tutorial for step-by-step instructions on how to add and customize transitions.
4. Add music with your photos
Click the Auto Music button to open the soundtrack library. Here you will find a range of different soundtracks for different moods. Make a selection and click Preview to check the soundtrack. There’s another way to access the preloaded soundtracks of Videostudio: click the ScoreFitter button under the Library panel. The soundtracks in the library are optimized for auto adjusting with the duration of your video. Just make sure that Auto Trim is enabled before you add the soundtrack to your timeline.
Want to learn more about adding music to your videos? Watch our video tutorial for step-by-step instructions.
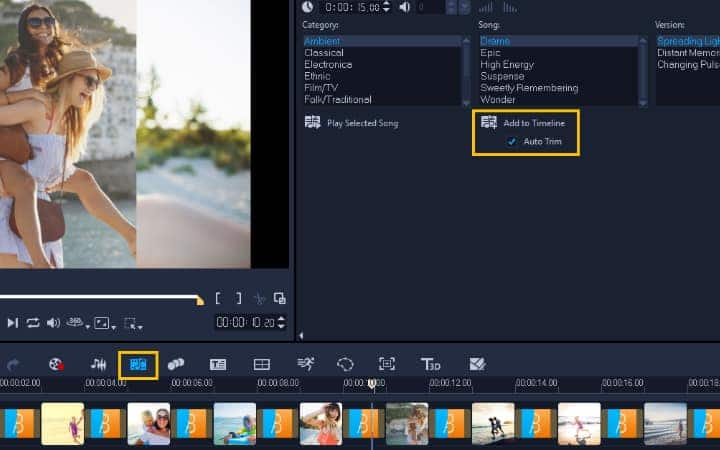
5. Apply fade effects
Fading the music at the beginning or ending of your clip creates an artistic atmosphere. To apply fading, press the Fade-out button under the Auto Music area. Also, you can right-click on the audio track in your timeline and choose Fade-in or Fade-out.
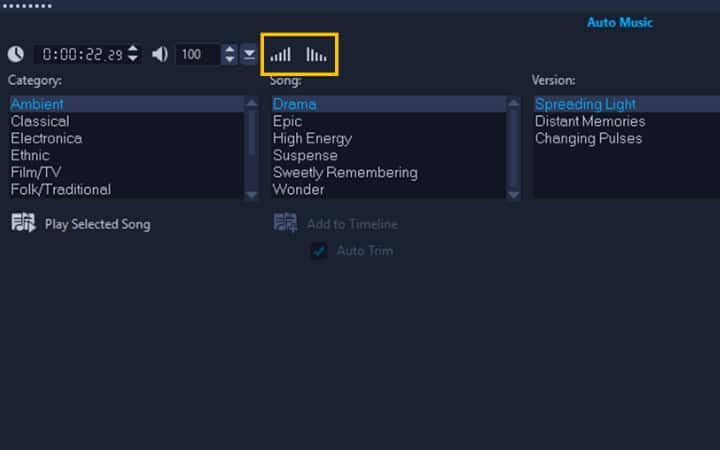
6. Save and share your project
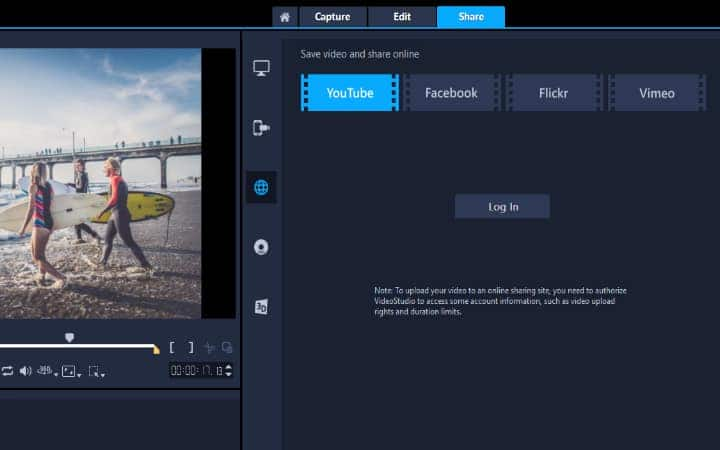
To save your creation, open the Share tab and save it in a video format. If you want to share it on the web, you can upload to Facebook or Youtube.
If you wish to do more to your slideshow, consider using Instant Project templates.
Watch our video tutorial to learn more about How to Export Video and see how you can upload directly to social media sites or export for viewing on all kinds of devices.
Want to learn more about creating slideshows and using Instant Project templates? Watch our video tutorial to see it in action.
Do more than just make a video with pictures and music with VideoStudio
Try out some of the other video editing features in VideoStudio, like How to Add Music to your Video, How to Remove Background Noise from Video, How to Mute a Video, and more! Create high quality videos with a fun and easy to use video editing software and make your movies stand out from the crowd.


