How to Record Screen
Need to record screen?
Try VideoStudio
Discover just how simple it is to record screen with our award winning video editor.
A 30-day free trial. No credit card required. The trial is designed to deliver access to the video editing software so that you may try it before you decide to buy it. The trial is limited in functionality and does not offer complete file support, features, and third-party effects.
How to Record Screen
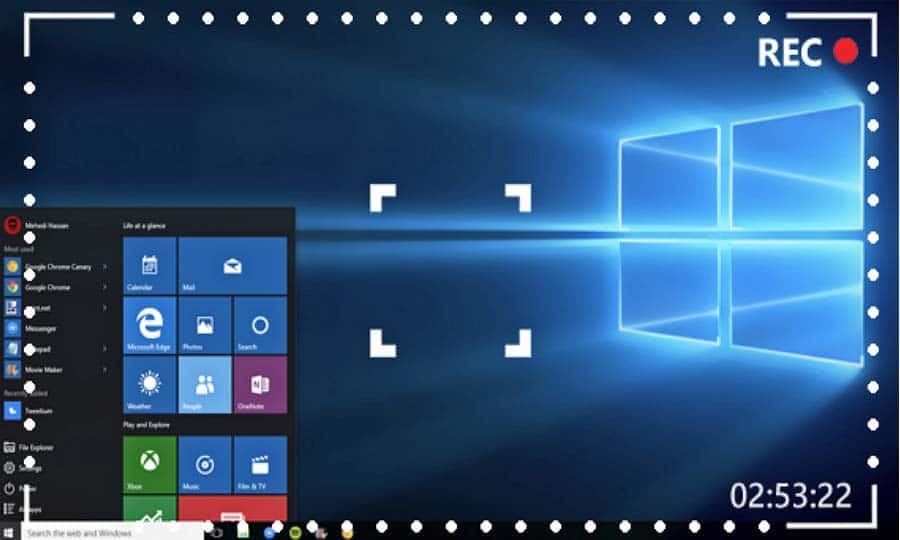
Shooting a video on a camera is one thing. But what if you need to show off some software, a website, or something else computer-based? Filming a screen with a camera comes with its own problems like lens flare, reflections, and a lack of detail. With VideoStudio, record directly from the screen to the software to capture the action in perfect detail. You can save the file straight into VideoStudio, and add it to a larger video or top and tail it with more content.
1. Install VideoStudio
To install a 30-day free trial of VideoStudio video editing software on your PC, download and run the installation file. Continue following on-screen instructions to complete the setup process.
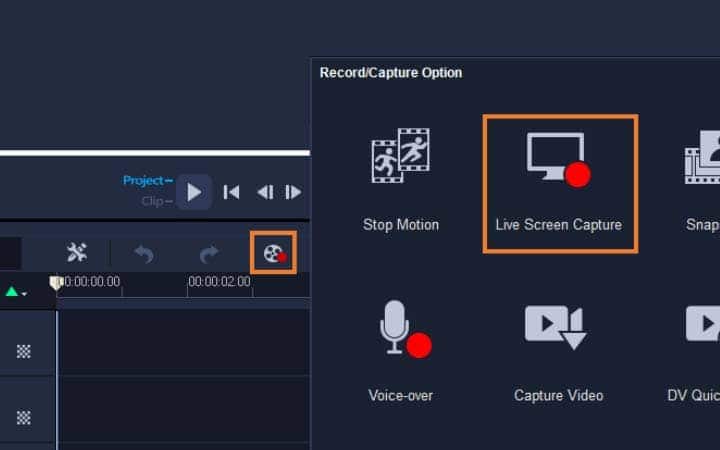
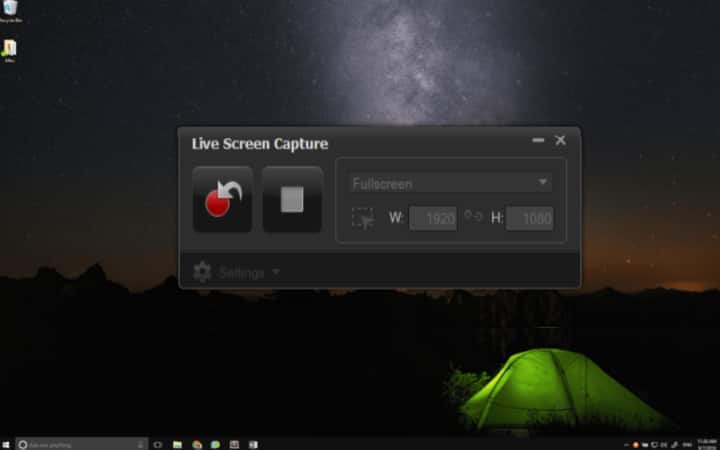
2. Launch Live Screen Capture
Corel VideoStudio package includes Live Screen as a separate tool. To capture a live screen, run the Live Screen Capture tool by clicking the desktop icon or from the start menu. Also, you will find the Live Screen Capture shortcut inside VideoStudio.
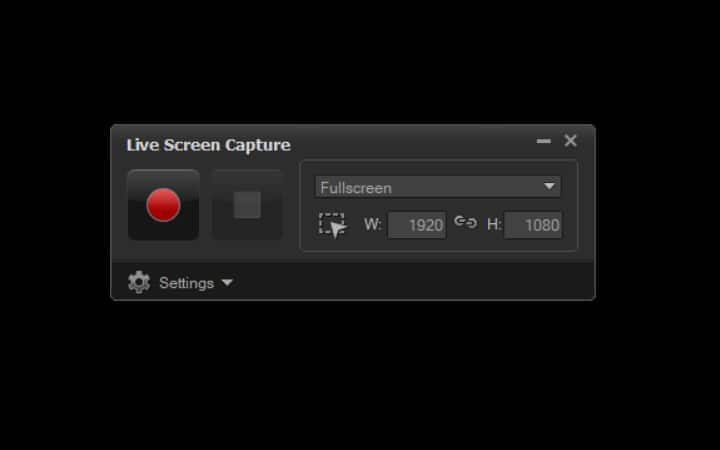
3. Select the area you want to record
After opening the Live Screen Capture tool, you have to select the area you want to record. The default area is to full screen but you can also select a running application window or set an area on the screen by customizing the corner nodes of the frame.
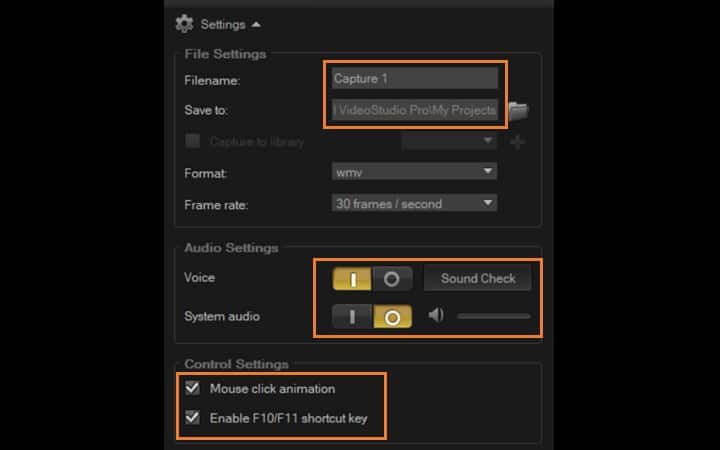
4. Choose the screen capture options
In this step, first, you have to expand the settings menu to access the options. Pick a name for your recorded file and choose a folder where you want to save it. Also, customize audio settings, apply mouse click animations and more from the settings menu. Both the microphone/voiceover sound and system audio will be recorded by default. You can turn off one or both audio stream and also plug an external microphone. Lastly, select the frame rate and the file format for your video recording.
5. Start Recording
Press record (red round button) to start the Screen Recording. A countdown will begin and after that, all movement inside the selected capture area will be recorded. When you want to stop the recording, press F10 on the keyboard or click the STOP button. If you want to pause during the recording, press F11 and press it again when you want to resume. The recorded file will be saved on the folder destination you defined earlier. Afterwards, you can add the file onto the VideoStudio timeline and make necessary edits like trimming, adding titles, background music and more.
Want to learn more about how to record screen? Watch our video tutorial to see it in action.
Do more than just record screen with VideoStudio
Try out some of the other video editing features in VideoStudio, like How to Change Video Aspect Ratio, How to Make a Movie Trailer, How to Make a Video with Pictures and Music, and more! Create high quality videos with a fun and easy to use video editing software and make your movies stand out from the crowd.