Make a flower icon
Design a simple flower icon using only ellipses – plus some time-saving tips and tools in CorelDRAW.
Watch this 2 minute video for an overview of the process; the steps are written out below.
Step 1: Start with basic shapes
- Select the Ellipse tool; click and drag to draw an ellipse.
- On the property bar, change the Object Size fields to 1” width by 1.75″ height.

Step 2: Transform a basic shape
- Select the ellipse with the Pick tool and click the Convert to Curves icon on property bar (Ctrl + Q shortcut)
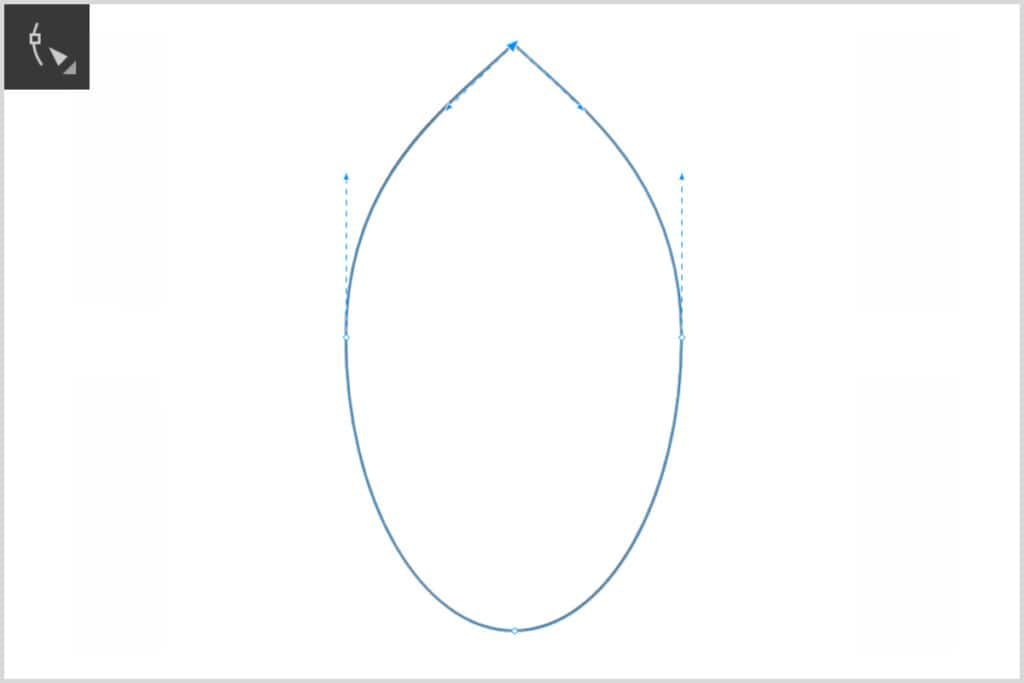
- Select the ellipse with the Shape tool, then click on the top node.
- On the property bar, change node type to Cusp node.
- Use the handles to shape the ellipse into a petal.
Step 3: Duplicate the petal to make a flower
- With nothing selected, change the Duplicate Distance on the property bar to 0.
- Select the Pick tool and click on the petal once, then click again to bring up the rotation handles.
- Drag the rotation center down to the bottom center of the petal.
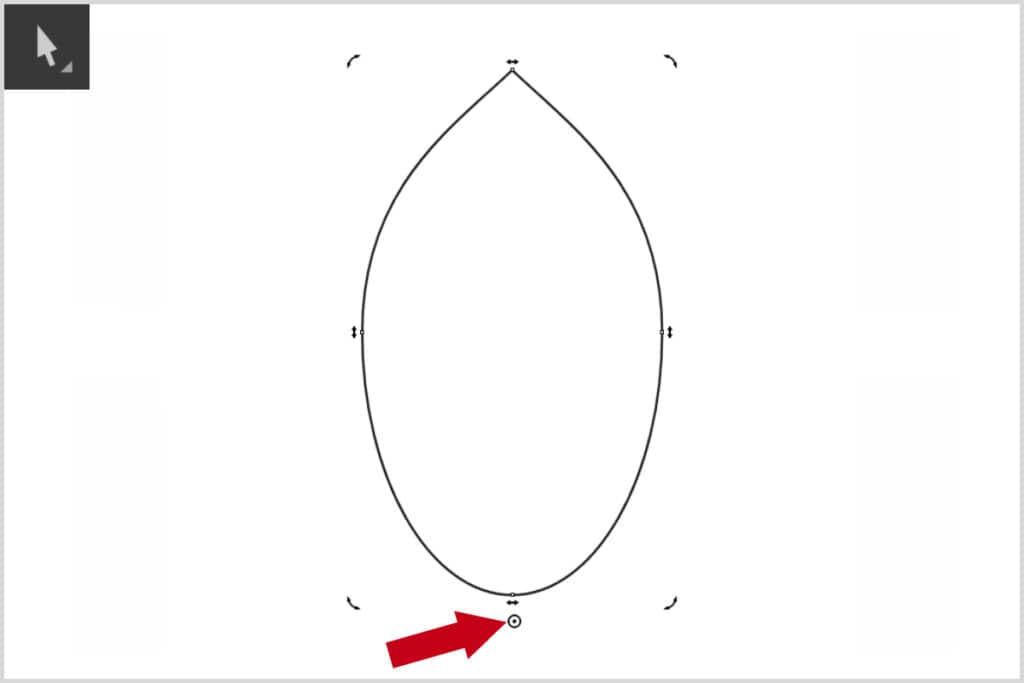
- Press Ctrl/Cmd + D to duplicate the petal. Note: since you set the Duplicate Distance to 0, the duplicate petal will be right on top of the original.
- On the property bar, enter 360/5 in the Angle of rotation field. CorelDRAW will do the math to divide 360 degrees by 5 (petals), which is 72. The duplicate petal will be rotated.
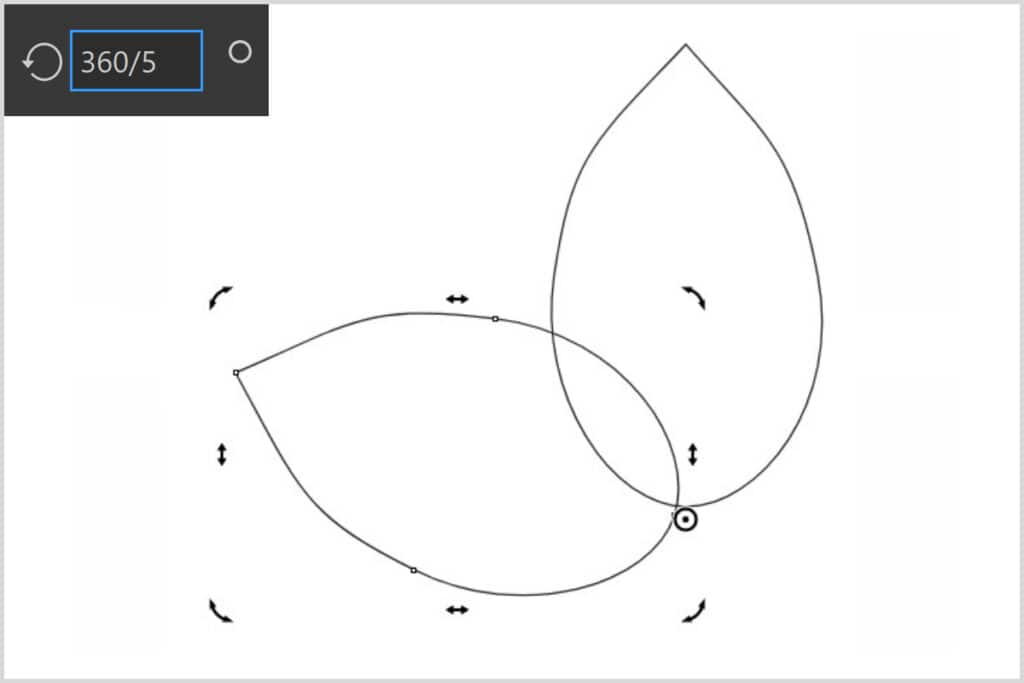
- Press Ctrl/Cmd + D three more times to make the rest of the petals.
- The Smart duplicate feature remembers the 72-degree rotation angle and applies it to each subsequent petal, so what you end up with is 4 duplicates of the original petal, evenly spaced and rotated around the center of the flower.
Step 4: Weld and fill
- Use the Pick tool to marquee select all 5 petals then click the Weld icon on the property bar.
- Switch to the Shape tool, marquee select the middle nodes and delete.
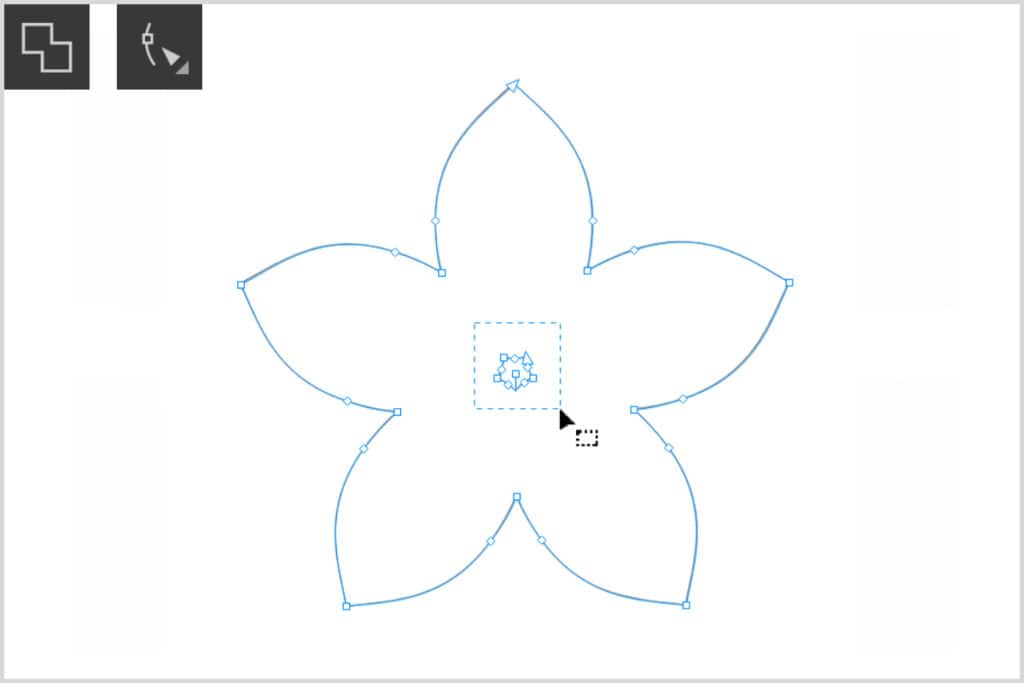
- Click a swatch on the Color palette to fill with a color of your choice.
Step 5: Create the flower center
- Use the Ellipse tool to draw a circle. Hold down CTRL as you’re drawing to keep it a perfect circle.
- On the property bar, change the Object Size fields to 1” x 1”.
- Draw a second, smaller circle, about 0.2”x0.2”.
- Fill the smaller circle with black.
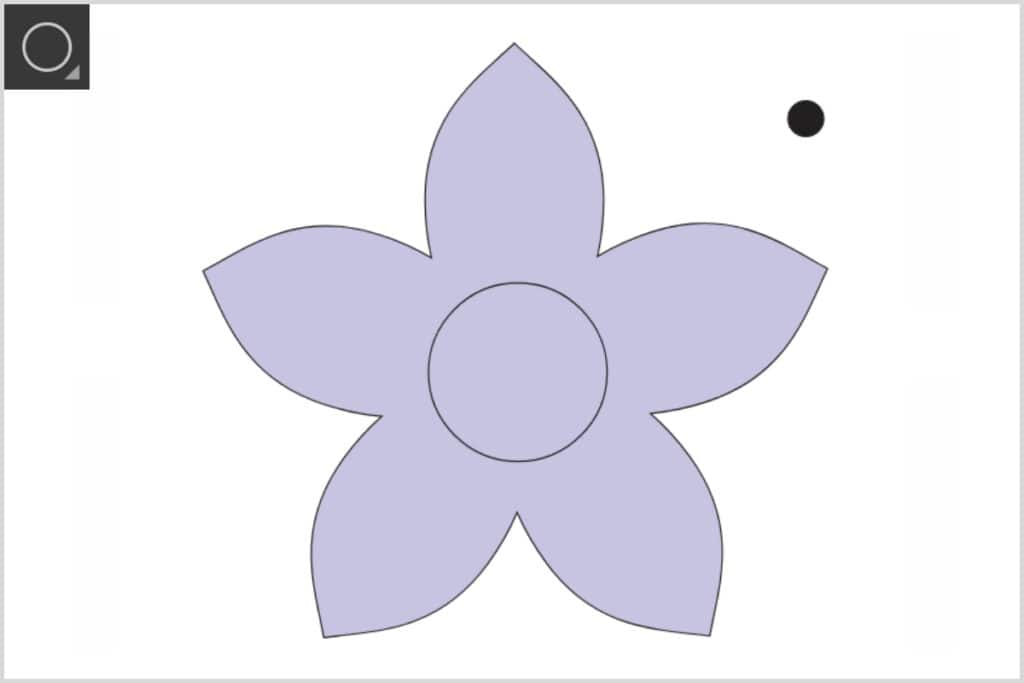
- Open the Fit Objects to Path docker/inspector (Window > Dockers/Inspectors > Fit Objects to Path).
- In Duplicates field, enter 20.
- Hold down Shift and select larger circle. Click the Apply button at the bottom of the docker.
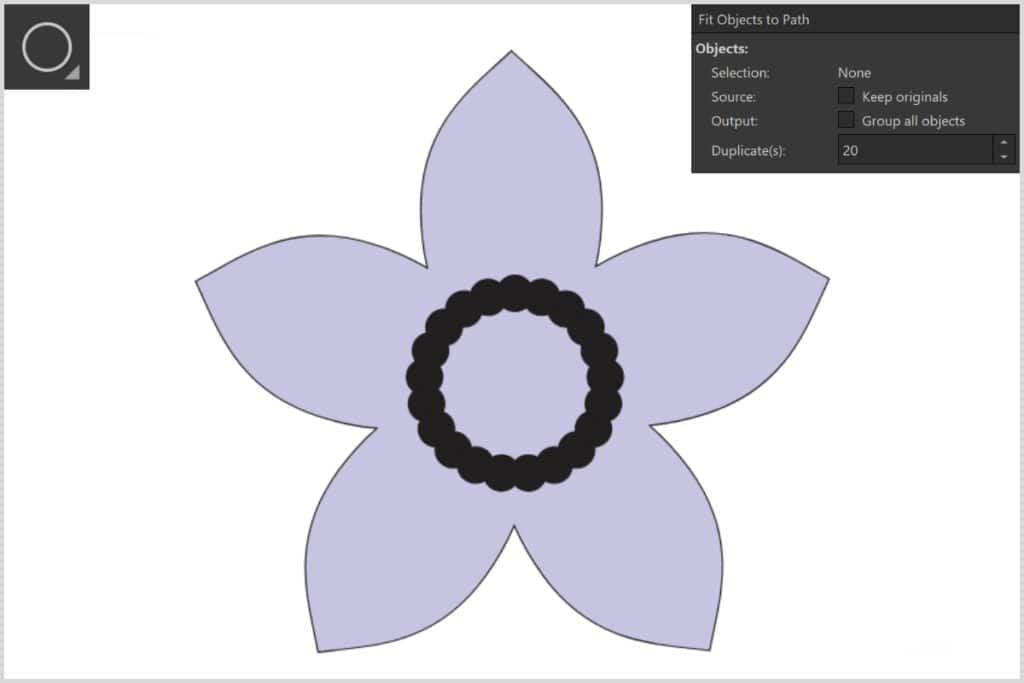
- Weld the 20 small circles to create a single object (curve). Keep the large circle as a separate object.
- With the Pick tool, select the large circle and click on a color swatch to fill with a color of your choice.
- With the large circle still selected, hold down the Shift key and select the curve (small welded circles) also. Use Ctrl/Cmd + G to group them together.
- Select the petals and on the property bar, change the Outline width to 40px (or width of your choice).
- If necessary, use the Pick tool to resize and reposition the flower center to your liking.
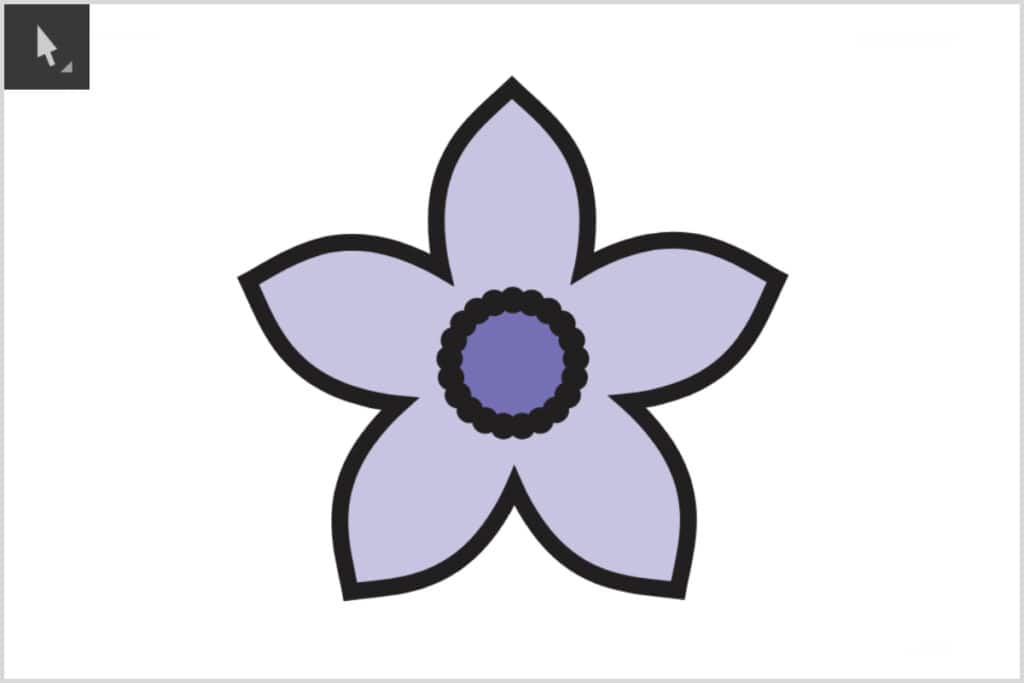
Now your flower icon is complete. You can save it as a CDR file to preserve the objects and layers for future editing, and export it in a variety of formats including JPG, PNG, PDF etc.
Additional resources
If you’re not familiar with the tools used in this project, watch the full tutorials below to learn more.
How to use the Ellipse tool
How to use the Shape tool
Basic shape transformations
How to weld, trim and combine objects
See more tutorials
Browse the full collection of tutorials for CorelDRAW and PHOTO-PAINT, from beginner to advanced, creative projects, and more!
What’s new in CorelDRAW
CorelDRAW tools
Working with text
See what’s new in CorelDRAW Graphics Suite!
Start your FREE 15-day trial and embark on a design journey with powerful tools for vector illustration, layout, photo editing, typography, and collaboration.






Comments (1)
Reader Interactions
Comments
wow that’s cool