
In CorelDRAW, a variety of shaping tools can help you easily create visually appealing designs for logos, clip art, and more. These powerful tools can be used to build simple or complex shapes that will give you practically limitless artistic abilities! This tutorial will go over the basics of the CorelDRAW shaping tools, step-by-step, and then guide you through creating even more advanced designs.
Thanks for watching! You will find a written version of this tutorial below, and a printable PDF copy and exercise file to download on the Download resources tab above.
Learn how to use CorelDRAW’s shaping tools to transform objects, by welding or combining objects, using one object to trim another object, and more.
Start your FREE 15-day trial and embark on a design journey with powerful tools for vector illustration, layout, photo editing, typography, and collaboration.
Download these free resources:
Written tutorial for Windows (PDF, 876 KB)
Written tutorial for Mac (PDF, 794 KB)
Exercise file (Zip file, 681 KB)
CorelDRAW Graphics Suite resources
Quick Start Guide (PDF, 2 MB)
Keyboard Shortcuts (PDF, 3.5 MB)
CorelDRAW and Corel PHOTO-PAINT user guides
For CorelDRAW Graphics Suite subscription and perpetual licenses (2018 to 2024), languages include English, Português do brasil, 简体中文, 繁體中文, Čeština, Deutsch, Español, Français, Italiano, 日本語, Polski, Русский
CorelDRAW Community
CorelDRAW learning center
Facebook
X (formerly Twitter)
YouTube
What’s new in CorelDRAW Graphics Suite
CorelDRAW tools
Working with objects, layers and pages
 CorelDRAW Graphics Suite
 Ultimate Vector Bundle Vol. 1
 CorelDRAW Standard 2021
 Ultimate Vector Bundle Vol. 2
 Corel Vector
Using the Shaping tools to modify objects
This tutorial will first show you the basics of the shaping tools in CorelDRAW. We will then use the tools to create a more advanced design. The shaping tools that will be used in this tutorial are:
- Weld
- Trim
- Intersect
- Front minus back
- Back minus front
- Simplify
- Boundary
- Combine
- Break apart
Click on any of the images below to view full-size.
How to access CorelDRAW Shaping tools
There are three ways to access shaping tools in the CorelDRAW interface:
- Go to Window > Dockers > Shaping to open the Shaping docker.
- Select multiple shapes in your design to activate shaping tools within an interactive toolbar.
- Go to Object > Shaping (or depending on the CorelDRAW version, possibly Arrange).

How to use the Weld tool
The Weld tool takes two shapes and combines them into one.It does this by giving the final shape that’s created the same properties of the selected target shape, once they’ve been welded together.
Here, we go over how to create a yellow cat with the Weld tool:
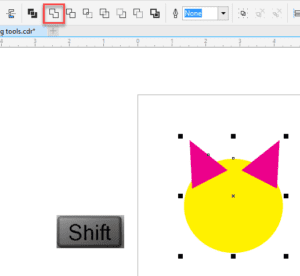
- Select the pink ear with the Pick tool
- Hold down the Shift key and select the yellow circle
- Click on the Weld tool in the interactive toolbar
- Repeat this process with the other ear to turn them both yellow
Welding using the Shaping docker
You can also use the Shaping docker to weld shapes. After opening the Shaping docker, make sure to select Weld from the drop-down menu. The Shaping docker has two options available when welding. You can choose to leave the original source object, which is the first object you selected, or you can choose to leave the original target object, in case you need to further build your artwork.
Let’s take a look at how you can use the Weld tool in the Shaping docker to create a logo:

For this example, make sure to choose the “Leave original source object” option.
- Use the Pick tool to select the R
- Click the Weld to button in the Shaping docker
- Click the C (our target object)
- Pull the welded letters away to see the original R left behind
How to use the Trim tool
The key to using the Trim tool is to decide which object needs trimmed, and which object you are going to use to trim it. In this example, we are going to create a simple crescent moon from two circles, using the pink circle to trim the grey circle:
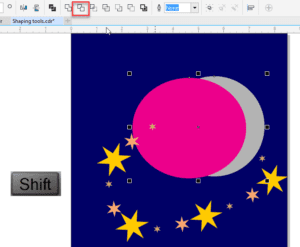
- Select the pink circle with the Pick tool
- Hold down the Shift key
- Select the grey circle
- Click Trim in the interactive toolbar
- Pull the pink shape away to reveal the grey crescent moon
How to use the Intersect tool
The Intersect tool helps you create a shape using overlapping shapes. In this first example, we are going to create half stars on the edge of a flag design:
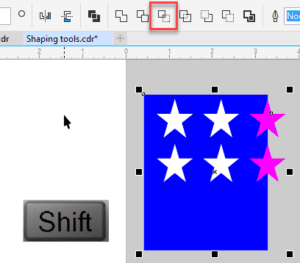
- Select the blue shape
- Hold down the Shift key
- Select the top star
- Click the Intersect button in the interactive toolbar
- Click white on your color palette while the new intersected piece is selected
- Delete the original pink star
- Repeat the same process with the second star
In this second example, we are going to put teeth inside the mouth of our “smiley guy” design:
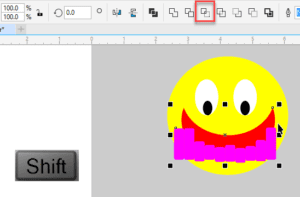
- Select the teeth
- Hold down the Shift key
- Select the red mouth
- Click the Intersect button in the interactive toolbar
- Delete the original teeth
- Select the new teeth
- Click white on your color palette while the new teeth are selected
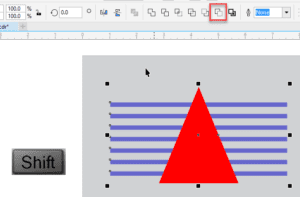
How to use the Front minus back tool
The Front minus back tool erases shapes that are in the back of a design and leaves those are at the front. With this tool, it’s not critical which shape is selected first.
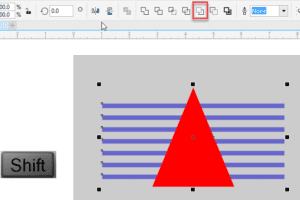
In this example, we’re going to remove the blue rectangles, while leaving the red triangle intact:
- Select the triangle
- Hold down the Shift key
- Select the blue rectangles
- Click the Front minus back button in the interactive toolbar
How to use the Back minus front tool
The Back minus front tool works in the opposite fashion, by subtracting the back shape from the front shape in designs, creating a different result.
In this example, we’re going to make a quick logo using this tool:
- Select the G
- Hold down the Shift key
- Select the black circle
- Click the Back minus front button in the interactive toolbar
How to use the Simplify tool
The Simplify tool trims overlapping areas among objects, no matter the order in which the objects are selected. At first, it looks like nothing has happened, but if you pull the objects away from one another, you will see each layer beneath is trimmed by the objects above or below it, like a cookie cutter.
In this example, we are going to remove the red rectangle from a design for a more uniform, simplified result:
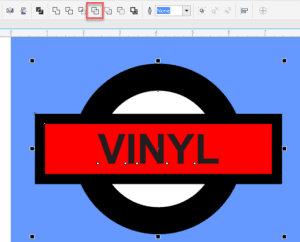
- Lasso all the objects on top of the blue background
- Click the Simplify button in the interactive toolbar

- Delete the red rectangle to see the blue background

- Go to View > Wireframe to see the bare bone results
- Go to View > Enhanced to return to your normal view
How to combine shapes
The Combine tool is a great way to modify existing artwork to recolor or manipulate it to look differently. In this example, we are going to use the Combine tool to get a pure silhouette in a deer design, so it can be placed on top of other pieces of art:
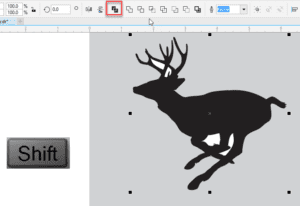
- Select one of the white shapes
- Hold down the Shift key
- Select the image of the deer
- Click the Combine button
- Repeat this process for each white shape
How to break apart shapes
The opposite of the Combine tool is the Break apart tool, which allows you to make multiple parts out of a single object. For this example, we’re going to break this shape apart, so we can color the stars white:
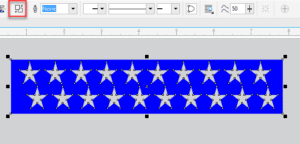
- Select the shape
- Click the Break apart button in the toolbar
It will look as if the stars have disappeared, but they are still there! They’re just now the same blue as the background.
Let’s find the stars using Wireframe view and finish coloring them white:
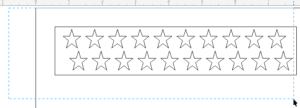
- Go to View > Wireframe
- Lasso the all the stars, making sure to avoid lassoing the rectangle
- Now click white on your color palette
- Go to View > Enhanced to return to normal view
- Go to Object > Order > To Front of Page to bring the stars forward into view
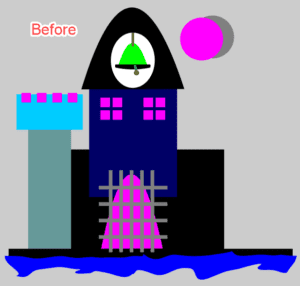
Putting it all together – creating a castle with CorelDRAW Shaping tools
Now that you’ve learned the basics of using the shaping tools in CorelDRAW, let’s put them to work by creating a fun design! In this example, we are going to use the shaping tools to create a castle:
- Select the left side of the castle
- Click the Weld tool to combine the top and bottom together
- Choose black in your color palette
- Select all 4 pink squares
- Click the Trim button
- Deleted the 4 pink squares
- Select the left side of the castle
- Duplicate it by pressing Ctrl + D on your keyboard
- Hold down the Ctrl key and drag the duplicate to the right side of the castle
- Select the left side and all other black parts of the castle
- Click the Weld button in the toolbar
- Select the pink and grey circle in the upper right corner
- Hold down the Shift key
- Click the Simplify button
- Delete the pink circle, leaving a grey crescent moon
- Hold down the Shift key
- Select all the pieces of the bell
- Click the Weld button in the toolbar
- Select all the squares in the window on the right side
- Click the Combine button in the toolbar
- Press Ctrl + D to duplicate the combined window
- Drag it underneath the other windows
- Select the upper left window and choose yellow in your color palette
- Select the other windows and choose white in your color palette
- Select the bars in the gate
- Select the other part of the gate
- Click Back minus front in the toolbar
- Choose white in your color palette
- Lasso the whole castle
- Press Ctrl + G to group it
- Go to Object > Sharing > Boundary
- Choose white in the color palette to change the outline color
- Go to the Outline tool
- Choose a width of .25”
- Set Behind fill and Scale with object
- Click OK
- Go to Object > Order > Back One
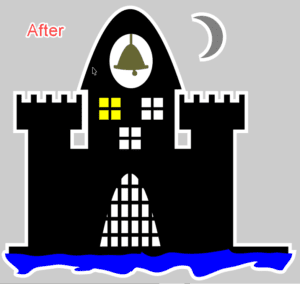
Congratulations! You’ve completed your castle and learned how to make good use of the shaping tools in CorelDRAW.
Start your FREE 15-day trial and embark on a design journey with powerful tools for vector illustration, layout, photo editing, typography, and collaboration.

Comments (2)
Reader Interactions
Comments
great tutorial
Excelente tutorial. Muchas Gracias por compartir.