
Make a postcard
To create a postcard quickly and easily, try starting off with a free template from the CorelDRAW template library.
Watch this 2 minute video for an overview of the process; the steps are written out below.
Step 1: Start with a template
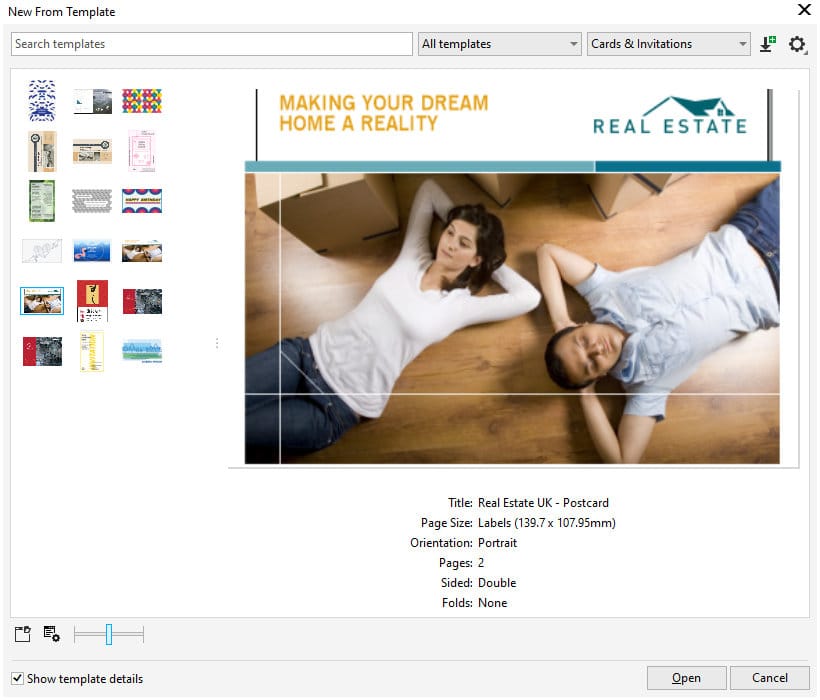
- Open the New from Template window (File > New from Template).
- Locate and select the “Real Estate UK – Postcard” template.
- Click Open.
Step 2: Add your logo
- Select and delete the Real Estate logo in the top right corner.
- Import (Ctrl/Cmd + I) your own logo.
- Use the Pick tool to resize and reposition the logo if necessary.

TIP: Under the View menu, activate Alignment Guides to help with precise positioning of text and design elements.
Step 3: Add and format your text
- Right-click on the text in the top left corner and select Convert to Artistic Text.
- Use Ctrl/Cmd + K to break apart the 2 lines of text. This will make it easier to apply different formatting to each line.
- Activate the Text tool, highlight the first line of text and type in your own text. Do the same with the second line of text.
- On the property bar, you can change the font and size (we used Bahnschrift Bold, 16pt and 11pt).
- To change the text color, you can click on any swatch in the Color palette. For our second line of text we used 70% black.
- You can also use the Color Eyedropper tool to sample a specific color – highlight the text, activate the Color Eyedropper tool and click on the color you want to sample. Your cursor will change to a paint bucket (fill) icon then click on the text to apply the sampled color (we changed our first line of text to match the red in our logo).

Step 4: Change the color of design elements
- Select the light blue rectangle above the photo. Click on a color swatch to change the color (we chose 70% black).
- Select the dark blue rectangle and click on a color swatch to change the color (we chose 90% black).
- Alternatively, use the Color Eyedropper tool to sample a color from your design and fill the rectangle with that color.

Step 5: Add your image
In this template, the photo is inside a PowerClip frame. This is to ensure your image is the proper shape and size, and in the correct position. Here’s how to replace it with a new image.
- Browse to the location on your computer where your photo is stored.
- Click and drag the photo into the CorelDRAW workspace, over top of the PowerClip frame.
- Hold down the “K” key and release the mouse button – this will replace the existing content in the PowerClip with your photo.
- On the PowerClip toolbar, click on the Fit Contents dropdown list and select “Fill Proportionally.”

TIP: if you want to resize or reposition the photo inside the PowerClip frame, click on the Edit button on the PowerClip toolbar, use the Pick tool to adjust the photo, then click Finish.
Step 6: Add a callout graphic
- Select the Polygon tool and on the property bar, set the number of points to 30.
- Hold down the Ctrl/Cmd key and click and drag to draw the shape.
- If necessary, resize and reposition the polygon with the Pick tool.
- Switch to the Shape tool and use it to pull one of the nodes inward slightly to create a starburst.
- Fill the starburst with color (we used the same red as our logo); right-click on the No Color swatch to remove the outline.
- To add text to the starburst, activate the Text tool and type out your text.
- Use the options on the property bar to change the font and size if you wish, and click a color swatch to change the text color (we chose white).

Now your postcard is complete. You can save it as a CDR file to preserve the objects and layers for future editing, and export it in a variety of formats including JPG, PNG, PDF etc.
Additional resources
If you’re not familiar with the tools used in this project, watch the full tutorials below to learn more.
How to use templates

How to use the Pick tool

How to use the Text tool

How to align objects

How to use the Color Eyedropper

How to use PowerClip

How to use the Polygon tool

See more tutorials
Browse the full collection of tutorials for CorelDRAW and PHOTO-PAINT, from beginner to advanced, creative projects, and more!
What’s new in CorelDRAW

CorelDRAW tools

Working with text

Start your FREE 15-day trial and embark on a design journey with powerful tools for vector illustration, layout, photo editing, typography, and collaboration.
