
This tutorial reviews the template workflow in CorelDRAW, including where to download free templates, how to organize and manage your template library, and how to edit templates. In this tutorial, we are using the CorelDRAW March 2023 Subscriber Update version.
FOR SUBSCRIBERS:
The New from Template workflow includes the following features exclusive to subscribers and licensees with an active CorelSure Maintenance Plan.
March 2023 update
The new online template library gives you access to over 200 design templates at your fingertips.
September 2022 update
You can now access the New from Template window on the Create a New Document dialog box. The dialog box now has two tabs, Document Settings and Templates, so you can switch between views with ease.
March 2022 update
Dozens of premium templates have been added, available free to subscribers.
Thanks for watching! We hope you found this tutorial helpful and we would love to hear your feedback in the Comments section at the bottom of the page. You will find a written version of this tutorial below, and a printable PDF copy to download on the Download Resources tab above.
This tutorial reviews the template workflow in CorelDRAW, including where to download free templates, how to organize and manage your template library, and how to edit templates.
Thanks for watching! We hope you found this tutorial helpful and we would love to hear your feedback in the Comments section at the bottom of the page. You will find a written version of this tutorial below, and a printable PDF copy to download on the Download Resources tab above.
Start your FREE 15-day trial and embark on a design journey with powerful tools for vector illustration, layout, photo editing, typography, and collaboration.
Download these free resources:
Written tutorial for Windows (PDF,1.6 MB)
Written tutorial for Mac (PDF, 1.7 MB)
CorelDRAW Graphics Suite resources
Quick Start Guide (PDF, 2 MB)
Keyboard Shortcuts (PDF, 3.5 MB)
CorelDRAW and Corel PHOTO-PAINT user guides
For CorelDRAW Graphics Suite subscription and perpetual licenses (2018 to 2024), languages include English, Português do brasil, 简体中文, 繁體中文, Čeština, Deutsch, Español, Français, Italiano, 日本語, Polski, Русский
CorelDRAW Community
CorelDRAW learning center
Facebook
X (formerly Twitter)
YouTube
What’s New in CorelDRAW Graphics Suite
CorelDRAW Tools
 CorelDRAW Graphics Suite
 Ultimate Vector Bundle Vol. 1
 CorelDRAW Standard 2021
 Ultimate Vector Bundle Vol. 2
 Corel Vector
How to Use CorelDRAW Templates
When you could use a little help getting started with a CorelDRAW project, it’s nice to start with a template. In this we’ll learn how to access and use CorelDRAW templates, and how to save your own templates.
Click on any of the images below to view full-size.
How to Access Templates
There are several ways to start a new document from a template.
From the Welcome Screen, you can open the Get Started tab, and click New from Template.
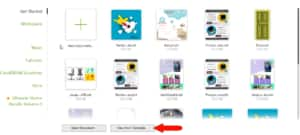
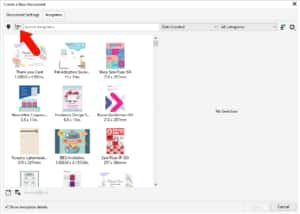
This opens the Create a New Document window to the Templates tab.
Choosing File > New from Template does the same thing, and choosing File > New opens the same window, where you can switch to the Templates tab.
CorelDRAW subscribers can access the online library with over 200 cloud-based design templates.
All users also have a local collection of several pre-installed sample templates.
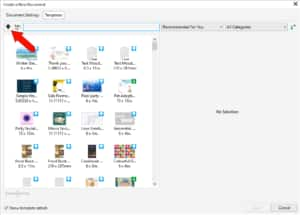
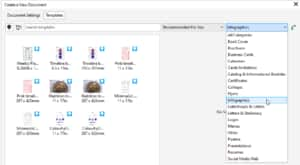
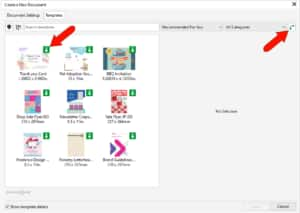
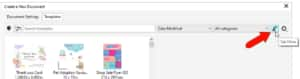
In the online library, templates can be searched by name or keyword. Deleting the search terms brings back the entire list.
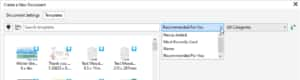
You can also sort by Newly Added, Most Recently Used, or Name. Choosing Recommended for You sorts templates according to your CorelDRAW subscriber profile.
Your profile is based on survey questions about your proficiency level and the types of projects you work on. If you didn’t fill out this survey, or want to update your profile, open the Learn docker to the Explore tab, and click the Personalize Results icon.
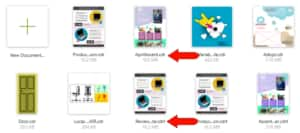
The online template library can also be filtered by category, such as Infographics or Brochures. Returning to All Categories brings back the entire list.
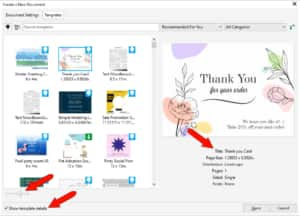
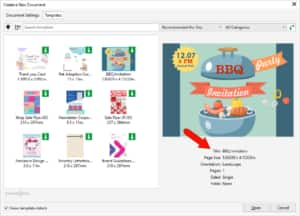
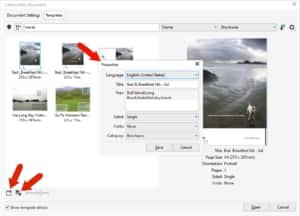
Template thumbnail size can be adjusted with the slider. When Show template details is checked, the right side of the window shows an enlarged version of the selected template, listing its title, size, orientation, pages, sides, and folds.
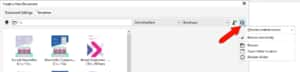
Clicking Open does two things. It opens a new CorelDRAW file based on the selected online template, and also downloads the template. All templates you’ve opened will have the Downloaded icon, and toggling the Show Downloads Only icon shows all previously opened templates.
Note that you can view properties of a downloaded template, but these properties cannot be changed.
This is to prevent your edited template being overwritten if you download the template again. You can save a copy of a downloaded template locally, and make any changes you like to the template itself or its properties, as we’ll see later in this tutorial.
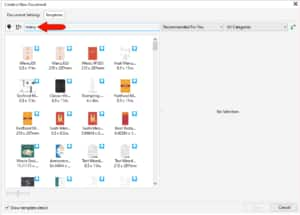
Local templates include the pre-installed sampler templates, any templates you’ve’ opened from the online library, and any custom template you’ve saved to the Corel templates folders.
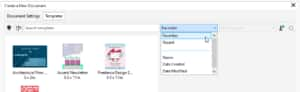
Local templates can also be searched by name or keyword, sorted by name, date created, or date modified, and filtered by category.

For a selected local template, clicking the Properties icon opens a window that also lists the template’s tags, which are the keywords that can be used for searching. If you add or change tags, or change the title, be sure to click Save. Clicking the Open folder location icon opens the folder where these Corel templates are placed. Templates can be placed in other folders as well, which we’ll see farther on.
Right-clicking the thumbnail of a local template opens a context menu in which you can mark a template as a Favorite.
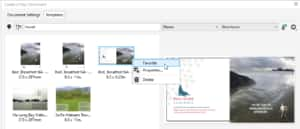
You can see your favorite templates by filtering the list for Favorites, and this menu also has an option for templates recently used.
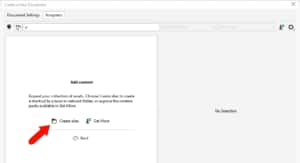
Non-subscribers can get more templates by clicking Get More. This opens the Store, where a selection of templates is available for free and for purchase.
How to Modify and Save Templates
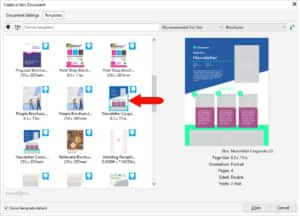
In this example, we want to create a template for a company newsletter that can be edited and distributed each month.
Start a new document from a template, and search in the Brochures category in the online template library. Select this newsletter template and click Open. Double-clicking a template thumbnail also opens the template.
As mentioned earlier, this adds the template to your local templates.
Now we can use this template as a basis for our own company newsletter. In this example, we changed the color of the large polygon at the top, replaced the generic “company” text with our logo, and edited the text.
- To change the color of an object in a template, such as the polygon, select the object with the Pick tool and then click a color swatch on the Color palette.
- To add a logo image, use File > Import to import the logo file into the newsletter document, then use the Pick tool to resize and/or reposition the logo if necessary.
- To edit the text, activate the Text tool and select the text you want to edit, then type in your new text.
Here is our modified newsletter template with our company logo and brand colors.

To save this document locally as a new template, choose File > Save as Template, which opens the default Corel Templates folder. Assign a template file name and save.

NOTE: within the Templates folder, the Library Downloads folder contains any downloaded templates from the online library,
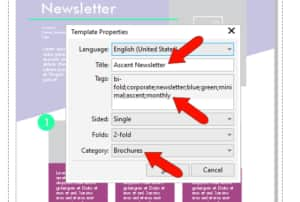
Because this is a local template, you can edit its properties, including template title. Assigning tags such as “ascent” and “monthly,” separated by semi-colons, will make it easy to find this template via a keyword search. The template is already in the Brochures category, but you could open the list and place it elsewhere or create a new category. Click Save again.
Now when you start a new document from a template, and open your local templates, the template you saved is in the Brochures category.
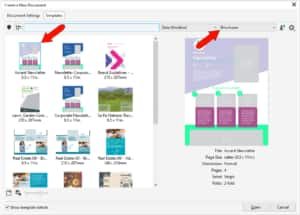
Open the template, which can now be used for each month’s newsletter. This particular template has PowerClip rectangles for images, so you can import an image and drag it into a PowerClip, holding the K key to replace PowerClip contents.

To learn more, watch the full tutorial on working with PowerClip.
After completing each edition of the newsletter, use File > Save As and save in a format such as JPG or CDR, so as not to overwrite the template file.
Creating a Custom Template
Any CorelDRAW file can be made into a template. This example is a design that will be used as a template for all of a company’s product review sheets. Choose File > Save As, but instead of saving to the default folder, this time we’ll save it in a new folder we’ve created called “Reviews”, on a company drive that our colleagues can access.
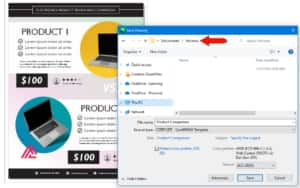
Now when you start a new document from a template, you’ll need to search in local templates and find the correct folder.
You could do this by clicking the Options icon and choosing Open Folder Location, but you would have to do this each time you need this template. Or you could choose Browse, but this would make the new folder the default for opening templates.
TIP: the Browse recursively option will search both folders and their subfolders. Reindex will scan the folders, look for any new or deleted files, and update the template window.
The way to make this folder easily findable is to use the Choose content source option and choose Add New.
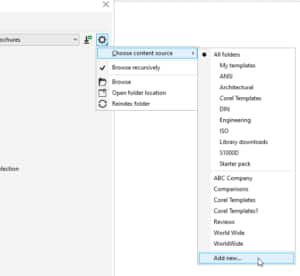
Click Create Alias, browse to the folder you created, and select it.
Now for future documents, you can find this folder in the Choose Content Source drop down, and returning to All Folders brings back the entire list.
Finally, whereas CorelDRAW files are saved with the CDR extension, template files have the extension CDRT.
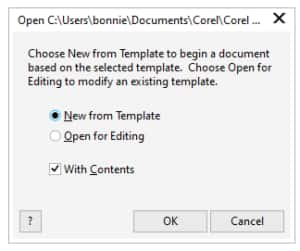
If you use File > Open instead of New from Template, and open a template file, you’ll be asked whether you want to create a new document based on this template or open the template itself to edit it.
Start your FREE 15-day trial and embark on a design journey with powerful tools for vector illustration, layout, photo editing, typography, and collaboration.

Comments (2)
Reader Interactions
Comments
thank you very much for information
Hmmm that’s great