
In this tutorial, we’ll review the three tools in the Pick tool group: Pick, Freehand Pick, and Free Transform. These tools are used for selecting, moving, and transforming objects. In order to make any changes to an object, whether it’s something simple like changing fill or outline color, or something more complex like moving or rotating, the object must first be selected. So learning how to use the Pick tools is the foundation for pretty much everything you’ll do in CorelDRAW.
Thanks for watching! We hope you found this tutorial helpful and we would love to hear your feedback in the Comments section at the bottom of the page. You will find a written version of this tutorial below, and a printable PDF copy to download on the Download Resources tab above.
Start your FREE 15-day trial and embark on a design journey with powerful tools for vector illustration, layout, photo editing, typography, and collaboration.
Download these free resources:
Written tutorial (PDF, 428 KB)
CorelDRAW Graphics Suite resources
Quick Start Guide (PDF, 2 MB)
Keyboard Shortcuts (PDF, 3.5 MB)
CorelDRAW and Corel PHOTO-PAINT user guides
For CorelDRAW Graphics Suite subscription and perpetual licenses (2018 to 2024), languages include English, Português do brasil, 简体中文, 繁體中文, Čeština, Deutsch, Español, Français, Italiano, 日本語, Polski, Русский
CorelDRAW Community
CorelDRAW learning center
Facebook
X (formerly Twitter)
YouTube
What’s New in CorelDRAW Graphics Suite
CorelDRAW Tools
 CorelDRAW Graphics Suite
 Ultimate Vector Bundle Vol. 1
 CorelDRAW Standard 2021
 Ultimate Vector Bundle Vol. 2
 Corel Vector
How to Use the Pick Tools
In this tutorial we’ll review how to select, move, and transform objects with the Pick, Freehand Pick, and Free Transform tools in CorelDRAW.
Click on any of the images below to view full-size.
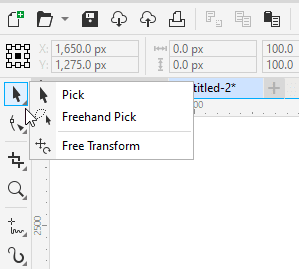
The Pick tool group is the first tool button at the top of the Toolbox. There are 3 tools in this tool group: the Pick tool, the Freehand Pick tool, and the Free Transform tool. Click on the small arrow in the bottom right corner of the tool button to see all three tools in this group.
The Pick Tool
The Pick tool serves many functions in CorelDRAW; mainly selecting, moving, and transforming objects. In order to make any changes to an object, whether it’s something simple like changing fill or outline color, or something more complex like moving or rotating, the object must first be selected. So learning how to use the Pick tool is the foundation for pretty much everything you’ll do in CorelDRAW.
Selecting Objects with the Pick Tool
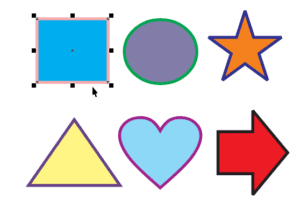
To select a single object, activate the Pick tool and click once on the object. The selected object is surrounded by square handles, which we’ll learn about a bit farther on.
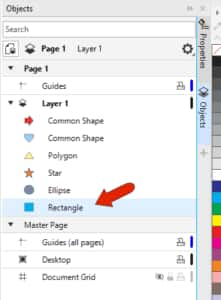
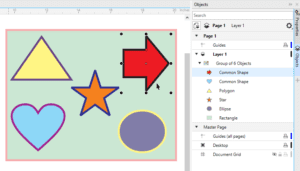
When your Objects docker (Objects inspector for Mac users) is open, the selected object is highlighted in blue. If you don’t have the Objects docker open, go to Window > Dockers > Objects.
If you want to deselect an object and/or have nothing selected, simply click in a blank space in the drawing window.
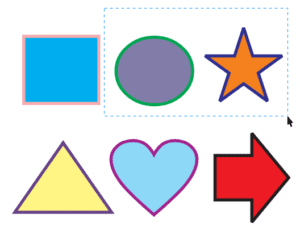
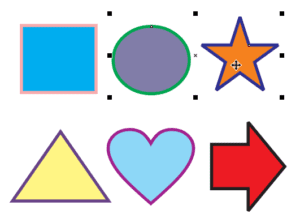
To select multiple objects, hold down the Shift key as you click the objects one by one. You can also use the Pick tool to drag a rectangular selection marquee around all the objects you want to select.
If you hold the Alt key while dragging, all objects within and touching the selection area are selected.
To select all objects in the workspace, you can drag a selection marquee around everything, or double-click the Pick tool icon, or press Ctrl + A (Cmd + A for Mac users). When multiple objects are selected and you want to deselect one, keep Shift pressed and click the object to deselect.
Any changes you make will affect all selected objects, such as changing fill color by left-clicking a color swatch, changing outline color by right-clicking a swatch, adding transparency with the Transparency tool, or as we’ll see in a bit, moving, resizing, etc.
A group is a collection of objects that acts as a single object. Groups are identified in the Objects docker with an expansion arrow, which you can click to see what’s inside. To select an object within a group, keep the Ctrl key pressed (Option key for Mac users), and use the Pick tool to select individual objects within the group. When objects within a group are selected, the surrounding handles are circles rather than squares.
In addition to using the Pick tool, objects can be selected directly in the Objects docker, no matter what tool is active. You can select an entire group, an object within a group, a consecutive set of objects with the Shift key, or multiple objects one by one with the Ctrl key.
The Freehand Pick Tool
The Freehand Pick tool works the same way as the Pick tool, the only difference being how multiple objects are selected. Instead of dragging a rectangular selection marquee, you can trace an irregular selection area around what you want to select.

Like with the Pick tool, if you hold the Alt key while dragging with the Freehand Pick tool, partially included objects will also be selected.
TIP #1: When multiple objects are stacked on top of each other, it can be tough to select an object hidden underneath. A solution is to activate the Pick tool and press the Alt key while clicking. We call this the Digger tool, because it lets you “dig” down through the stacking order.
TIP #2: You can also press the Tab key while the Pick tool is active, to select objects one by one from newest to oldest. Pressing Shift and Tab together reverses the selection order.
Moving Objects with the Pick and Freehand Pick Tools
When one or more objects are selected, a bounding box encloses the selection, with an X in the center and 8 black squares all around. These squares are called handles. When the cursor is on an object or on the X, it becomes a 4-way arrow, called the position cursor.
Clicking and dragging while the position cursor is displayed moves the selected objects.
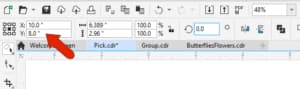
To move the X to an exact location, you can enter X and Y coordinates in the Object Position fields on the property bar.
You can also move selected objects by increments with the arrow keys – this is called nudging. Pressing Shift with an arrow key moves by greater increments – a super nudge – and with the Ctrl key pressed it’s a smaller distance – a micro nudge.
TIP #3: For a quick way to make copies of an object, you can select the object and move it around with the Pick tool, pressing the Spacebar wherever you want to place a copy.
Transforming Objects (Basic Transformations)
The Pick tool can also be used for basic object transformations: sizing and scaling, stretching, skewing, rotating, and mirroring. Handles can be used for basic transformations, but for precise transformations, you can also use the Position and Size fields in the property bar.
Corner handles are used for resizing or scaling.

Side handles are for stretching horizontally or vertically.

To mirror an object, keep the Ctrl key pressed while dragging a side handle to the opposite side. This flips an object by its side, whereas the Mirror icons in the property bar flip by the object’s center.
When the Pick tool is active, clicking one or more objects that are already selected displays a new set of handles. Now the corner handles are used for rotating, or you can enter a rotation angle.
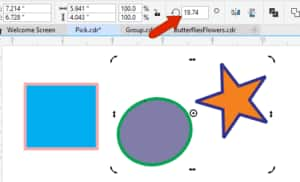
By default, the rotation is about the center of the objects, but you can drag the center point elsewhere.
The side handles are used for skewing.
Clicking again brings back the square handles, and if you click again to return to the rotation handles, the center of rotation will return to its default spot.
This works a bit differently when just one object is selected. If you click on a selected object and move the rotation center, then click twice more to toggle handles again, the rotation center remains in place. But you can drag it back to the center of the object. Snap points such as Center, Node, or Edge, appear as long as Objects is checked in the Snap To menu on the standard toolbar.
The Free Transform Tool
We’ve seen how objects selected with the Pick or Freehand Pick tools can be moved, scaled, rotated, and skewed. For more flexibility with these transformations, try the Free Transform tool.
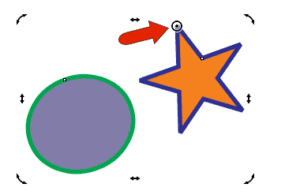
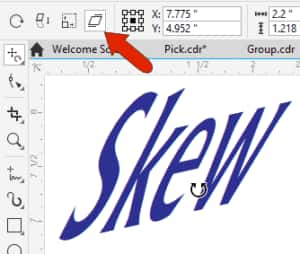
In this example, the text is selected with the Freehand Transform tool, and Free rotation is enabled from the four transformation options on the property bar.
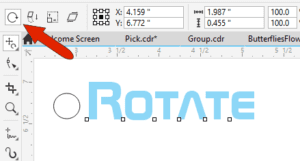
Rotation of the text is done by clicking and holding the mouse at the center of rotation – in this case, the circle – and dragging to rotate the text around this point.

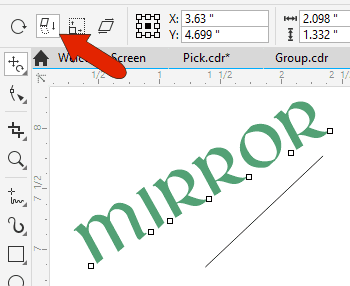
To use Free Angle Reflection, select the object to mirror then drag the mouse along the mirror line.
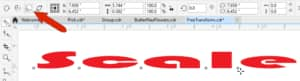
With Free scale, you can scale in any direction or proportion, relative to the cursor location.
And with Free skew, you can both skew and rotate an object.
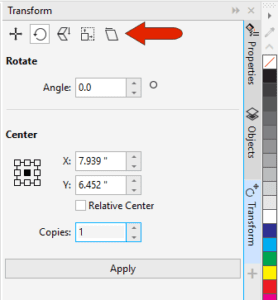
For more transform options, open the Transform docker (Window > Dockers > Transform). For the selected objects, you can use exact values to position, rotate, scale and mirror, size, and skew. All of the options can include making copies.
Start your FREE 15-day trial and embark on a design journey with powerful tools for vector illustration, layout, photo editing, typography, and collaboration.
