
Make a Jewel Design
See how you can use the Fit Objects to Path feature to turn a few simple objects into a jewel design.
Watch this 1-minute video for an overview of the process. The steps are written out below and you can download the practice file if you want to follow along.
Start your FREE 15-day trial and embark on a design journey with powerful tools for vector illustration, layout, photo editing, typography, and collaboration.
Step 1: Getting started
- Open the practice file Jewel-Design.cdr in CorelDRAW.
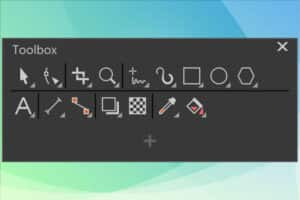
- Open the Fit Objects to Path docker (inspector for Mac users).
- Select Dockers/Inspectors > Fit Objects to Path under the Window menu, or
- Select Fit Objects to Path under the Object menu.
Step 2: Using the Fit to Path feature
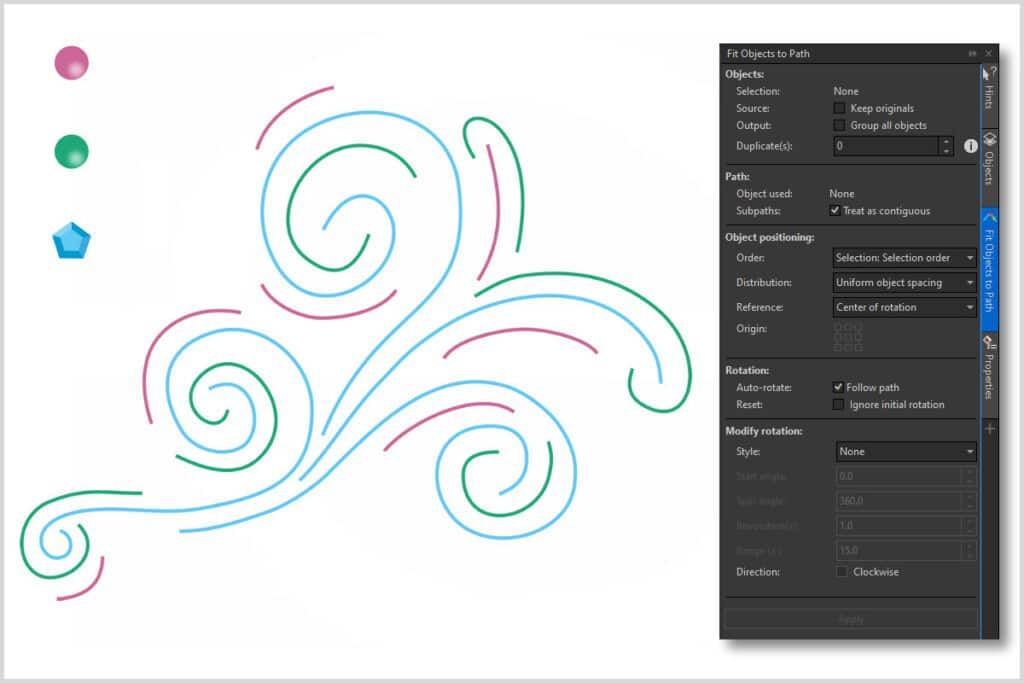
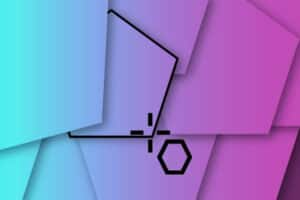
Our design has 3 “jewel” objects and 3 curves (lines) that will serve as the path to place the objects on. We’ll start with the pink jewel and path.
- Activate the Pick tool and select pink jewel.
- Hold down the Shift key and click on one of the pink lines to select the pink path. Now both the object and the path will be selected.
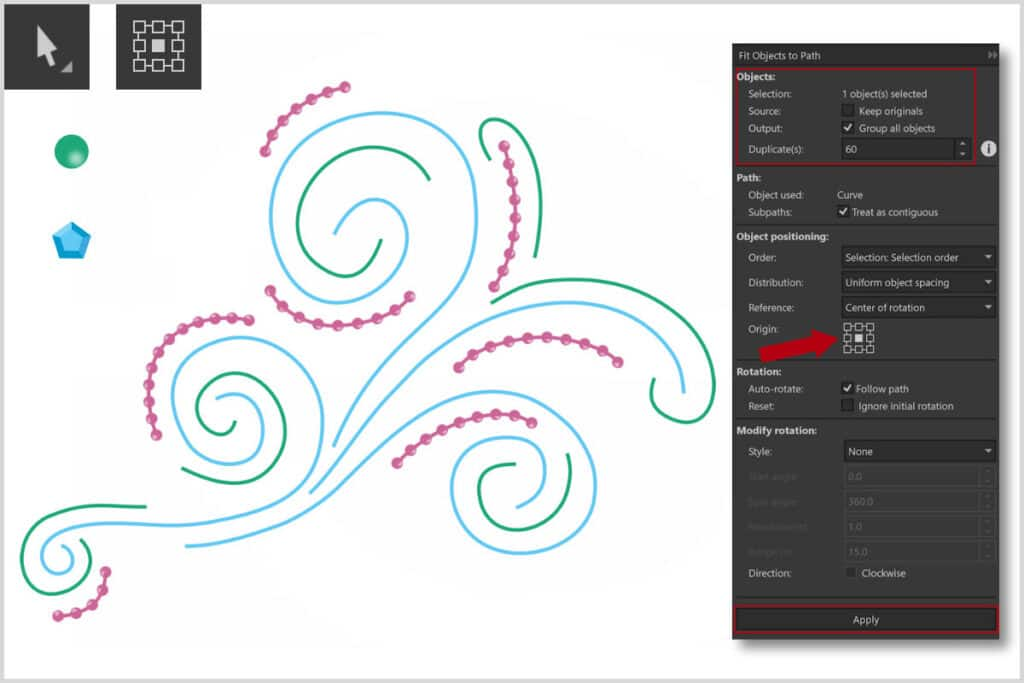
- In the Objects section of the docker, set the Duplicates number to 60 and beside Output, check off Group all objects.
- In the Object positioning section of the docker, set the Origin to center by clicking on the middle square.
- All other settings in the docker can be left at their default setting.
- Click the Apply button.
Next, we’ll do the green jewel and path following the same process but with a different number of Duplicates.
- With the Pick tool, select the green jewel.
- Hold down the Shift key and select the green path also.
- In the Objects section of the docker, change the Duplicates number to 125.
- Keep all the other settings as is.
- Click Apply.

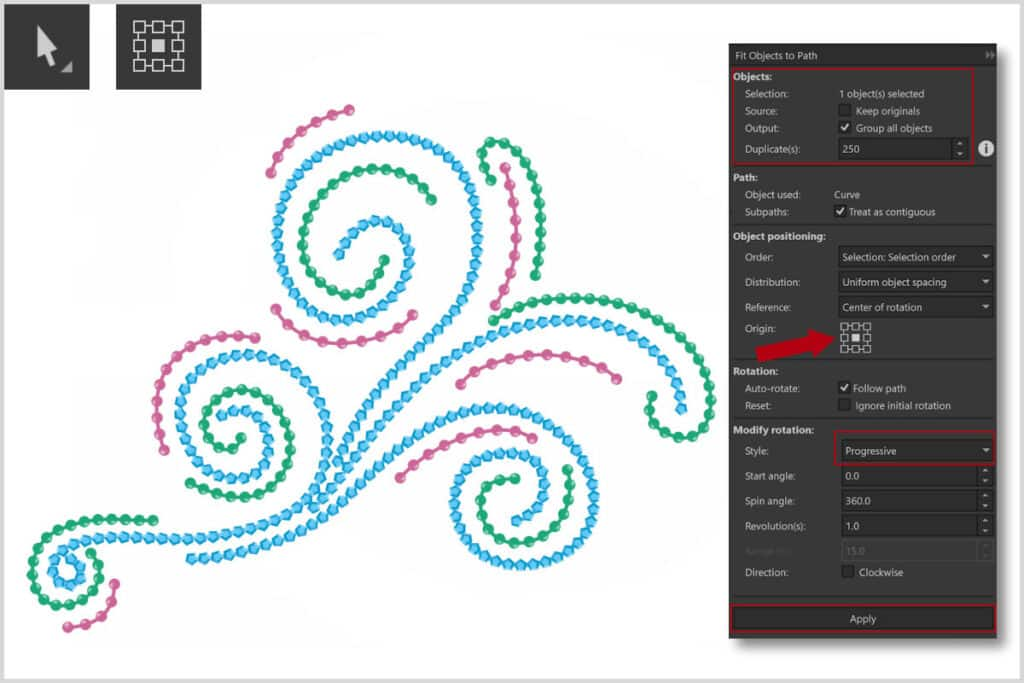
Next, we’ll do the blue jewel and path following the same process but with changes to the Duplicates and Rotation style.
- With the Pick tool, select the blue jewel.
- Hold down the Shift key and select the blue path also.
- In the Objects section of the docker, change the Duplicates number to 250.
- In the Modify Rotation section of the docker, select Progressive from the Style dropdown list.
- Click Apply.
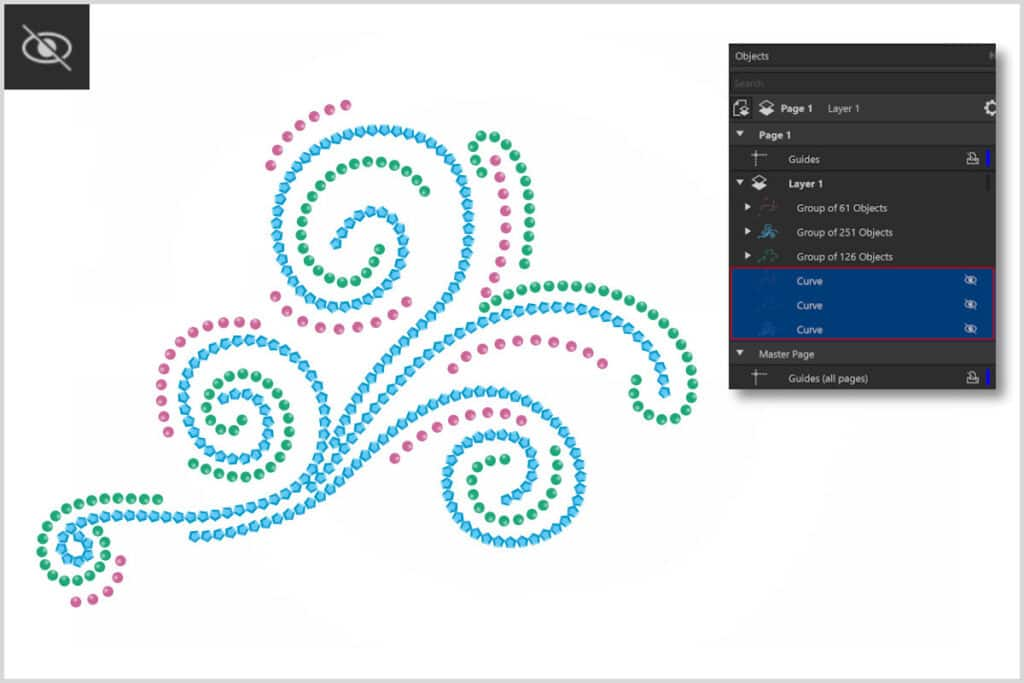
Step 3: Removing the paths
The final step is to remove the lines that served as paths. The easiest way to do this is to select the curves in the Objects docker (inspector for Mac users) and delete or hide them.
- If you want to keep the paths for future edits, such as experimenting with different values in the Fit Objects to Path docker to create new looks, you can hide the paths until you need them again. Simply toggle the Visibility (eye) icon off and on in the Objects docker, beside each object.
- If you want to delete the paths, select a path and press Delete, or right-click on the path in the Objects docker and select Delete.
Now your jewel design is complete. You can save it as a CDR file to preserve the objects and layers for future editing, and export it in a variety of formats including JPG, PNG, PDF etc.
See More Tutorials
Make a Custom Logo

Make a Postcard

Make a Flower Icon

Make an Instagram Template

How to Use the Polygon Tool
How to Draw Lines and Curves

How to Use the Transparency Tool
See More Tutorials
Browse the full collection of tutorials for CorelDRAW and PHOTO-PAINT, from beginner to advanced, creative projects, and more!
What’s New in CorelDRAW

CorelDRAW Tools
Working with Text

Need more help? Watch the in-depth tutorial.
In this 6-minute video, we’ll show more examples of how the Fit Objects to Path feature can be used to speed up your design workflow.
Start your FREE 15-day trial and embark on a design journey with powerful tools for vector illustration, layout, photo editing, typography, and collaboration.
