
Get an introduction to the SmartClone tool introduced in PaintShop Pro 2020 and see clone technology at its finest. In this video, we’ll review the options and settings for this feature and briefly show how it can be used to retouch images, remove flaws and create interesting composites that merge elements from multiple image into one. You can also save any of your SmartClone selections as presets to use in other images.
Download your FREE 30-day trial and make every shot your best shot with PaintShop Pro 2023, your all-in-one photo editing and design software.
Download these free resources:
Written tutorial (PDF, 696 KB)
PaintShop Pro resources
Keyboard shortcuts (PDF, 173 KB)
PaintShop Pro User Guide (PDF, 25.4 MB)
What’s New in PaintShop Pro
Cloning and Blending
Featured products
 PaintShop Pro 2023 Ultimate
 AI HDR Studio 3.0
 PaintShop Pro 2023
 Vision FX
How to Use the SmartClone Tool
Content-aware tools can be extremely helpful in removing unwanted elements, flaws, or distractions from your photos. They can also be a powerful asset in creating unique compositions and interesting designs. In this tutorial you’ll learn about PaintShop Pro’s SmartClone tool which harnesses clone technology and produces amazing results. SmartClone can be used in a variety of different ways, for all different styles of projects.
Click on any of the images below to view full-size.
Let’s start with some basic retouching. We’ve all snapped photos similar to this one that require a little touching up. In this case, there’s a big spot on the grass that’s brown and dead and is kind of an eyesore. With the intelligence of the SmartClone tool we can easily fix that by selecting the tool or pressing D on the keyboard.

We’ll first choose our Selection Type, and there are three options: Ellipse, Rectangle or Freehand.

We’ll choose Ellipse then select an area of grass that looks good and use that clone selection to fill in the patch of dirt.

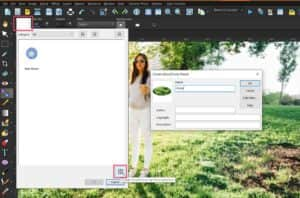
If we like this selection and want the option of using it later or in another project, we can save it as a preset. To do that, just select the dropdown from the Options toolbar, click on the Plus icon at the bottom to Create SmartClone tip from selection, give it a name and press OK.
Now we can easily use this preset on future projects, and manipulate the Size, Rotation and Mode.
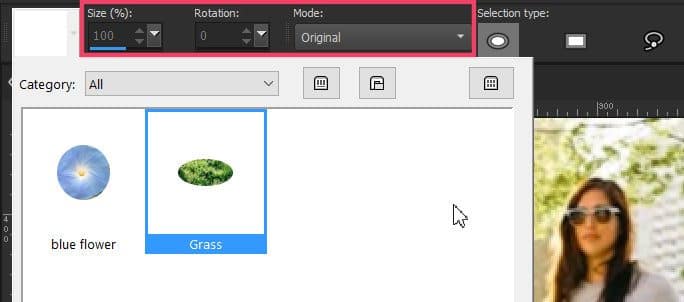
The Mode option determines how much of your source image will appear on your destination image. For example, if we change the mode from Original to Blend, that will apply a light transparency to our selection so that it blends nicely into its destination. Whereas the Original mode maintains almost the exact appearance of the source selection. If you choose Black and White mode, that will desaturate the clone selection so that it’s mostly just texture that’s pasted on to the destination image.
Give this intelligent tool a try and see how it can make it super easy to create some interesting and fun design projects.


Download your FREE 30-day trial and make every shot your best shot with PaintShop Pro 2023, your all-in-one photo editing and design software.
Using the Clone Brush

Face Swap Cloning Technique

Reader Interactions