
With PaintShop Pro’s versatile range of pro-level photo editing and graphic design tools, plus time-saving AI-based solutions, you can enjoy a positive editing experience from start to finish, and produce results that are as unique as your images. In this video, we’ll highlight some of the new features and enhancements in PaintShop Pro 2023.
To learn more about these new features, watch the full videos:
NEW! Focus Stacking
NEW! AfterShot Lab
ENHANCED! Frame Tool
Download your FREE 30-day trial and make every shot your best shot with PaintShop Pro, your all-in-one photo editing and design software.
Download these free resources:
Written tutorial (PDF, 2.3 MB)
PaintShop Pro resources
Keyboard shortcuts (PDF, 173 KB)
PaintShop Pro User Guides
Partner and User websites
PaintShop Pro User Forum
Scrapbook Campus (Tips and tricks, workshops, master classes, and more)
Creation Cassel (Scripts, picture tubes, and other PaintShop Pro tools, plus weekly freebies)
PaintShop Pro Maniacs (Facebook group)
PaintShop Pro (Facebook group)
What’s New in PaintShop Pro
Getting Started in PaintShop Pro
PaintShop Pro Tools
Featured products
 PaintShop Pro 2023 Ultimate
 AI HDR Studio 3.0
 PaintShop Pro 2023
 Vision FX 2.0
Overview of What’s New in PaintShop Pro
This tutorial will highlight some of the new features and enhancements in PaintShop Pro 2023. To learn more about these new features, please see the full tutorials:
How to Use Focus Stacking
Introduction to AfterShot Lab
How to Use the Frame Tool
Click on any of the images below to view full-size.
Focus Stacking
The new Focus Stacking feature enables you to blend multiple images of the same scene, taken at different focus distances, to create a final composite with a greater depth of field than any of the individual source images.
There are three steps in the Focus Stacking process:
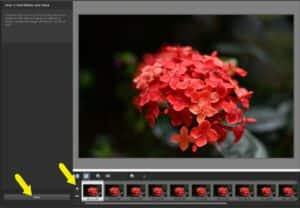
Step 1: Add Photos and Stack
While in the Edit space, choose File > Focus Stacking to open the Focus Stacking interface. Click Add Photos, select the images you want to use, and they’ll be added to the tray. Then click the Stack button.
If the stacked image is to your liking, you can click Blend at the bottom. If not, proceed with Step 2.
Step 2: Choose Areas of Focus
If there are areas in the stacked image you want to fix, such as this small white spot, you can use the Brush In tool.
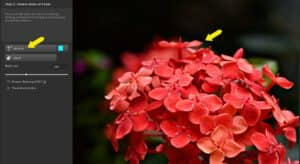
To use the Brush In tool, choose one of the source images, and replace pixels in the stacked image by dragging over the area to fix. When you’re happy with the results, click Blend.
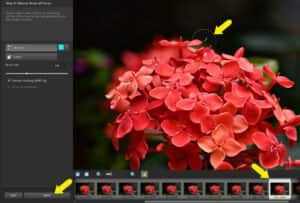
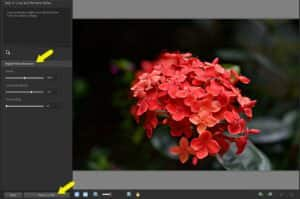
Step 3: Crop and Remove Noise
The final step, also optional, is to crop and remove noise. To crop, you can use preset sizes, enter your own width and height values, or drag the handles to adjust the crop window, then click Apply.
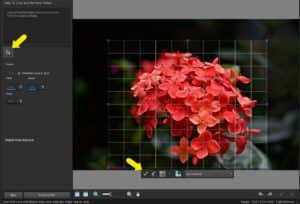
Digital Noise Removal enables you to adjust settings for Detail and Correction Blend which controls the degree to which the corrected image will be blended in with the original. You can also control what sharpening, if any, is applied to the image after the noise reduction is applied.
When you have the results you want, click Finish in PSP.
This returns you to the Edit workspace, where you can continue working with other image editing tools and effects.
To learn more, watch the full tutorial How to Use Focus Stacking.
AfterShot Lab
Corel AfterShot Lab is a RAW editing feature integrated within PaintShop Pro 2023. It provides advanced features and tools for optimizing images in the RAW file format, without needing to run separate applications. AfterShot Lab is non-destructive, so your original image files remain untouched.
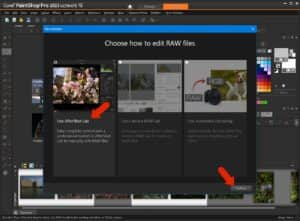
To open AfterShot Lab, bring one or more RAW files into the Edit workspace, choose Use AfterShot Lab, and click Continue.
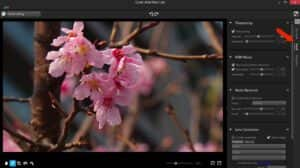
The AfterShot Lab interface features the preview area, the tray, and the tools panel, which has three tabs.
The Standard tab features basic adjustments and presets. The most popular adjustments are at the top, including Auto Level, Perfectly Clear, and White Balance, where you can select from a list of lighting presets, or use the Click White tool to select a neutral image area.
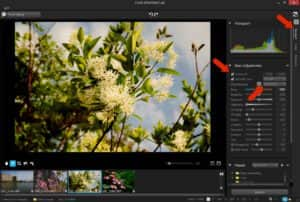
There are also several adjustment sliders, such as Temperature, Fill Light and Contrast.
Double-clicking a slider resets it, and you can use the Reset All button at the bottom to start over.
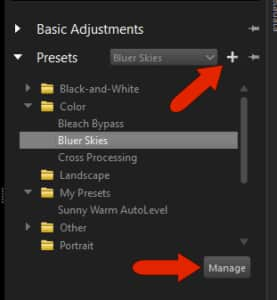
Below the Basic Adjustments are several preset adjustments to try, such as Bluer Skies or Cross Processing.
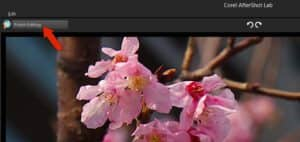
After applying a preset, you can continue to make adjustments with any of the sliders or tools in the Basic Adjustments list.
If you want to save the new settings as a preset to use for other images, click Add Preset. The Manage button enables you to create or edit preset folders, and your presets can be dragged in and out of folders.
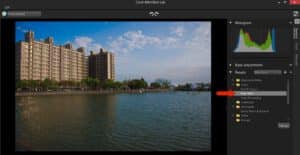
The Detail tab has controls for adjusting Sharpening, RAW Noise, Noise Removal and Lens Correction, plus options to mirror or invert the image.
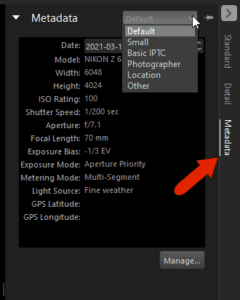
The Metadata tab displays data about the image itself, such as Default metadata for date shot, camera model and settings, light source, etc. There are other tabs for other metadata categories.
When finished in AfterShot Lab, click Finish Editing.
This opens your edited RAW file in the PaintShop Pro Edit workspace, where you can make further edits or add effects, then save the image to any format you like.
To learn more, watch the full tutorial Introduction to AfterShot Lab.
The Frame Tool
Introduced in PaintShop Pro 2022, the Frame tool has been enhanced in PaintShop Pro 2023 to include the ability to create frames with preset shapes, symmetric shapes, and text.
In this example, to add a heart-shaped frame, start by activating the Frame tool. Select the Preset Shape option, choose the heart shape, set a line width that works as a thick border, and choose a swatch in the Materials palette for the outline color. Then click and drag to create the frame.
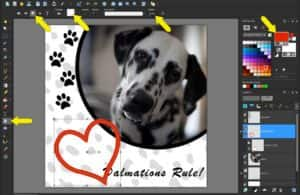
After rotating, resizing, and repositioning the frame, embed an image by going to File > Embed Image, or by dragging it in from the Organizer or file browser. The image is sized and clipped automatically, and placed within the frame layer group.

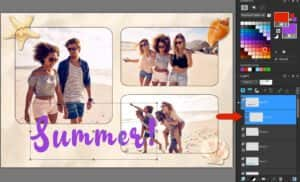
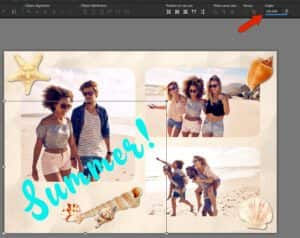
You can also convert existing vector objects, such as text, ellipses, or rectangles, into a frame. In this example, we want to convert the “Summer” text to a frame.
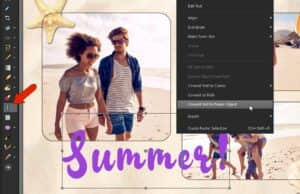
For any vector object, the process is the same: in the Layers palette, open the layer group that contains the vector object and select the vector object itself.
Then activate the tool used to create the object, which is the Text tool in this example. Right-click anywhere and choose the option to covert to frame object.
Now you can drag in the photo, and if necessary, adjust the photo so that the part you want is in the frame.

The Frame tool can also be used to create composite images, such as this example of a circular frame into which an image was embedded. With the image layer opacity reduced, the background layer below shows through a bit to create an interesting effect.

To learn more, watch the full tutorial How to Use the Frame Tool.
New from Template
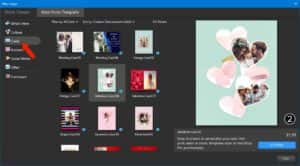
The New from Template window gives you access to hundreds of creative templates —from cards, to collages, brochures, and social media templates. You can choose from a selection of free templates, or you can purchase templates.
In PaintShop Pro 2023, the layout has been updated with more content visible plus new Filter and Sort options to make it easier to find just the right template for your project.
To start with a template, click the New from Template icon on the Welcome screen.
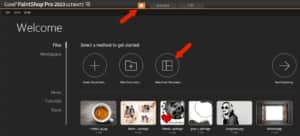
If you’re in the Edit workspace, you can find this icon on the Standard toolbar or use File > New from Template. You can also choose File > New and open the New from Template tab.
On the left are the template categories and to the right are template thumbnails. Click on any thumbnail to see a preview of the template.
You can use the Filter dropdown to display templates by themes and types. The Sort by dropdown enables you to change the thumbnail order by title, creation date, price and more. So if you want to find free templates, sort the list from the lowest price.
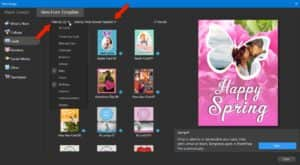
To install a paid template, click Buy Now, or for a free template click Download. Then click Open.
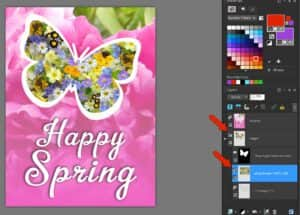
In the Layers palette, you’ll see that the templates are built with layers and masks. Simply add an image to the layer group and use the Pick tool if needed to resize and reposition. If you’re familiar with working with layers and masks, you can customize the template, such as changing the frame color or adding text.
You can use File > Save As to save your modified template as a new file. Just remember that if you want to preserve layers and masks, be sure to save in .PSPIMAGE format.
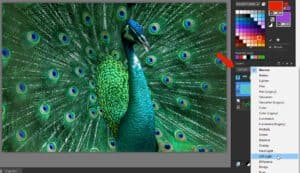
Blend Mode Preview
With the new real-time Blend Mode preview, you can check layer blending results on the go, by hovering over drop-down-list options in the Layers palette.
Snap to Objects
The new Snap To Objects feature, located in the View menu, enables you to align objects with precision in no time. Use the bounding box to precisely snap two objects together with automated, high-level control and avoid extra steps in the editing process.
Rotation Values for Objects
For more precise rotation of raster or vector objects selected with the Pick tool, you can enter a rotation angle in the Angle field on the Tool Options palette.
Refine Brush Improvements
We’ve also improved the performance of the Refine Brush, so that processing is much smoother when you want to make extremely precise and accurate selections.

Camera Support
And finally, we’ve also added RAW file support for the latest camera models, such as Fujifilm X-E4, Nikon Z fc, Sony ILCE-1, and more. View the full list of supported cameras here.
Download your FREE 30-day trial and make every shot your best shot with PaintShop Pro, your all-in-one photo editing and design software.

Comments (9)
Reader Interactions
Comments
Bei Kauf von sämtlichen Pfennigs Artikeln ist eine Beschreibung in vielen Sprachen beigelegt. Bei der Firma Corel nur in Englischer Sprache zu lesen oder zu hören?
Wo finde ich die Deutsche Bedienungsanleitung?
Hallo Herbert,
Hier ist der Link für die Bedienungsanleitung in Deutsch
https://help.corel.com/paintshop-pro/how-to/de/user-guide/paintshop-pro-2022.pdf
Sie können die Tutorial-Videos mit Untertiteln ansehen.
Klicken Sie auf das CC-Symbol, um Untertitel zu aktivieren
Klicken Sie auf das Symbol „Einstellungen“, wählen Sie „Untertitel/CC“ > „Automatisch übersetzen“ und dann Ihre Sprache aus.
Mit freundlichen Grüßen
Discovery Center team
why doesnt 2023 colorize black and white phots
Hi Patrick,
Unfortunately there is no automatic colorizing feature in PaintShop Pro but you can follow this tutorial https://learn.corel.com/tutorials/colorize-black-and-white-photos/ to add color to black and white photos.
Hope this helps!
The Discovery Center team
Crop and remove noise is something very important and mostly used, overall other input and update is appreciable.
Will the 2023 coral photoshop pro ultimate support the Nikon Z-9 Camera. Will it also allow 4K viewing on a 4K monitor or say a 4K OLED TV (?)
Hello,
Currently, PaintShop Pro does not support the Nikon Z-9 camera but it does provide 4K monitor support that is compatible with Ultra High DPI displays.
Best regards,
The Discovery Center team
I notice that Aftershot Lab, a watered down raw editor is now included in 2023, however as I have already purchased Aftershot Pro3, this is not required.
Can ASP3 be linked to PSP so that it opens raw files instead of Lab?
Hi KR,
It’s not possible to have PaintShop Pro open RAW files in AfterShot Pro 3 instead of AfterShot Lab. You can make AfterShot Pro the default program for opening RAW files by right-clicking on a RAW file in Windows, choose Open With > Choose another app. Select AfterShot Pro 3 from the list of available programs and check the box “Always use this app”.
Also, you can open an external image editor like PaintShop Pro from within AfterShot Pro. You can find more information in the AfterShot help files here.
Best regards,
The Discovery Center team