
The enhanced Frame tool makes placing raster objects into shapes quick, easy and intuitive. Designed to accelerate the creation of digital layouts, the Frame tool works with a variety of frame shapes and sizes to achieve your desired look. This video will demonstrate how to create frames from shapes or text, how to add your images to a frame, and how to make adjustments to the size and position of both the image and the frame. You’ll also see some creative ways to use the Frame tool to create composite images.
Note: the Frame tool was introduced in PaintShop Pro 2022 and enhanced in PaintShop Pro 2023 to include the ability to create frames from preset shapes, symmetric shapes, and text.
If you want to follow along step-by-step with this tutorial, you can download the collage files on the Download resources tab above.
Download your FREE 30-day trial and make every shot your best shot with PaintShop Pro, your all-in-one photo editing and design software.
Download these free resources:
Written tutorial (PDF, 2.5 MB)
Sample collage templates (Zip file, 7 MB)
PaintShop Pro resources
Keyboard shortcuts (PDF, 173 KB)
PaintShop Pro User Guides
Partner and User websites
PaintShop Pro User Forum
Scrapbook Campus (Tips and tricks, workshops, master classes, and more)
Creation Cassel (Scripts, picture tubes, and other PaintShop Pro tools, plus weekly freebies)
PaintShop Pro Maniacs (Facebook group)
PaintShop Pro (Facebook group)
What’s new in PaintShop Pro
Working with templates
PaintShop Pro tools
Featured products
 PaintShop Pro 2023 Ultimate
 AI HDR Studio 3.0
 PaintShop Pro 2023
 Vision FX 2.0
How to use the Frame tool
The Frame tool makes it easy for PaintShop Pro users of all skill levels to create digital layouts and composite images. You can create frames, also called clipping masks, based on all vector shapes, including Ellipse, Rectangle, Symmetric and Preset Shapes, as well as vector text. Existing vector shapes and text can also be converted into frames. Once a frame is created, you can fill it with a photo, pattern, or colors to achieve the effect you want.
The Frame tool was introduced in PaintShop Pro 2022 and enhanced in PaintShop Pro 2023. It is available in the Essentials and Complete workspaces.
Click on any of the images below to view full-size.
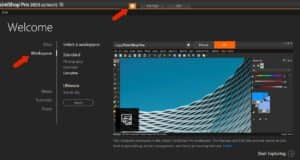
If you are working in the Photography or Sea-to-Sky workspace, you’ll need to change workspaces. Click the Home icon to open the Welcome screen, choose Workspace on the left menu, then select either the Essentials or Complete workspace and click Apply. For this tutorial, we’re using the Complete workspace.
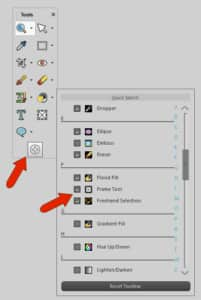
NOTE: if you’re using in the Essentials workspace, you’ll need to add the Frame tool to the Tools toolbar, as it’s not included by default. Click the Customize (plus) icon at the bottom of the toolbar and put a check beside Frame Tool.
The Layers palette should be open while working with frames. If yours isn’t open, press F8 or go to the Palettes menu and enable Layers.
Creating a frame with the Ellipse shape tool
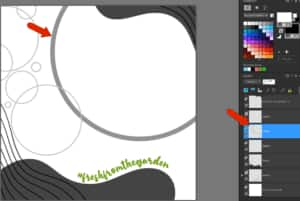
In our first example, we’ll add a photo inside the large gray circle. This circle is a raster object, and only vector objects can be used as frames. So we’ll need to create a vector frame.
Click the Frame tool, which has five options in the Tool Options palette: Rectangle, Ellipse, Preset Shape, Symmetric Shape, and Text. Choose the Ellipse frame option, and then choose the Draw Circle mode.
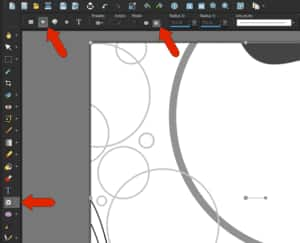
Click and drag to create the circle.
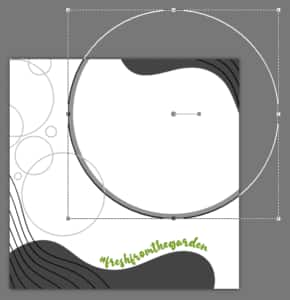
This adds a layer group called Frame Group 1, which for now contains only the ellipse you just drew.
You can use either the Frame tool or the Pick tool to move and resize the circular frame, as in this case to fit the gray circle.
Adding an image to a frame
There are a few ways to place an image into a frame:
- With the frame selected, choose File > Embed Image.
- Drag an image directly into the frame in the workspace, either from the Organizer or from a file browser window.
- Drag an image directly into the frame layer group in the Layers palette.
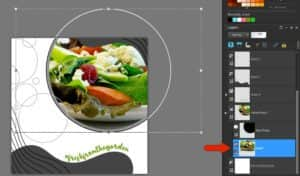
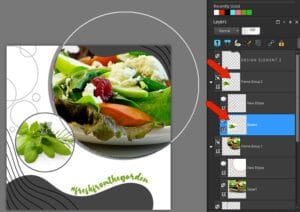
The image is automatically adjusted to fit the frame, while still maintaining its aspect ratio, and now also appears inside the frame layer group.
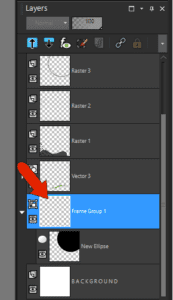
If you need to further resize or reposition the frame after you’ve added the image, it’s important to select the proper layer first:
- If the frame (New Ellipse) layer is selected, moving the ellipse moves the frame itself.
- If the Frame Group 1 layer is selected, the image and the ellipse move together, though not with the original gray circle because that object is not part of the frame group.
- If the image layer is selected, the image can be moved or resized inside the frame.
To remove an image from its frame, you can:
- Right-click on the framed image, or on the frame layer or image layer, and click Extract Image.
- Drag the image out of its frame layer group.
When the image is out of the frame, and in its own layer, you can delete the layer or use the Visibility (eye) icon to toggle its visibility off, if you’re not sure you want to delete it. You can embed a new image into the empty frame.
Converting a vector shape into a frame
Continuing with the same example, this smaller gray circle is a vector object, so it can be converted to a frame.

All vector objects in PaintShop Pro are created as a group, with the object itself on a layer inside the group. Open the Ellipse group and choose the New Ellipse layer.
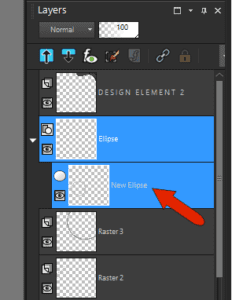
The next step is to activate the tool used to create this object, which was the Ellipse tool. Then right-click anywhere and choose Convert to Frame Object.
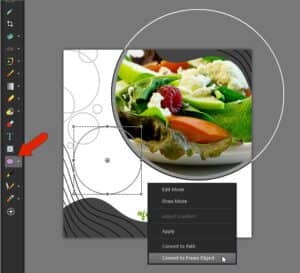
This converts the vector group into a frame group, and you can embed or drag in the image you want to fill the frame.
Note that the outlines around the frames will not print, and will not appear if you save the image to JPG, PNG, etc.
If you want to preserve this file with the frames intact so that they can be used for other photos, you need to preserve the layer structure. This means the file needs to be saved in .PSPIMAGE format.
Creating a frame with a Preset shape
With the enhancements to the Frame tool in PaintShop Pro 2023, you can now create frames based on Preset shapes, Symmetric shapes, and text (which we’ll explore a bit further on). Creating a frame based on a preset shape is the same process we used for the elliptical frame in the previous example.
In our next example, we’ll create a heart-shaped frame. Click the Frame tool, choose the Preset Shape option, and select the heart from the Shapes List dropdown.

In this example, we want a red outline around the frame, so we’ll set the Width to 30 and select a red swatch in Materials palette.
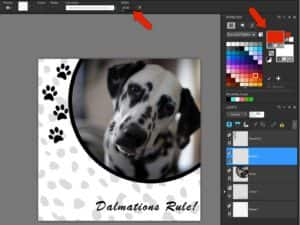
Click and drag to draw the heart.
TIP: Keeping the Shift key pressed as you draw the shape will maintain an even aspect ratio.

Then rotate, resize, and move the heart to where you want it, and drag in the photo for the frame.

If you already have a Preset or Symmetric shape in your layout, you can convert those shapes to a frame following the same steps we used to convert an ellipse shape to a frame:
- Open the Vector group layer and select the shape layer within.
- Activate the shape tool that was used to draw the shape (either Preset or Symmetrical).
- Right-click anywhere and select Convert to Frame Object.
Creating a frame from text
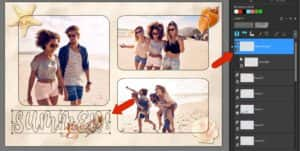
This beach collage contains three rectangular frames and some decorative elements, and we want to add a text frame as well.

For a text frame, activate the Frame tool and choose the Text option. Choose the font, size, and any formatting you want as well.
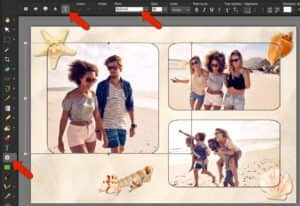
Click and type the text, then double-click to finish. In this example, the new text frame layer was moved above all other layers so that it appears on top.
Our text frame will be filled with a photo of the ocean, so we’ll choose File > Embed to add it to the frame. The image has water only in the bottom half, so drag the image upward so that only water appears in the text.

We want to rotate and reposition the text, so in the Layers palette we’ll select the entire frame group then rotate and place the entire text frame, and its image, as a single object.

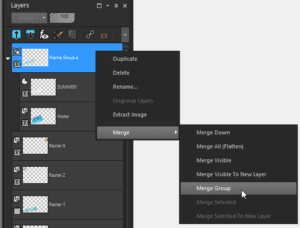
We want to add a drop shadow to create a 3D effect on the text frame, but first we need to merge the frame group into a single layer by right-clicking on the group in the Layers palette and selecting Merge > Merge Group.
Now we can apply Effects > 3D Effects > Drop Shadow.

Converting vector text into a frame
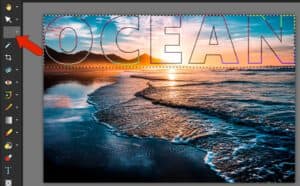
In this example we’re going to convert text into a frame and create an artistic image that combines the background photo and the text frame.

We have a background photo with the word “OCEAN” on a separate vector layer.

Converting vector text into a frame is done the same way as for vector shapes:
- Open the text layer group and select the text in the Layers palette.
- Activate the Text tool.
- Right-click and choose Convert Text to Frame Object.
Embed into the frame the same photo used for the background.
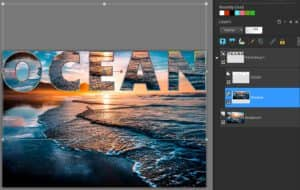
To align the framed image with the background, choose Objects > Align > Top.
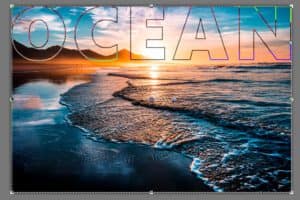
The next step is to remove the background around the letters. Activate the Selection tool and draw a selection around the text.
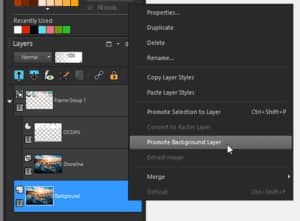
To complete the image, we need to remove the background around the letters inside the selection. However, you can’t remove the background from a Background layer, so in the Layers palette right-click on it and choose Promote Background Layer. This will convert it to a raster layer.
Now, with the selection marquee still active, we can press Delete and the selected part of the raster layer is removed, leaving just what’s inside the frame.

Using the Frame tool to create composite images
The Frame tool is not just for layouts, it can also be used in other creative ways. Here are some examples for creative inspiration!
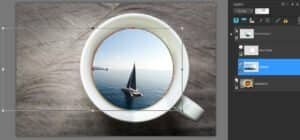
In this example, a circular frame was added to match the coffee in the cup. In this frame is a sailboat image.
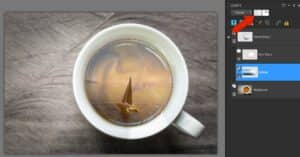
By reducing the opacity of the image layer, some of the coffee swirls from the background image show through the sailboat image.
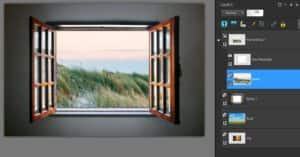
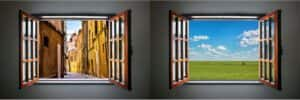
In this example, a rectangular frame was added to the window, and several landscape images were added as separate layers. Each image can be moved in and out of the frame layer group, to try out different window views.
And for our final example, a circular frame was added to one sunglasses lens, with the embedded image sized large enough to cover both lenses.

The entire frame group was copied and pasted to cover the other lens.

Double-clicking a frame group that’s already selected toggles the selection, so that only the image is selected. Now the image can be aligned to match the first frame.

Now that you’ve learned how to use the Frame tool and seen several project examples, what will you create with the Frame tool? Share your projects in our photo editing gallery!
Download your FREE 30-day trial and make every shot your best shot with PaintShop Pro, your all-in-one photo editing and design software.

Comments (2)
Reader Interactions
Comments
How do I add new picture frames to my programme?
Hi Len,
This tutorial will show you how to add picture frames in PaintShop Pro.
https://learn.corel.com/tutorials/paintshop-pro-adding-picture-frames/
If you have created your own frames and want to save them to the PaintShop Pro picture frame library, go to File > Export and select Picture Frame.
Hope this helps!
The Discovery Center team