In this tutorial, you’ll learn the basics of how to use the Clone Brush tool to cover parts of an image (target area) by copying colors or patterns from another part of the image (source area). We will show you how to clone using a source area that is part of the same layer, a source area from another layer, and a source area from another image.
Thanks for watching! You will find a written version of this tutorial below, and a printable PDF copy to download on the Download resources tab above.
Download your FREE 30-day trial and make every shot your best shot with PaintShop Pro, your all-in-one photo editing and design software.
Download these free resources:
Written tutorial (PDF, 809 KB)
Sample images (Zip file, 7.32 MB)
PaintShop Pro resources
Keyboard shortcuts (PDF, 173 KB)
PaintShop Pro User Guides
Partner and User websites
PaintShop Pro User Forum
Scrapbook Campus (Tips and tricks, workshops, master classes, and more)
Creation Cassel (Scripts, picture tubes, and other PaintShop Pro tools, plus weekly freebies)
PaintShop Pro Maniacs (Facebook group)
PaintShop Pro (Facebook group)
What’s new in PaintShop Pro
Cloning and blending
PaintShop Pro tools
Featured products
 PaintShop Pro 2023 Ultimate
 AI HDR Studio 3.0
 PaintShop Pro 2023
 Vision FX 2.0
Using the Clone Brush
In this tutorial, you’ll learn the basics of how to use the Clone Brush tool to cover parts of an image (target area) by copying colors or patterns from another part of the image (source area). We will show you how to clone using a source area that is part of the same layer, a source area from another layer, and a source area from another image.
Click on any of the images below to view full-size.
How to use the Clone Brush
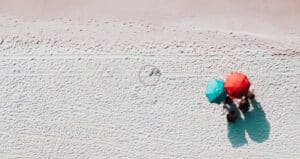
In this example, we will remove one of the umbrellas and people from the shot and just keep the pair of umbrellas on the right.
- Open your image in PaintShop Pro’s Edit workspace
- Activate the Clone Brush tool on the Tools toolbar on the left (or press C on your keyboard).
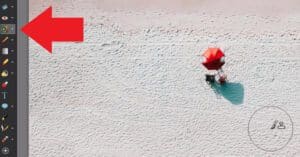
- Zoom in on the area you want to clone over (in this case the umbrellas) to be more precise with your cloning.
- Select a brush shape from the Tool Options palette.
- Adjust the size of your brush.

The Clone Brush tool allows us to paint over one area of an image (target) with another part of the image (source).
- To select a clone source, hover your mouse to where you want to start cloning from, then right-click. For this example, we chose a nice patch of sand that will work.
- A circle with an X will mark the clone source you’ve just chosen.
- Pan your mouse over to the target area (in this example, the second beach umbrella) and begin clicking the mouse to clone from the source area to the target area.
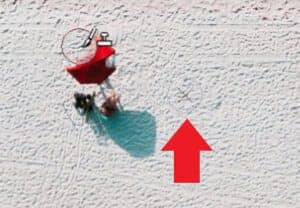
Alternatively, hold down your left mouse key and drag to cover up the area. The circle with the X will move as well and shows you what area you are cloning from as you go. Just keep in mind that if you make a mistake while dragging you may have to press Undo many times to correct it, whereas using single clicks makes it easier to undo and correct.
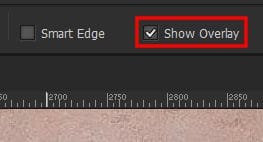
There will be a semi-transparent overlay of the source material in the circle as you hover over your target area. If you don’t want to use this overlay option, just click on Show Overlay at the top to disable it.
Change your clone source if necessary, to match areas like the tracks below so the image looks more authentic.
How to clone from one image to another
We can also use the Clone Brush tool to clone from one image to another.
- Open the images you want to work with. In this example, we’ll clone the abstract art from one image onto the sketchbook in another image.
- Right-click to select your clone source.
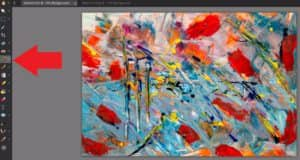
- Go to the other image and click or drag your mouse to clone the painting onto the sketchbook, changing your brush size if needed.

How to clone onto a new layer
Cloning onto a new layer preserves the original image as you clone so it is easier to make adjustments before merging both layers into one image.
In this example, we’ll use the Clone Brush to remove the people on the grass in a landscape image.
- Open the Layers palette by going to Palettes > Layers.
- Then click on Layers > New Raster Layer.
- Name the layer if you want and click Ok. In this example, we’ll name it “Grass Fix”.
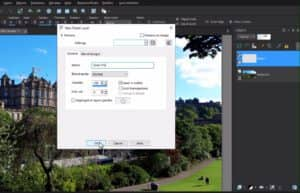
Zoom in on the image so it’s easier to clone.
- Activate the Clone Brush tool.
- In the Layers palette, click on the layer that contains your clone source, in this case the Background layer.
- Select a clone source from the background layer, in this case a patch of grass.
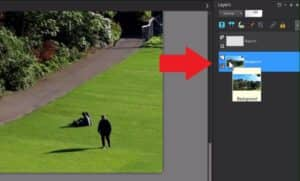
- Now click on the layer in the Layers palette that contains your clone target area (i.e. Grass Fix layer)
- Click or drag to clone over your target area (i.e. people on the grass).
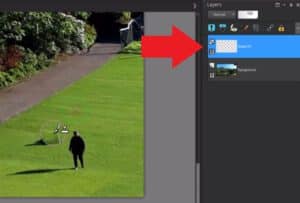
Use the Visibility (eye) icon to toggle off the clone source layer to see just the new cloned area you’ve created on the clone target layer.
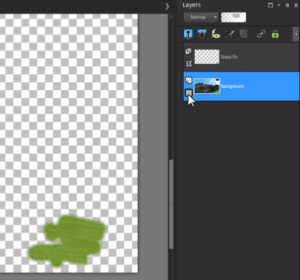
You’ll see that the grass cover-up has been created on its own layer which you can adjust or fix independently if you need to before saving the image to merge both layers together.
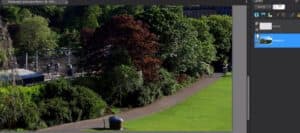
These are just a few of the basic ways you can use the Clone Brush to remove unwanted objects from your images or clone from one image to another.
Download your FREE 30-day trial and make every shot your best shot with PaintShop Pro, your all-in-one photo editing and design software.

