
Go crisp and clear with the new Focus Stacking feature in PaintShop Pro 2023 that allows you to blend multiple images of the same scene, taken at different focus distances, to create a final composite with a greater depth of field (DOF) than any of the individual source images.
Download your FREE 30-day trial and make every shot your best shot with PaintShop Pro, your all-in-one photo editing and design software.
Download these FREE resources:
Written tutorial (PDF, 1.5 MB)
PaintShop Pro resources
Keyboard shortcuts (PDF, 173 KB)
PaintShop Pro User Guides
Partner and User websites
PaintShop Pro User Forum
Scrapbook Campus (Tips and tricks, workshops, master classes, and more)
Creation Cassel (Scripts, picture tubes, and other PaintShop Pro tools, plus weekly freebies)
PaintShop Pro Maniacs (Facebook group)
PaintShop Pro (Facebook group)
What’s new in PaintShop Pro
Photo corrections and enhancements
Cloning and blending photos
Featured products
 PaintShop Pro 2023 Ultimate
 AI HDR Studio 3.0
 PaintShop Pro 2023
 Vision FX 2.0
How to use Focus Stacking
In this tutorial, we’ll learn about the new Focus Stacking feature introduced in Corel PaintShop Pro 2023.
This technique enables you to blend multiple images of the same scene, taken at different focus distances, to create a final composite with a greater depth of field than any of the individual source images.
Focus Stacking requires multiple shots of the same scene, taken at different focus distances. To take the photos you want to use, start with your camera on a tripod or a steady rest. Set your focus to manual, and while shooting the photos, adjust the focal ring to change aperture settings between shots.
For landscape photos we recommend at least three shots: with focus on foreground, mid-ground, and background.
For macro photos, like the ones we’ll be using in this example, you’ll want at least 8 shots and as many as 20, to capture all the tiny details.
In this tutorial, we’re working in the Edit space of the PaintShop Pro Complete workspace.
You can switch workspaces by clicking the Home icon to open the Welcome screen, and choosing Workspaces. In addition to the Complete workspace, Focus Stacking is also available in the Photography and Essentials workspaces.
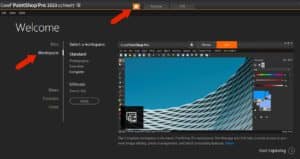
If you change your workspace, click Apply, then return to the Edit space.
With no images in the workspace, choose File > Focus Stacking. This opens a separate Focus Stacking interface window, with a Getting Started window that explains the process, and a Learn More button that opens the Help article.
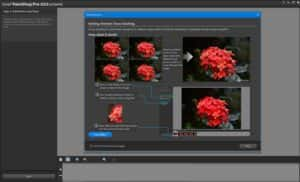
This window will appear each time you start Focus Stacking, until you click the box for Don’t show this window again. Click Close.
Step 1: Add photos and stack
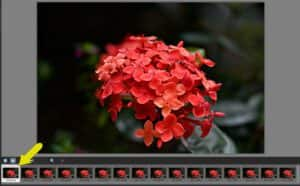
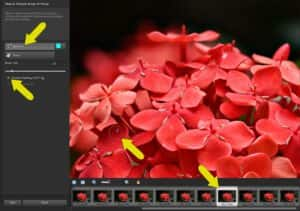
If you have default images loaded in the tray, remove them by clicking the Remove Photos icon. Then click Add Photos and browse to the folder that contains the stacking images. After bringing them all in, image thumbnails appear in the tray.
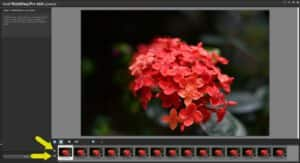
As I click through the images, note how the focus moves from the center of the group of flowers, to the middle, then the back.
To proceed to the next step, click Stack.
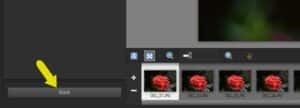
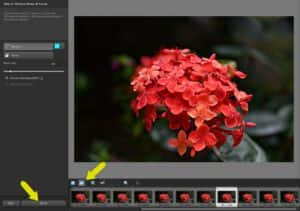
After a bit of processing time, you’ll have a new image in the tray called Stacked, which is a composite image that combines the different focus areas from each of the source photos.
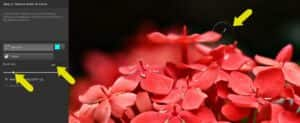
Step 2: Choose areas of focus
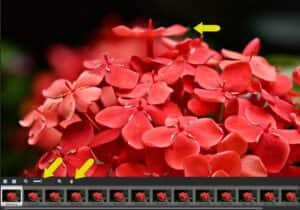
We’re now in Step 2, where you can choose areas of focus if you want to make any edits. The image looks nearly perfect, but there are a couple of areas that could be fixed.
First, let’s focus on this small light spot at the edge of the top flower. To find the spot, increase the zoom, then use the Pan tool to bring the spot into the workspace. Here we have a few light pixels where there should be dark background.
The image we’ll use as the source to paint over this spot is the last one in the tray. Select this image, which has the top flower in focus but without that light spot. Then click Brush In. This automatically turns on Preview Stacking.
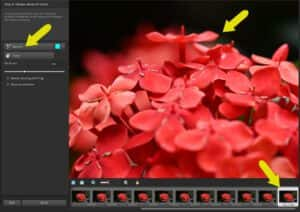
You can adjust the brush size with the slider, by entering a value, or by dragging the cursor up or down while holding the Alt key. Moving the cursor over the spot in question shows how the replaced pixels will look, and clicking and dragging brushes in the repair.
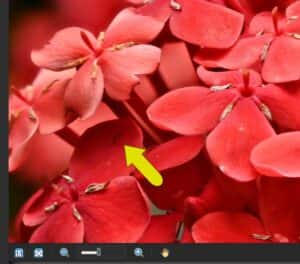
The other part of the image to fix is this little brown spot on the red petal.
To find the photo to select for this fix, first turn off Preview Stacking, so that you can view the images from the tray. This automatically turns on Show brushstrokes, which shows, in the brush color, the area that you brushed in for the previous repair.
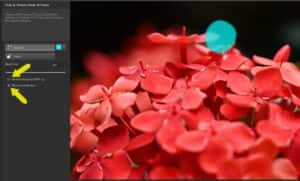
If you want to remove any of the brushstrokes previously added, you can erase them. For example, we don’t need this entire area brushed in around the light spot, so we can click on Eraser and remove all but the small area you wanted to fix.
Back to the brown spot, the image that we’ll use for the fix is one of the images toward the end, where the outer flowers are in focus. We can see that image 12 doesn’t have the blemish, we we’ll turn Preview Stacking back on, click Brush In, and brush over the spot.
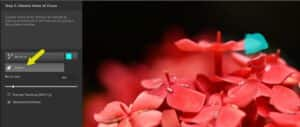
Now click Fit to Window to see the entire image, which looks great! Click Blend to complete the composite.
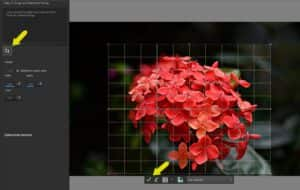
Step 3: Crop and remove noise
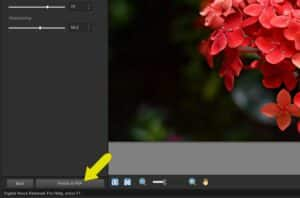
With Crop you can adjust the image size, by entering a custom width and height or by dragging edges, either with or without Maintain aspect ratio checked. Options you may recognize from PaintShop Pro’s Crop tool appear here as well, such as changing proportion, and displaying Golden Ratio, Triangle, Grid, etc. Click Apply to complete the crop.
Digital Noise Removal is optional – you don’t need make changes if you’re happy with your photo as is.
These are the options you can set:
- Detail ranges from 0 for no noise reduction, to 100 which is full processing of the entire image.
- Correction Blend controls the degree to which the corrected image will be blended in with the original. The default value is 70.
- Sharpening controls what sharpening, if any, is applied to the image after the noise reduction is applied.
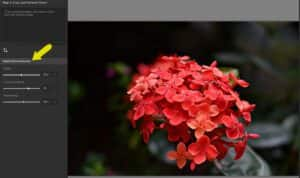
After any value change, the preview updates after a few seconds of processing. When you have the results you want, click Finish in PSP.
This opens the stacked image back in your PaintShop Pro Edit space, where you can continue working with any other image editing tools.
With Focus Stacking, it only takes a few clicks to blend a series of images with different areas of focus to produce a final composite that has a greater depth of field than any of the source images.
Download your FREE 30-day trial and make every shot your best shot with PaintShop Pro, your all-in-one photo editing and design software.
