
Sometimes the green screen footage you are working with doesn’t have that perfectly even shade of bright green. If the footage was shot at home or in a poorly lit area there may be shadows or darker areas that make the editing process a challenge. In this tutorial you’ll learn about fixing imperfect green screen footage using the NewBlue Chroma Key filter in Pinnacle Studio. Simply drop the filter onto your footage then adjust the Sensitivity level and other settings to get perfect green screen results every time.
Thanks for watching! We hope you found this tutorial helpful and we would love to hear your feedback in the Comments section at the bottom of the page. You will find a written version of this tutorial below, and a printable PDF copy to download on the Download Resources tab above.
Download a FREE 15-day trial and discover all the essential and advanced video editing features that Pinnacle Studio delivers to make your videos look their best.
Download these free resources:
Written Tutorial (PDF, 477 KB)
Pinnacle Studio User Guide and Help Files
Studio Backlot
Pinnacle learning center
YouTube
What’s New in Pinnacle Studio
Color Effects and Corrections
Featured products
 Pinnacle Studio 26 Ultimate
 Studio Backlot Membership
 Pinnacle Studio 26
 Vision FX 2.0
How to Improve the Quality of Green Screen Footage
With Pinnacle Studio, you can use the chroma key tool with green screen footage to create special effects. In this tutorial, you will learn about fixing imperfect green screen footage that may contains shadows or isn’t properly lit, by using one of the NewBlue Chroma Key filters.
The best type of green screen footage to work with will be very well lit and a shade of bright green. But if you have taken the footage at home or in a poorly lit area, the shade of green will be darker and may have some shadows, making it difficult to edit.
We can fix imperfect green screen footage using the NewBlue Chroma Key filter.
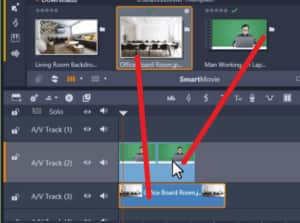
- Drag the green screen footage you want to use onto A/V Track 2.
- Drag the video or image you want to use as a background onto A/V Track 3.
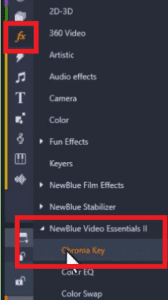
- Click on the FX tab and select the arrow on the left of NewBlue Video Essentials II.
- Then click Chroma Key.
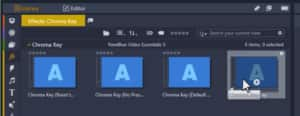
This will bring up four different Chroma Key filters we can use depending on the type of footage we’re working with. You can select Chroma Key (No Preset) to customize the options yourself or Chroma Key (Default – Blue) if you’re working with blue screen footage.
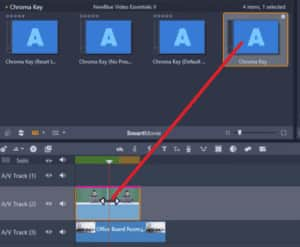
- Select Chroma Key and drag the filter overtop of your green screen footage on A/V Track 2.
- Double click on the green screen footage to bring up the Editor.
- Scroll down under the Chroma Key tab and click on Show Mask.
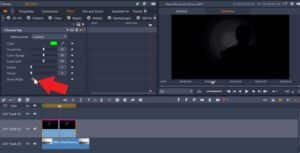
You want to see a crisp black subject against a white background.
Depending on the green screen footage you’re working with, you’ll either need to increase or decrease the Sensitivity level to create this contrast.
- Increase or decrease the sensitivity until your subject is black and the background is completely white.
- Note: I have increased the sensitivity to 75, which is the perfect level for my green screen footage.

- Deselect Show Mask and you can see that the subject is perfectly visible against your image or video background.

- Increase the Erase Spill level to clean up any slight green screen border around the subject.
- You can also adjust the Softness level so it is less sharp around the borders.
- Now you can preview your video and it’s ready to export!

Download a FREE 15-day trial and discover all the essential and advanced video editing features that Pinnacle Studio delivers to make your videos look their best.

Comments (1)
Reader Interactions
Comments
VERY UNFORTUNATELY this does NOT come with ULTIMATE. Costs $ 80 MORE! In fact there are several items in these videos I have found out do not come with “Ultimate”, that cost $80, $100, even $300 MORE.
These videos make it look like these are PART of the program, as it IS called “Ultimate”. Nothing could be farther from the truth. If you need this improved green screen/chroma key effect, be prepared to shell out another $80. It would have taken only a second to add the words ‘optional’ NewBlue effect or similar.
So, yeah, I’m kinda’ pi$$ed.