This tutorial will show you how to synchronize your video to a beat of a music track. This is a great way to highlight key moments in your clips and add some extra impact. You can also use the beat sync technique to mark the transition between still images for a more polished and professional-looking video.
Thanks for watching! We hope you found this tutorial helpful and we would love to hear your feedback in the Comments section at the bottom of the page. You will find a written version of this tutorial below, and a printable PDF copy to download on the Download resources tab above.
Download these free resources:
Written Tutorial (PDF, 267 KB)
Download a FREE 15-day trial and discover all the essential and advanced video editing features that Pinnacle Studio delivers to make your videos look their best.
What’s new in Pinnacle Studio
Speed and motion
Audio and music
Featured products
 Pinnacle Studio 26 Ultimate
 Studio Backlot Membership
 Pinnacle Studio 26
 Vision FX
Synchronize your video to a beat
In this tutorial, you’ll learn how to synchronize your images and videos to the beat of a song to make your final video or project more exciting and impactful.
Click on any of the images below to view full-size.
How to add markers
Open Pinnacle Studio and add the music track you want to work with to A/V Track 2. Before adding any images or videos, you need to add markers across the timeline to mark where the beat drops in the audio track.
- Drag the playhead to where you want to place a marker and then click on the Marker icon to mark the beat.
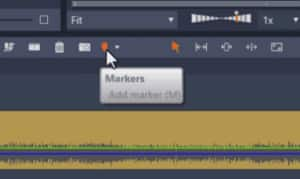
- Alternatively, press the space bar on your keyboard to start playing the music and as the music is playing, press the M key on your keyboard to mark where the beat drops.
As you add markers, orange icons will pop up to indicate the markers.
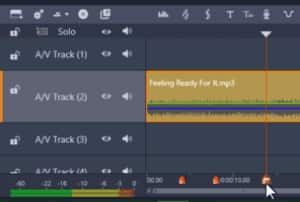
- To move the marker to a different position, click on the marker and drag it forward or backwards on the timeline to adjust its position.
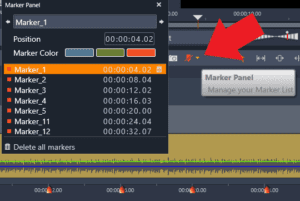
- Click on the Marker Panel to make further adjustments to your markers such as deleting any of the ones created or even change the marker color.
How to sync photos to the beat
Once you’ve set all your markers, you’re ready to add media to the timeline. We’ll start with a collection of photos, and synchronize the beat at the moment between 2 photos.
- Make sure you are in the correct editing mode by going to the right of the screen and selecting Insert Mode which is this arrow icon pointing to the right.
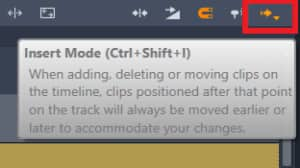
Insert Mode allows you to make changes to one clip and will make changes to the clips that follow that clip automatically. This is important especially when syncing video clips to a beat.
- Go to your project bin and hold down CTRL on your keyboard and click all the photos you want to use. Then drag them onto A/V Track 1.
- From here, click on each photo individually and hover your mouse on the edge of the photo to extend or shorten its length so that the photo ends where the markers are set.
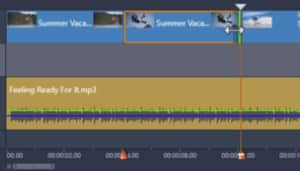
This means that the photo will change at the exact moment the beat drops so our clips will sync nicely alongside our music track.
How to sync videos to the beat
- Add your video clips to A/V Track 1 on the timeline.
In this example, the video clip is of two girls diving into a lake.
- Drag the playhead to the point on the video clip where you want to drop the beat. In this example, I want to drop the beat right when the girls splash in the water.
- Click on the Split Clips icon or press N on your keyboard to split the video clip into two different sections.
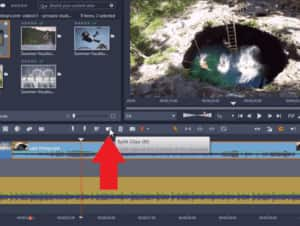
- Hover your mouse over the beginning edge of the video clip.
Since you’re in Insert Mode, when you click and drag the clip to the right, you’ll see the clip is being automatically shortened.
- Do this until the end of the video clip you split lines up to the marker on the timeline.
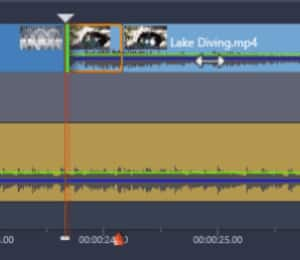
Now if you play our video from the start, you’ll see you have a great video showing off all the highlights of a summer vacation that syncs along with the music of your choice!
Download a FREE 15-day trial and discover all the essential and advanced video editing features that Pinnacle Studio delivers to make your videos look their best.


Reader Interactions