In this tutorial, you’ll learn how to set up and create a time-lapse video using Pinnacle Studio. This tutorial will provide you with the basics of time-lapse photography and show you how to convert a series of photos into a time-lapse video. You’ll also learn how to use the Auto Capture feature to automatically capture photos at the intervals of your choice once you set up your camera within Pinnacle Studio.
Thanks for watching! You will find a written version of this tutorial below, and a printable PDF copy to download on the Download resources tab above.
Download a FREE 15-day trial and discover all the essential and advanced video editing features that Pinnacle Studio delivers to make your videos look their best.
Download these free resources:
Written Tutorial (PDF, 455 KB)
Pinnacle Studio User Guide and Help Files
Studio Backlot
Pinnacle learning center
YouTube
What’s new in Pinnacle Studio
Speed and motion
Advanced video editing projects
Featured products
 Pinnacle Studio 26 Ultimate
 Studio Backlot Membership
 Pinnacle Studio 26
 Vision FX 2.0
Creating a time-lapse video
In this tutorial, you’ll learn how to set up and create a time-lapse video using Pinnacle Studio. This tutorial will provide you with the basics of time-lapse photography and show you how to convert a series of photos into a time-lapse video.
You’ll also learn how to use the Auto Capture feature to automatically capture photos at the intervals of your choice once you set up your camera within Pinnacle Studio.
Click on any of the images below to view full-size.
How to use Auto Capture
If you don’t already have the photos for your time-lapse, you can use the Auto Capture feature. Open Pinnacle Studio and click on the Import then click on the Stop Motion tab.

Connect your camera to your computer and select it from the dropdown menu above the preview pane. You’ll see a live preview of what the camera is capturing in the preview pane.
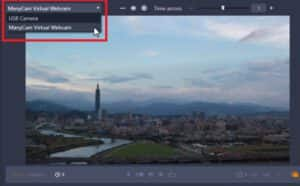
On the left, set up your Project Settings to save your captured photos.
- Change your Project Nameand select a folder where you want to save your captured photos.
- Click on the Auto Capture icon to turn it on then click on the arrow on the right of the icon to adjust the settings.
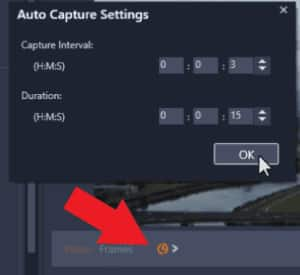
Before you begin capturing, determine how long you want your time-lapse to be, so you know how many photos you’ll need to capture.
For example, if you want 25 seconds of sunset footage and you’re shooting at 30 frames per second, you’ll need 750 photos or frames to be captured because 25 seconds X 30 frames each second = 750 photos.
If I was recording this sunset over a span of three hours, I’d divide the total recording time in seconds by the number of photos (750) which means the capture interval would be every 14.4 seconds.
- Adjust the Capture Interval which sets the time interval between image captures and set the Duration which is the length of time you want Auto Capture to run for.
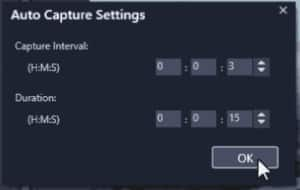
Then click OK. Press Capture Frame to start the Auto Capture.
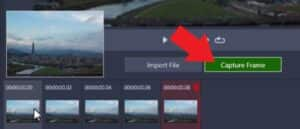
You can preview the captured images by hovering on the thumbnails at the bottom.
Once you’re finished capturing all the images, click Import to Library to import the images the folder location you’ve selected.
Importing images into Pinnacle Studio
With Pinnacle Studio opened, click on the Edit tab.
- Click on the Project Bin icon, then New Project Bin and name your new bin.
- Click on Quick Import and hold down CTRL on your keyboard and press A to select all the images in the folder.
- Click Open.
Now the images will take some time to import into the project bin.
Creating a time-lapse
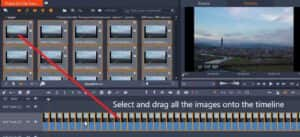
Highlight all the images in the project bin again by holding down the CTRL key on your keyboard and pressing A. Then drag the images onto A/V Track 2 on the timeline.
This will create quite a long video since these photos will have an automatic duration length that is based on your default settings.
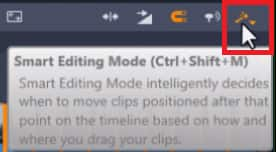
Before we adjust the duration of the photos, make sure you’re in Smart Editing mode so that you won’t need to close all the gaps after adjusting the photo duration.
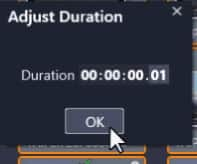
With all the photos on the timeline still selected, right-click on one of the photos and click Adjust Duration and change the duration to 1 single frame. Click OK and give this some time to finish rendering.
Cropping the images
One thing you’ll notice is that these images have a black border on either side which you will likely want to remove for the final output video.
- Zoom up with the ruler zooming to see the images individually on the timeline.
- Right-click on the first image and click on Open Effects Editor.
- Click on Crop.
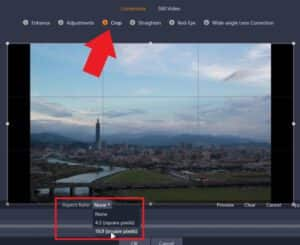
- Change the Aspect Ratioto 16:9.
- Drag on the edges of the box and reposition it so that you no longer see the black borders.
- Click Apply, and then OK.
A green bar will be visible above the clip on the timeline which means an effect has been added to the image.
To copy this effect to all the images on the timeline, hover the cursor over the green bar until the fx symbol pops up.
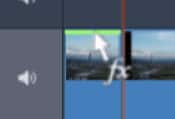
- Right-click and select Corrections.
- Then click Copy All.

- Highlight all the image clips on the timeline and right-click on one of them.
- Then click Paste.

A dialogue box will pop up asking if you want to apply the copied attributes to all the clips. Click OK.
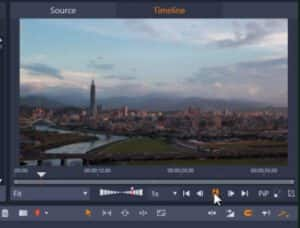
Now you can preview your video and you’ll see that you have a really cool time-lapse video of the city from day to night that you’re ready to export and share!
Download a FREE 15-day trial and discover all the essential and advanced video editing features that Pinnacle Studio delivers to make your videos look their best.

