With the Publish to WordPress feature introduced in CorelDRAW 2018, you can quickly and easily upload your graphics and images directly to your WordPress site. This feature includes multiple image formats (JPEG, GIF, PNG) that can previewed and adjusted simultaneously from the export preview windows within the Export to WordPress dialog box. This tutorial will show you how to work with settings and options of the Export to WordPress feature, as well as uploading and adding content to a WordPress site.
Thanks for watching! We hope you found this tutorial helpful and we would love to hear your feedback in the Comments section at the bottom of the page. You will find a written version of this tutorial below, and a printable PDF copy to download on the Download Resources tab above.
Start your FREE 15-day trial and embark on a design journey with powerful tools for vector illustration, layout, photo editing, typography, and collaboration.
Download these free resources:
Written Tutorial and Sample File (Zip, 2 MB)
CorelDRAW Graphics Suite resources
Quick Start Guide (PDF, 2 MB)
Keyboard Shortcuts (PDF, 3.5 MB)
CorelDRAW and Corel PHOTO-PAINT user guides
For CorelDRAW Graphics Suite subscription and perpetual licenses (2018 to 2024), languages include English, Português do brasil, 简体中文, 繁體中文, Čeština, Deutsch, Español, Français, Italiano, 日本語, Polski, Русский
CorelDRAW Community
CorelDRAW learning center
Facebook
X (formerly Twitter)
YouTube
What’s New in CorelDRAW Graphics Suite
 CorelDRAW Graphics Suite
 Ultimate Vector Bundle Vol. 1
 CorelDRAW Standard 2021
 Ultimate Vector Bundle Vol. 2
 Corel Vector
How to Publish to WordPress from CorelDRAW
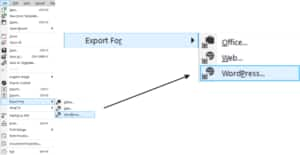
In this tutorial we’re going to look at a new feature in CorelDRAW 2018. This is a feature that will be especially useful to those of you with WordPress web sites. This new feature you will find up here in the menu. Go to File > Export For and you will now see WordPress.
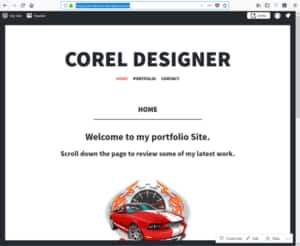
Here I have a demonstrative WordPress website I’ve set up for this tutorial as a portfolio site. What I would like to do is add my Blue Studios logo to the portfolio preview on the homepage of my WordPress website. To do that, I’ll go back to CorelDRAW.
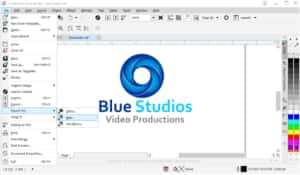
With my logo set up on my page, I’ll go to File > Export For > WordPress and I will click on that.
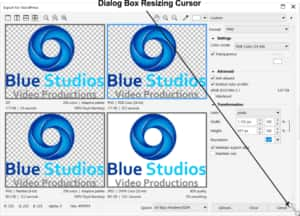
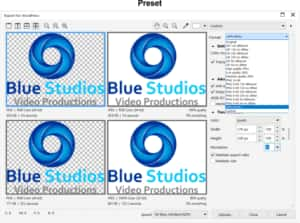
The Export for WordPress dialog box will pop up within CorelDRAW. I have some options for my preview modes. I have a full preview mode. I have a two vertical previews mode. I have a two horizontal previews mode and I have a four previews mode. There are also zoom and size mode I can preview as zoom to fit, one-to-one pixel or as zoom to actual size.
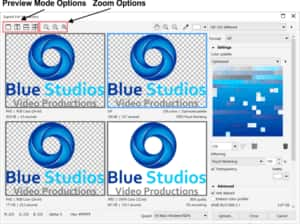
I can also click on the Title bar, hold down and move this dialog box. If you go the right corner you will see the cursor change. Left click and hold down if you want to resize the dialog box.
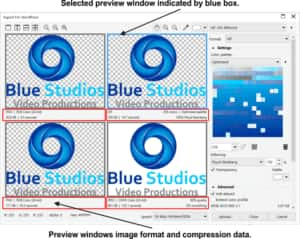
I will set my preview to zoom to fit. Here I have four different preview windows in the dialog box and I can select anyone of these with a left click. The preview window with the blue box around it is the preview window that is selected. The selected preview window is set to a GIF format based on a palleted image. A Palleted image is an image that is based on the number of colors used to reproduce the image. From the Export to WordPress dialog box I can preview different types of image format for exporting my graphics or images to my WordPress web site. In the upper left preview window I have a PNG image that’s set to RGB 24-bit. That will be a large file. 171KB and 25.2 seconds to load. Whereas my GIF is much smaller, actually about 10% of the PNG Image. But that’s because a GIF works with a limited number of colors, whereas an RGB image could have millions of colors.
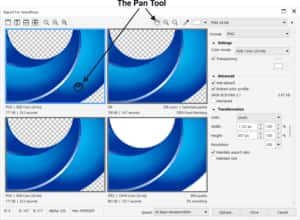
With the Pan tool I can also move my center mouse wheel forward and zoom in. I can also left click, hold down, and pan around in my images to preview and compare the different formats and settings I have for my export to my WordPress website image. I can also, with my center mouse wheel, pull back to zoom out.
I will click Zoom to Fit to get a better preview. As you can see I will have a very good preview of four different image formats and settings or exporting or publishing my graphics or content to my WordPress web site. So, from these preview windows, I can preview different formats for exporting and publishing my graphics and content to my WordPress website. In the top left window is a PNG-RGB. In upper right preview window is a GIF format. In the lower left I have a PNG image that’s based on Paletted 8-Bit. The size is 90.2 KB 13.2 seconds load time. In the lower right is a JPG image. This JPG image is set to CMYK. CMYK really is not ideal for exporting to the web for a WordPress website.
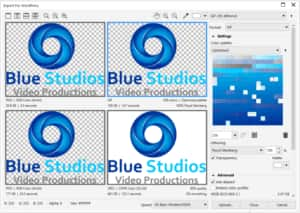
I’ll select this with a left click. I can go to the color mode and change that to RGB. And we’ll see that change and we’ll see also that we get a smaller image size and a faster loading time.
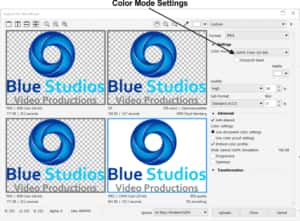
We will see the color mode change to RGB and we’ll see also that we get a smaller image size and a faster loading time.
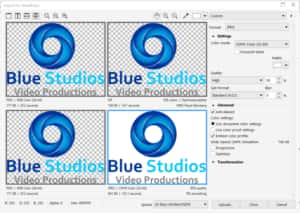
By selecting our preview windows, we can change image formats and preview images based on different presets. For example, with this GIF selected, as indicated by the blue box around it, I can change that to a High Quality JPG. And here I would have a preview of a High Quality JPG in that preview window.
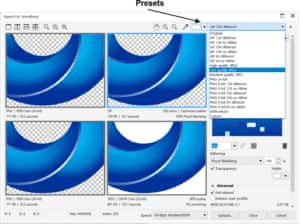
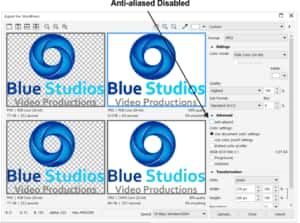
Now that I’ve changed the image preview to JPG format, I can review the options in this preset and change them. I can go from High Quality to Highest and preview that. I can take a look at disabling Anti-Aliasing and we can see that image does not look as good as it does when it is anti-aliased. We can see that having these preview windows, the presets and all of these different options available to us, give us the ability to look at different image formats and different settings to give us the best possible export and publishing of our content directly to our WordPress website from within CorelDRAW 2018.
Looking at all these images previews and understanding that I’m going to upload an image for my portfolio, I would really prefer a very clean image, and very good retention of the color in the image. In other words, no changing or shifting of the color. GIF and JPG will change and shift your colors around because they are compressing the image files. For example, GIF which will export your image with a limited number of colors. Such as 256 colors as opposed to RGB which could potentially be millions of colors. So, exporting with PNG, I am going to get the cleanest image, but it will be a bit larger in file size. If I we’re working with images that I feel aren’t that important that they be very clean and they are really do not need to be portfolio image quality, I might want to go with a GIF or a JPG. GIF and PNG are the only two file formats that will support transparency. JPG will not support transparency.
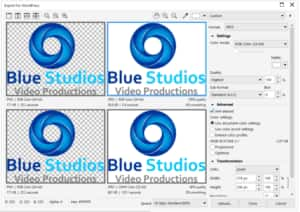
So now I have gone through these different previews, I’m going to go with the PNG. Now up here I have my presets and you can see these and you can come down and this will just set this to the original PNG 24-Bit. Over here we have presets again and here we can load a preset, save a preset or delete a preset.
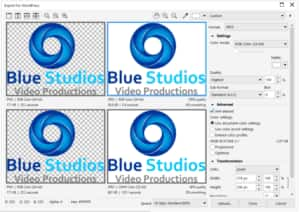
I’m going to go with this PNG because that’s selected so that’s the file that will be exported and published to my WordPress website. I’m going to go with a transparency so that the color in the background of my theme will show through the transparency in my PNG image. I’ll stay with anti-aliasing and I will also leave my color profile embedded.
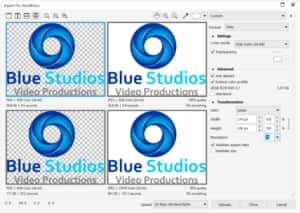
I will go down to Transformation and click to expand this section. The Units are set to pixels by default. You can change that but when you are working with web graphics, pixels is your best option. Here we have the width and height of our graphic. You can change that by changing the pixels or the percentages. There is also resolution. I’m going to set this to 72 dpi. That is the correct resolution for web graphics. For my portfolio I’ve decided to go with the PNG format, holding my transparency. I’ve got anti-aliasing enabled. I’ve got embed color profile enabled and I’ve set the resolution to 72 DPI.
Once I’ve set up my export options up for the PNG format of image for my export and publishing my graphics to my website portfolio, I will go up to presets and I’ll click on Save Preset. That will open the presets window folder and I’ll just type in “WPPortfolio” next to File name and I’ll save that as a preset.
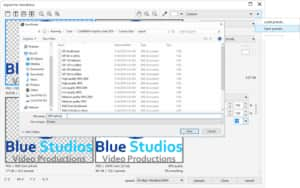
Now the PNG format and setting will be saved as a preset and it will be available in my preset scroll down, down here at the bottom. Now whenever I want to export graphics for my portfolio, I can just select this preset and my image format and options will automatically be loaded into the Export For WordPress dialog box for me, so I can very simply just click on Upload.
Once everything is set up, I can simply click on Upload. I’m going to get the Upload to WordPress dialog box. I need to Authenticate my WordPress account.
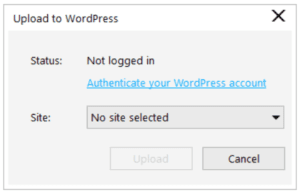
I’ll click on that and I’ll get to my login screen.
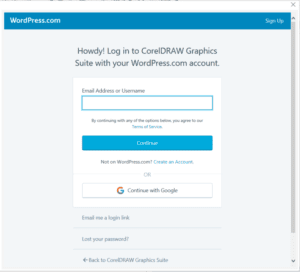
I’ll enter my username and click on Continue; enter my password and click on Log In; and click Approve. Now I can see my Corel Designer site in the dialog box and I’ll click on Upload.
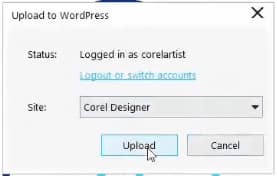
Once that’s completed, I’ll go back to my WordPress website and select My Site > Site Pages.
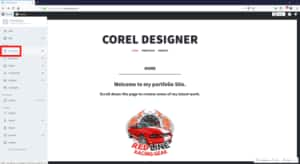
I’ll select my Home Page. From my home page I’m going to the end of text line below the header text and put my text cursor at the end of sentence. Then I will hit Enter one time. That way my image will be below this text. Now I click on Add > Media to insert my new image.

Here I can see my Blue Studios logo. I’ll select that and click the Insert button.

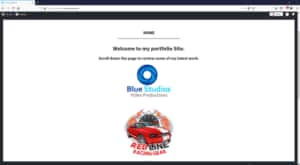
The image has now been added to my page and I can align it in the center. Then I will click on Update to update my web page. Now when I view my web page you can see that I’ve added this logo to the portfolio preview on the homepage of my WordPress website. I’ve done this very quickly and very easily working directly in CorelDRAW 2018 to publish graphics and content directly to my WordPress website.
Start your FREE 15-day trial and embark on a design journey with powerful tools for vector illustration, layout, photo editing, typography, and collaboration.

