An animated travel line can add some extra creativity to your vacation video projects, and in this tutorial we’ll show you how to create this simple effect. First you will learn how to use PaintShop Pro to draw your travel line on a map image. Next you will learn how to use Pinnacle Studio’s 2D Editor and keyframes to create the effect of the line travelling across the screen.
If you don’t have PaintShop Pro or other image editing software, you can download a free 30-day trial.
Thanks for watching! We hope you found this tutorial helpful and we would love to hear your feedback in the Comments section at the bottom of the page. You will find a written version of this tutorial below, and a printable PDF copy to download on the Download Resources tab above.
Download these free resources:
Written Tutorial (Zip, 1 MB)
Pinnacle Studio User Guide and Help Files
Studio Backlot
Pinnacle learning center
YouTube
Download a FREE 15-day trial and discover all the essential and advanced video editing features that Pinnacle Studio delivers to make your videos look their best.
What’s New in Pinnacle Studio
Advanced Video Editing Projects
Featured products
 Pinnacle Studio 26 Ultimate
 Studio Backlot Membership
 Pinnacle Studio 26
 Vision FX 2.0
How to Make an Animated Travel Line on a Map
Here is a great technique to add a cool effect to your vacation video projects. In this tutorial, I will show you how to draw your travel route on a map and add an effect so that it looks like the line is being drawn across the screen. First you will learn how to use a photo editing product like PaintShop Pro to draw a line on a map designating a travel route. Then I’ll bring the map into Pinnacle to create the effect. I’ll discuss how to use two identical maps and layer them in the timeline. Once that is done, you’ll learn how to use 2D Editor Advanced and keyframes to crop the top layer of maps in order to create movement as if a line is being drawn on the video screen. This is a simple cool effect that can add a lot to your vacation, trip, and holiday videos.
Click on any of the images below to view full-size.
Preparing Your Images in PaintShop Pro
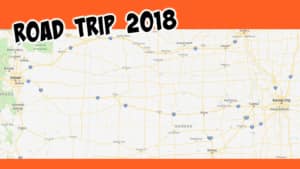
Start off with the map or title image you want to add a line to. If you don’t have a map image, you can use the sample image provided in the tutorial download file above. You are going to need two copies of this image – the original, plus a second version with the travel line drawn on it.
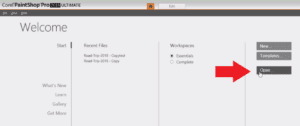
For this first step you will need to use photo editing software like PaintShop Pro. If you don’t have image editing software, you can download a free 30-day trial of PaintShop Pro. You can also use Paint or another image editor of your choice.
- Open PaintShop Pro
- Click Open and locate your original image saved on your computer.
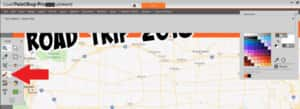
- Activate the Paint Brush tool on the left toolbar.
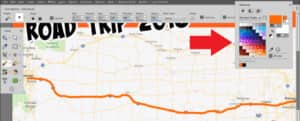
- Under the Tool Options, adjust the size of your paint brush.

- Select the color you want for your travel line from the Palette on the right.
- Draw the line across the map from destination to destination.
- Once finished, click on File and make sure to click Save As to save as a new image since you’ll still need your original image file to create the animation.
Animating the Travel Line
- Open Pinnacle Studio and click on the Edit tab.

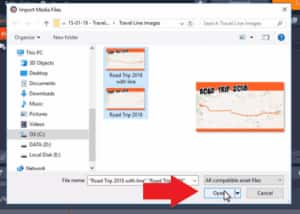
- Click on Quick Import and locate your original map image and the image with the line added.
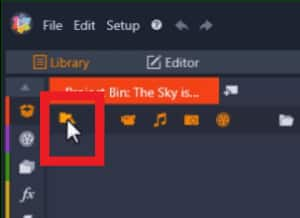
- Select both of these images and click on Open to add them to your project bin.
- Add the original image without the drawn-on line and drag it onto A/V Track 2.
- By default, the image duration is only 3 seconds, so extend that by clicking on the image on the timeline, and dragging it to your desired length (10 seconds in this example)
- Add your map with the line to A/V Track 1.
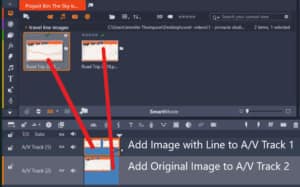
- Again, adjust the duration of the clip so it matches the length of the clip on A/V Track 2.
- Double-click on the clip on A/V Track 1 to open up the Effects Editor.
- Click on the Effect tab, and then select 2D/3D.
- Select the 2D Editor Advanced option.
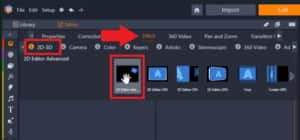
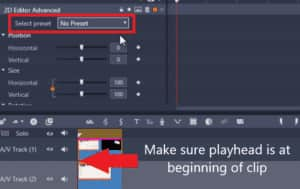
Note: Make sure that your playhead is at the beginning of your clip so that you’ll add the effect correctly.
- Under the effect tab, go to Select Preset and make sure that No Preset is selected.
- Scroll down until you reach the Cropping section.
Here you’re basically going to crop the top image in the direction that follows your line and what that does, is it will make it seem as though the line is being followed across the screen.
Because my line is going from left to right, I want to crop the image from the right.
- Adjust the bar from the Right and note that the line is disappearing in the preview pane as you continue scrolling the bar.
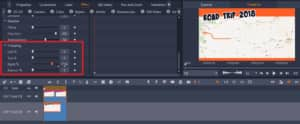
- Then stop the bar once you see the line has disappeared.
- Scroll back up to the top of the Effects editor, and click on the diamond icon to enable keyframing.

- A keyframe has been added to the beginning of the image.
- Drag the playhead to the point on the clip where you want the line to be finished. This will also change the speed of the “animation” as the cropping will go quicker if you end it earlier.
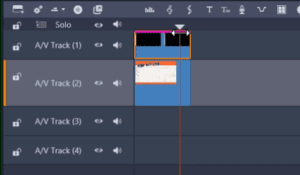
- Go back to the Cropping section and adjust the crop back down to 0%.
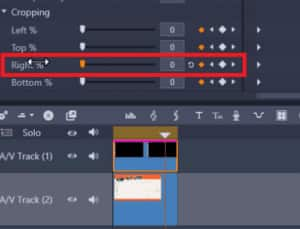
If you preview your video, the timed cropping of the top layer revealing the original map makes it look as though the travel line is being drawn across the map!
This is a simple and great effect you can use as an intro to your holiday and vacation videos to show off your destination!
Download a FREE 15-day trial and discover all the essential and advanced video editing features that Pinnacle Studio delivers to make your videos look their best.


Comments (1)
Reader Interactions
Comments
Love Pinnacle 26, already noticed much better performance, more stable, and easier to use key frames.
This tutorial is very nice, but couldn’t you do the same thing with a simple wipe right transition a lot quicker with no keyframes? Did something similar recently on a video revealing a new bike path. Just place both images on the same AV track, drop in a wipe right transition, and adjust the speed, duration.