
In this tutorial, we will show you how easy it is to create an eye-catching cinemagraph in Pinnacle Studio. Cinemagraphs combine a snapshot and a video clip to produce an image with subtle animation in one element or area. Learn how to take a snapshot of a video clip and then use masking tools to block out all areas of the snapshot except the part that you want to remain animated. The result is a striking image with subtle motion that will grab viewers’ attention on your website or social media channels.
Thanks for watching! We hope you found this tutorial helpful and we would love to hear your feedback in the Comments section at the bottom of the page. You will find a written version of this tutorial below, and a printable PDF copy to download on the Download Resources tab above.
Download these free resources:
Written tutorial (PDF, 835 KB)
Sample video clip (MP4, 23 MB)
Pinnacle Studio User Guide and Help Files
Studio Backlot
Pinnacle learning center
YouTube
Download a FREE 15-day trial and discover all the essential and advanced video editing features that Pinnacle Studio delivers to make your videos look their best.
What’s New in Pinnacle Studio 25
Advanced Video Editing Projects
Featured products
 Pinnacle Studio 26 Ultimate
 Studio Backlot Membership
 Pinnacle Studio 26
 Vision FX 2.0
How to Make a Cinemagraph
In this tutorial, you’ll learn how to create an eye-catching cinemagraph using video footage you’ve taken.
Click on any of the images below to view full-size.
A cinemagraph is created by combining a video clip with a still image to create a unique animated photo.
- Open Pinnacle Studio under the Edit
- Import your video into a Project Bin.
- Drag the video clip from your Project Bin onto A/V Track 2.
NOTE: It’s important to choose a video clip that you’ve shot using a tripod in order to get the best results.
In this project, we’ll use a video of a waterfall flowing into a lake and make the waterfall stationary as it streams down but still have movement in the lake at the bottom.
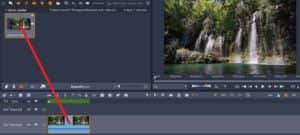
- Drag the playhead to the point on the clip where you want to take a snapshot.
- Click on the Snapshot (camera) icon to take the snapshot.
The snapshot of this still image is now saved in our Project Bin.
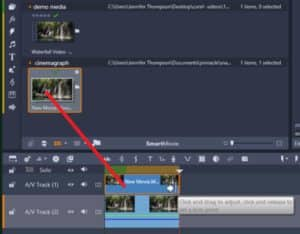
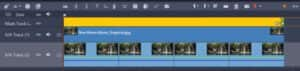
- Drag the snapshot onto A/V Track 1 on the timeline.
- Go to the edge of the snapshot with your mouse until the arrow pops up and click and drag to the right to resize the snapshot until it matches the length of the video clip.
How to Create a Mask
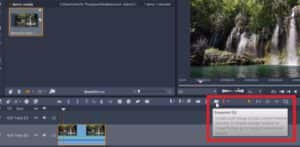
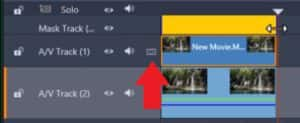
- Click on the Insert Mask Track icon on A/V Track 1 where you have your snapshot.
- Hold down the CTRL key on your keyboard and click and drag your mouse to create a mask track to match the length of the snapshot and video clip.
The Mask Editor will pop up. Click on the Create Shape button.
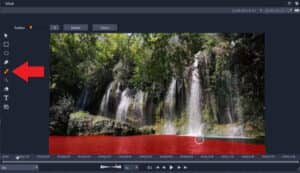
From here you’ll use one of the masking tools on the left of the preview pane to brush over the area of the video where you want to show movement.
TIP: Click on Undock the Mask Preview button to make the preview window larger while you brush the mask.
- Select the Brush tool and begin brushing along the water.
- Use the Radius slider to adjust the size of the brush to make a more precise selection.
- When you’ve finished creating the mask, click Done.
Now you need to select what exactly you want to do with the selected mask.
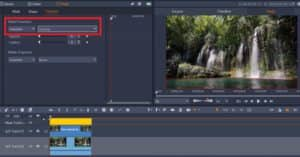
- Click on the Function tab in the Mask Editor.
- To show movement where you created the mask, go to Mask Properties, select Function and then Opacity.
Drag your playhead to the beginning and press play to preview our unique cinemagraph of a still waterfall with a flowing lake.
You can experiment with the functions to create different effects within the same video. For example, I could take this same video and image snapshot and switch the Mask and Matte Properties.
- Set the Mask Properties function to None and change the Matte Properties function to Opacity.
- The Matte Properties will affect everything outside of the mask.
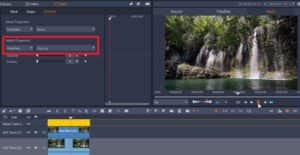
If we preview this, you’ll see we’ve created the opposite effect where the waterfall is flowing and the lake is still.
How to Loop or Lengthen your Cinemagraph
If your video clip is very short, you may want to make it loop to create a longer video.
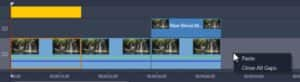
- Right-click on the video clip on the timeline and select Copy.
- Then right-click on the timeline beside the first clip and select Paste.
Repeat this as many times as you want to create the desired length of your cinemagraph.
- Hover your mouse over the edge of the snapshot until the arrow icon pops up and click and drag your snapshot so that it matches the length of the video clip.
- Then hover your mouse over the edge of the mask track and click and drag until it matches the length of the video clip as well.
Press play to preview and you’ll see we have our cinemagraph on loop!
You can have fun experimenting with these tools in different ways to create unique cinemagraphs to add eye-catching elements to your website or social media page or to share with your friends and family!

Download a FREE 15-day trial and discover all the essential and advanced video editing features that Pinnacle Studio delivers to make your videos look their best.
