In this tutorial we’ll teach you how to replicate the Star Wars intro text effect that appears at the beginning of the movies. This famous scrolling text is very easy to create in VideoStudio. Starting with a title preset from the VideoStudio library, you will learn how to modify the font attributes (type, size and color) and adjust the speed. Then use the custom motion options to adjust the perspective and angle so that the text scrolls off into space, just like the original Star Wars intro text.
Thanks for watching! We hope you found this tutorial helpful. You will find a written version of this tutorial below, and a printable PDF copy to download on the Download resources tab above.
Download a FREE 30-day trial and turn your best moments and life experiences into unique movies with this easy and fun video editor packed with intuitive tools and creative effects.
Download these free resources:
Written tutorial (PDF, 745 KB)
VideoStudio User Guides and Help files
For VideoStudio X9 to 2023, languages include English, Deutsch, Français, Italiano, Nederlands, 简体中文, 繁體中文, 日本語
What’s new in VideoStudio
Speed and motion editing techniques
Advanced video editing projects
Featured products
 VideoStudio Pro 2023
 Studio Backlot Membership
 VideoStudio Ultimate 2023
 Vision FX 2.0
Create a scrolling Star Wars intro text effect
In this tutorial, you’ll learn how to how to create the classic Star Wars intro text crawl for your video projects in VideoStudio using your own text.
Click on any of the images below to view full-size.
Adding text
- Open up VideoStudio and switch to the Edit tab.
- Drag the background image you want to use onto the Video track on the timeline.
- Click on the Title icon then click on the fifth title in the first row.
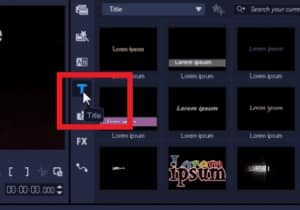
If you click on it, you’ll see in the preview pane how the text scrolls up from the bottom.
- Drag this title from the library onto the Title track on your timeline.
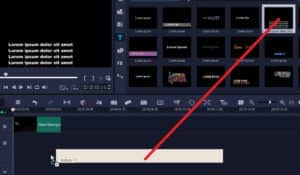
NOTE: We recommend typing out the text you want to use in advance in a simple text editor like Notepad, so that you can easily copy and paste it into VideoStudio. The reason for this is that it will be difficult to edit the text in VideoStudio since the complete text will be larger than the box we see on screen.
- Copy the text you’ve typed out from your chosen text editor (Ctrl+ C).
- Go back to VideoStudio and double-click on the Title track on the timeline.
- Double-click on the placeholder text on the preview pane and click and drag to highlight all the pre-existing text (or press Ctrl+ A to select all).
- Press the Delete key on your keyboard to erase it.
- Hold down CTRL on your keyboard and press V to paste your text onto the screen.
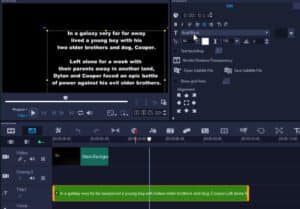
Formatting text
- Double-click on the Title track on your timeline to open the Options panel.
- On the Edit tab of the Options panel:
- Change the font face to Franklin Gothic Medium or something that closely matches the original Star Wars intro text.
- Change the font size to 60 or according to your preference.
- Click on the Align Center button to align the text into the middle of the screen.
- Click on the color icon, then go to Corel Color Picker and select a darker shade of yellow to match the color from the original Star Wars movie.
- Click OK.
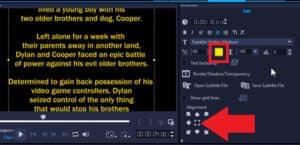
Now drag your playhead to the beginning and press Play to preview what the intro looks like.
Adjusting the speed of scrolling text
- Click on the Title track on the timeline, then hover your mouse to the end until the arrow icon pops up.
- Then click and drag to extend the duration of the text to around 25 seconds.

You can adjust the duration length to be shorter or longer depending on the length of your text.
- Click on the background image on the Video track and hover your mouse to the edge until the arrow icon pops up to click and extend the image to last as long as the text does.
Adjusting the perspective of the text crawl
- Right-click on the Title track on the timeline and select Motion Options > Customize Motion.

- Drag the playhead arrow on the timeline until you can see the text so you’ll be able to adjust what the font perspective looks like.
TIP: Right-click on the preview pane and select Show Grid Lines and click OK. This will help you create an even perspective.
- Click on the green node on the preview pane on the edge of the text box and drag it inwards a few centimeters.
- Repeat this on the other side to create an even trapezoid shape with the green nodes on either side.
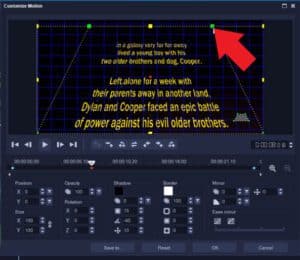
- Adjust the X Rotation level to -60.
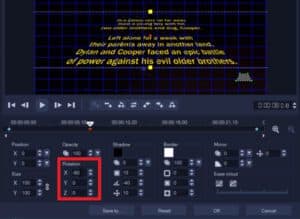
- Click and drag to adjust the yellow square to increase the size of the font, and place it further below so that the text will scroll directly from the bottom off screen.
IMPORTANT NOTE: Right-click on the keyframe you’ve just created and select Copy and Paste to All so that these settings will be copied throughout the entire intro.
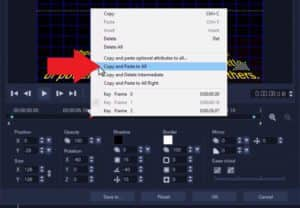
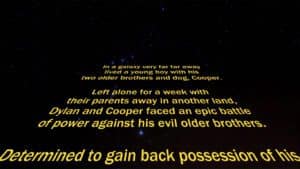
Now press OK. And if we preview our video, you’ll see we have recreated the scrolling Star Wars intro text effect that looks just like the movies!
Download a FREE 30-day trial and turn your best moments and life experiences into unique movies with this easy and fun video editor packed with intuitive tools and creative effects.


Comments (2)
Reader Interactions
Comments
I Like the Star Wars Text, and Scrolling Text, but can it be put within a Text Box, Motion Graphics (Modern Titles, or Call Outs) Text box, rather than scrolling over the whole video screen ?
Brilliant! Instructions are very precise and easy to follow! 🙂