Learn how to apply, adjust and experiment with CorelDRAW’s NEW non-destructive effects to get just the look you want, without altering your original image.
Artwork in this tutorial created by Elena Blagodarova.
Thanks for watching! We hope you found this tutorial helpful and we would love to hear your feedback in the Comments section below. You will find a written version of this tutorial below, and a printable PDF copy to download on the Download Resources tab above.
Start your FREE 15-day trial and embark on a design journey with powerful tools for vector illustration, layout, photo editing, typography, and collaboration.
Download these free resources:
Written tutorial (PDF, 622 KB)
CorelDRAW Graphics Suite resources
Quick Start Guide (PDF, 2 MB)
Keyboard Shortcuts (PDF, 3.5 MB)
CorelDRAW and Corel PHOTO-PAINT user guides
For CorelDRAW Graphics Suite subscription and perpetual licenses (2018 to 2024), languages include English, Português do brasil, 简体中文, 繁體中文, Čeština, Deutsch, Español, Français, Italiano, 日本語, Polski, Русский
CorelDRAW Community
CorelDRAW learning center
Facebook
X (formerly Twitter)
YouTube
What’s New in CorelDRAW Graphics Suite
 CorelDRAW Graphics Suite
 Ultimate Vector Bundle Vol. 1
 CorelDRAW Standard 2021
 Ultimate Vector Bundle Vol. 2
 Corel Vector
How to Apply Non-destructive Effects
Artistic effects are not new to CorelDRAW. But what is new in CorelDRAW 2019 is the ability to apply non-destructive effects. In other words, any effects that are applied can be turned on or off, adjusted, or rearranged, to get just the look you want. And a set of effects can also be exported to use in other projects as well.
Click on any of the images below to view full-size.
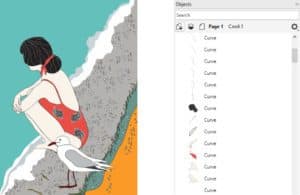
This is the vector artwork that will be used in this example. We have the Objects docker open (Window > Dockers > Objects) and can see that almost everything in this document is ungrouped, which makes it easy to select specific objects on which to add effects and perform edits.
How to Apply and Edit Effects
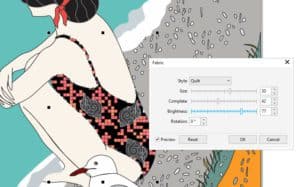
With the swimsuit selected, go to Effects > Creative and choose Fabric. Adjust the settings, keeping Preview checked, then click OK.
Open the Properties docker (Window > Dockers > Properties) and click on the Effects (FX) tab to see the single effect applied so far. Hovering over the Fabric effect reveals two icons to the right.
- Click the Edit (pencil) icon to reopen the effect settings.
- Click the Visibility (eye) icon off and on to hide or show the effect. Hidden effects remain in the list, even when not highlighted.
- Click the Plus icon to add more effects.
- Click the Delete icon to remove an effect.
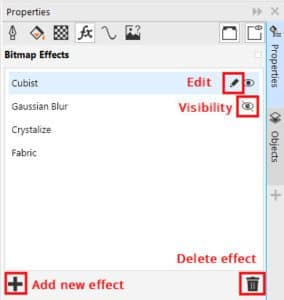
In this example we added the following effects, in this order:
- Creative > Crystalize
- Blur > Gaussian Blur
- Art Strokes > Cubist
You can also use drag-and-drop to rearrange the order of effects. For example, drag Cubist above Fabric, and Gaussian Blur below Crystalize. Each change in order causes the effects to be applied differently.
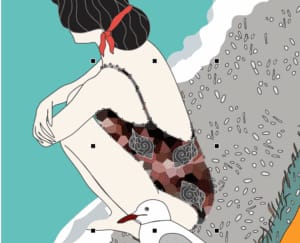
How to Apply Effects to Other Objects
Once a list of effects is set the way you want, the effects can be applied to other objects. Hold down the Shift key, select the effects and drag them over to the new object (in this example we applied the effects to the hair band).
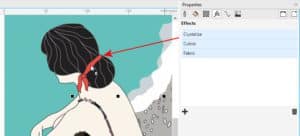
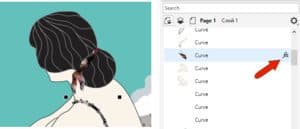
The effects are applied with the same order and settings as in the original. In the Objects docker, the FX icon indicates objects that have effects applied.
Saving and Applying Custom Styles
A set of effects can be saved as a style, to apply to other objects in the document.
- Right-click on the object that has the set of effects you want to save and choose Object Styles > New Style From > Effects.
- Assign the style a name such as “Cubist Fabric.”
- Check the Open Object Styles docker box to open this docker after you save the custom style.
- Click OK.
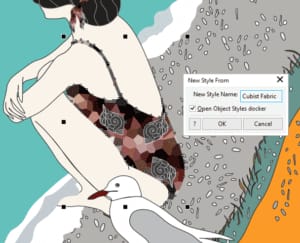
Now in the Object Styles docker we can see the new Cubist Fabric style we saved is listed under Styles.
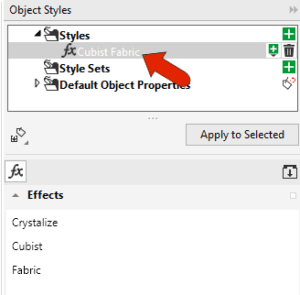
There are three ways to apply a saved style to a new object:
- Drag the style from the Object Styles docker onto the object you want to apply the style to.
- Select the object in the document and click Apply to Selected in the Object Styles docker.
- Select the object in the document and double-click the style in the Object Styles docker.
Importing and Exporting Styles
If you want to use a saved style in a new CorelDRAW document, you need to export it first.
- Select the style in the Object Styles docker.
- Click on the Import / Export icon and choose Export Style Sheet.
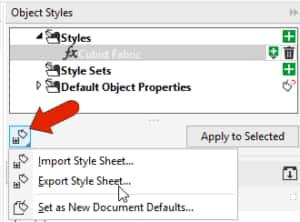
- Enter a file name and choose a location to save the style sheet.
- Check the Styles box in the Export Style Sheet window and click OK.
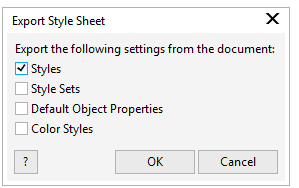
Now open another CorelDRAW document that has objects you want to apply the new style to.
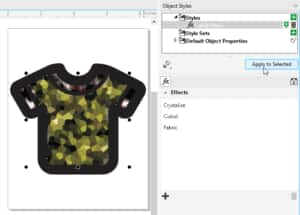
In the Object Styles docker, click the Import / Export icon again and choose Import Style Sheet to bring in the style sheet you saved. It will be listed in the Object Styles docker and you can apply it in the same manner:
- Drag the style from the Object Styles docker onto the object you want to apply the style to.
- Select the object in the document and click Apply to Selected in the Object Styles docker.
- Select the object in the document and double-click the style in the Object Styles docker.
Start your FREE 15-day trial and embark on a design journey with powerful tools for vector illustration, layout, photo editing, typography, and collaboration.

