Learning how to make a panorama gives you one more tool to ensure your memories are preserved just as you remember them. Because the human eye has a much wider peripheral than the average camera lens, making a panoramic photo is sometimes the best way to capture that breathtaking scene just the way you saw it.
PaintShop Pro makes it easy to piece together individual photos to produce a seamless panoramic image. Learn techniques for working with layers, placing and aligning images, and cropping your final image. And for photos that aren’t so easy to align, learn how to “erase your tracks” with the Eraser tool.
You’ll learn how to:
- Create a new image with a custom canvas size
- Use layers to bring multiple images onto one canvas
- Align images to one another with the help of layer translucency and positioning tools
- Crop your final image
- Remove any seams that may appear between adjacent images
Thanks for watching! We hope you found this tutorial helpful and we would love to hear your feedback in the Comments section at the bottom of the page. You will find a written version of this tutorial below, and a printable PDF copy to download on the Download Resources tab above.
Download your FREE 30-day trial and make every shot your best shot with PaintShop Pro 2023, your all-in-one photo editing and design software.
Download these free resources:
Written Tutorial and Sample Images (Zip, 11 MB)
PaintShop Pro resources
Keyboard shortcuts (PDF, 173 KB)
PaintShop Pro User Guide (PDF, 25.4 MB)
What’s New in PaintShop Pro
Getting Started in PaintShop Pro
Photo Editing Projects
Featured products
 PaintShop Pro 2023 Ultimate
 AI HDR Studio 3.0
 PaintShop Pro 2023
 Vision FX
How to Make a Panorama Image from a Series of Photos
If you have a series of photos taken along a uniform horizontal angle, PaintShop Pro makes it easy to assemble your photos into a single, seamless panoramic image. For this type of project, the individual photos should be taken with a tripod, so that the vertical angles will be uniform.
Click on any of the images below to view full-size.
First, open your images in PaintShop Pro and make sure you are in the Edit workspace. Go to Window > Tile Horizontally to display all images at once, with no overlap. Then use your mouse scroll wheel to zoom each image to the same size, and drag to arrange them in the order in which they should appear in the panorama.

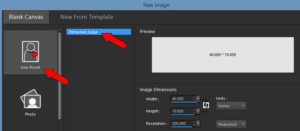
These photos will be placed on a blank canvas that’s set to have dimensions that will work for the final panorama. To start a new image, go to File > New or press Ctrl + N. In the New Image window, you’ll find several preset groups, each with several standard sizes. But our panorama will require a size not listed here. For this custom size, set the image dimensions to inches, and enter 40 for the width, and 10 for the height. It’s fine if the size is too large; we can trim away parts of the image after the panorama is completed. To save this size as a preset that can be used in the future, click the “plus” icon.

Assign a name such as “Panorama_Large” and click OK.

Then click OK again to create the custom image. This will be the blank canvas on which we’ll place the four photos.
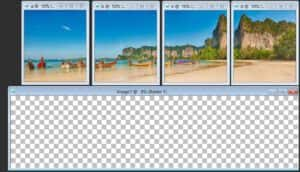
To bring in the first photo, select it by clicking its title bar.
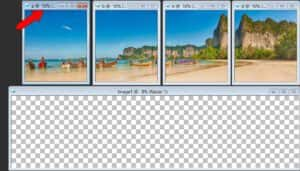
The background layer of that photo appears in the Layers palette.
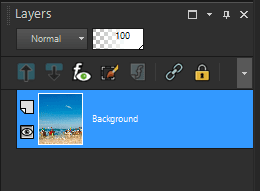
From the Layers palette, drag and drop the layer directly onto the blank image. By default, the image is placed at the center of the canvas. And the canvas size is fine – there is blank space all around which can be trimmed away after the panorama is complete.

To slide this image over, making room for the others, activate the Pick tool.
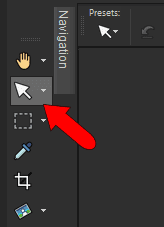
Drag the image to the left.

Continue bringing in the remaining photos the same way: select each photo, and drag its layer onto the canvas. As long as Pick remains the active tool, each image can be moved into place according to the correct order.

The panorama image now has five layers: its own blank background layer, plus one layer for each of the imported images.
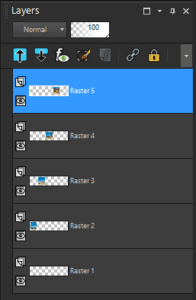
Now we can start aligning images to one another. We’ll start with the second image and align it to the first. While still in the Pick tool, click the second image to activate its layer.

In the Layers palette, reduce the opacity of this layer.
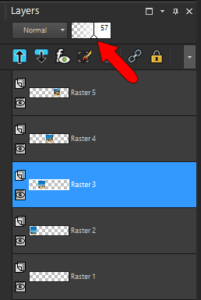
Now we can carefully slide the translucent second image over the opaque first image, using objects that appear in both images for a general placement.
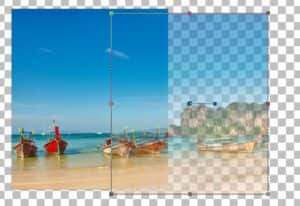
To place the second image more accurately, zoom in closely on an object common to both images. Get the two objects as close as possible while dragging the image.

For fine-tuning the image placement, you can use the Position X and Position Y fields in the Interactive Property Bar.

You can also use your keyboard arrow keys to nudge the image into place. A single tap on an arrow key will move the image one pixel. Pressing Ctrl with the arrow moves 10 pixels, and pressing Shift with the arrow moves 50 pixels. When alignment is perfect, nothing should appear blurry.

Once the second image is in place, zoom out and bring the layer opacity back to 100%. There should be no visible seam between the first and second images.
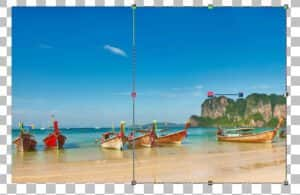
Continue with the same steps to align the remaining images.
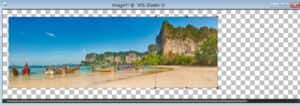
Now we can trim around the image to remove the empty parts of the canvas. We’ll look at two techniques for this.
For the first technique, activate the Crop tool.
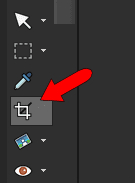
The Crop tool has several pre-set, standard sizes, but our panorama doesn’t fit any of those. So choose the Free Form option.
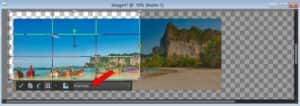
Drag the corners of the crop borders to match the panorama, then click the Apply check mark to finish.
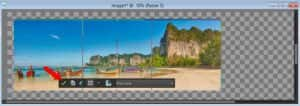
Now the image contains only the panorama.
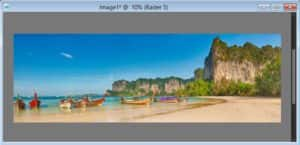
The other way to trim this image is with the Selection tool.
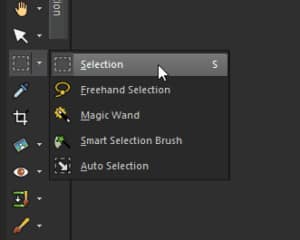
Drag a selection window to enclose the panorama.
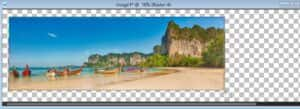
Go to Image > Crop to Selection.
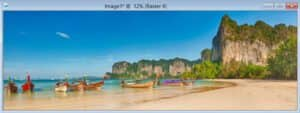
To reduce the image to a single layer, you can right-click on any layer and choose Merge > Merge All. Now the image can be saved.
The previous example was rather straightfoward as far as lining up images – there were clear edges and well-defined objects. But sometimes it’s not so clear where images align. Our second example will use these three photos of a mountain lake scene.

I can use the same canvas size as before. After starting a new image, the “Panorama_Large” size can be found in the User Preset group.
For another method of bringing images onto the blank canvas, select the first photo and press Ctrl + C to copy it.
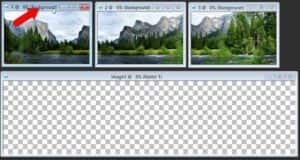
Then select the canvas and use either Ctrl + V or Ctrl + L to paste it. This pastes the image onto its own layer, and as before, the image is brought into the center of the canvas.
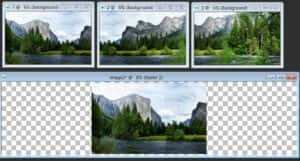
Bring in the remaining images the same way, and arrange them in order.

In this example, the first and second images are already aligned below; the mountains in the background are easy reference objects. The second and third images are rather easy to align as well, but let’s assume there is no clear place or object to align. (This could be the case for uniform objects such as trees or a field, with no background or foreground objects.) With the placement as shown below, where the mountains are not correctly aligned, there will be a clear seam between the two images.

In a case like this, you can either take the time to re-align, or you can cover the seam with the Eraser tool.
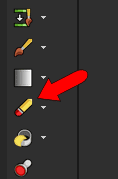
Zoom in closely on the seam area, and adjust the Eraser brush size by pressing the Alt key while dragging the mouse. You can also adjust the brush hardness and opacity on the Tool options palette, which may help with blending.
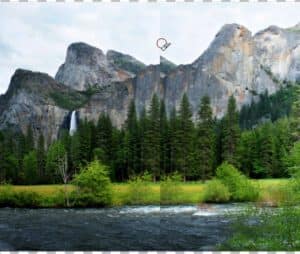
Drag the Eraser carefully along the seam, and over any other areas where misalignment appears.
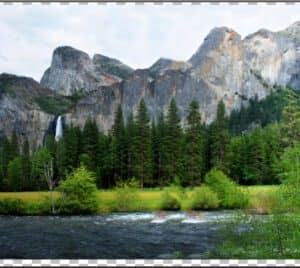
Zoom out, and nothing appears amiss. Now we can crop, merge layers, and save.

Download your FREE 30-day trial and make every shot your best shot with PaintShop Pro 2023, your all-in-one photo editing and design software.


Reader Interactions