
Just like framing the photos displayed on your wall, PaintShop Pro makes it easy to frame your digital photos as well. In this tutorial, we’ll show you how to add a picture frame, how to use the different options for applying frames, and look at how frames work with transparency and layers.
FREE frames and creative content! Click on the Store or Get More tab in the PaintShop Pro welcome screen, select the Creative Content filter and scroll down to find the free content available to download.
Thanks for watching! You will find a written version of this tutorial below, and a printable PDF copy to download on the Download resources tab above.
Download your FREE 30-day trial and make every shot your best shot with PaintShop Pro, your all-in-one photo editing and design software.
Download these free resources:
Written tutorial (PDF, 1.6 MB)
PaintShop Pro resources
Keyboard shortcuts (PDF, 173 KB)
PaintShop Pro User Guides
Partner and User websites
PaintShop Pro User Forum
Scrapbook Campus (Tips and tricks, workshops, master classes, and more)
Creation Cassel (Scripts, picture tubes, and other PaintShop Pro tools, plus weekly freebies)
PaintShop Pro Maniacs (Facebook group)
PaintShop Pro (Facebook group)
What’s New in PaintShop Pro
Getting Started in PaintShop Pro
Artistic Tools and Projects
Featured products
 PaintShop Pro 2023 Ultimate
 AI HDR Studio 3.0
 PaintShop Pro 2023
 Vision FX 2.0
Adding Picture Frames to your Photos
Just like framing the photos displayed on your wall, PaintShop Pro makes it easy to frame your digital photos as well. In this tutorial, you’ll learn about the many framing options in PaintShop Pro’s preset picture frames, learn how to get many more frames, and see how frames work with transparency and layers.
First, open PaintShop Pro and make sure you are in the Edit workspace.
Open any photo you’d like to frame.

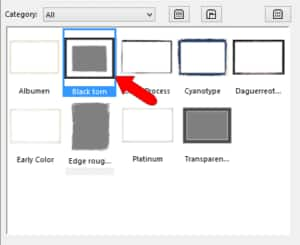
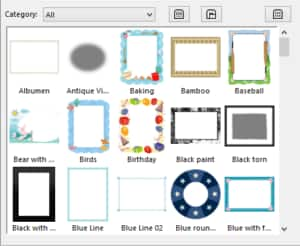
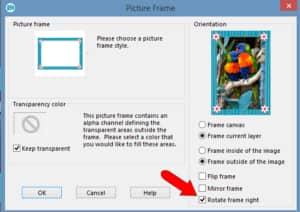
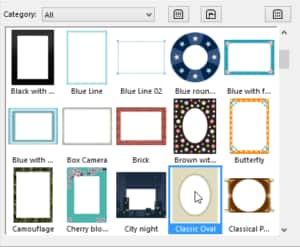
Go to Image > Picture Frame. The Picture Frame dialog box will open. Click the picture frame thumbnail to open the library of frames available.

For a simple example, choose the Black torn frame.
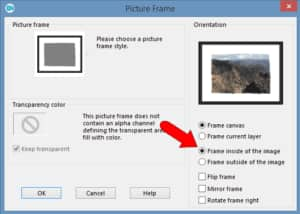
The Orientation window shows how the framed image will appear. If you choose to frame inside of the image, the frame resizes to fit within the image canvas.
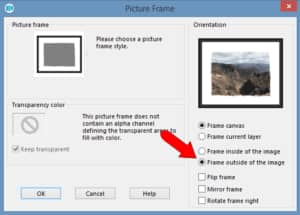
Or you can frame outside of the image, which means the canvas size updates to accommodate the frame.
Click OK to apply the frame.
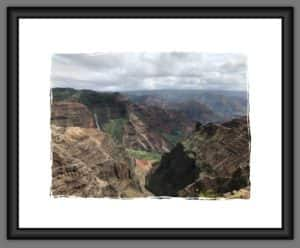
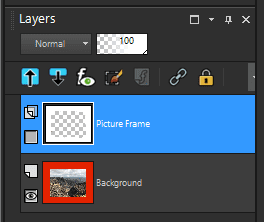
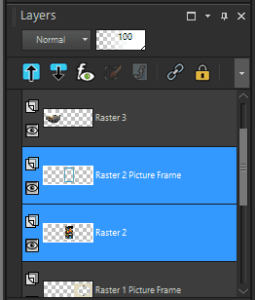
Now a new layer is added, called Picture Frame. And because this frame was applied to the outside, meaning the canvas size was updated, the extra canvas appears as a color in the background layer (orange, in this case).
Use Undo (Ctrl + Z) to remove the frame and return to the original photo.
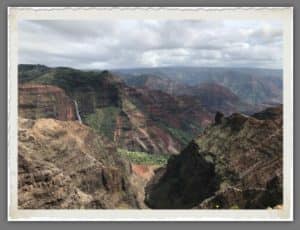
For the next frame, choose Cyanotype, which creates a thick, blue, hand-painted looking frame. The Flip, Mirror, and Rotate options can be used to establish which frame edge appears along which photo edge. In this example, the frame is applied inside of the image.

Because the frame was applied inside of the image, no extra canvas was added to the original background layer.
To try out different frames, click the Visibility toggle (eye icon) to hide the layer with the first frame.
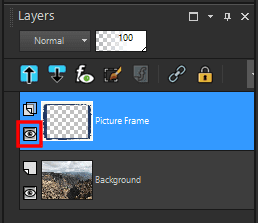
The second frame we are using is Transparent, and it will be fully visible on a new layer above the hidden layer with the Cyanotype frame.

Each frame has its own layer, and you switch layer visibility to see which one you prefer. Layers are assigned default names, but you can click a layer name and assign a new name.

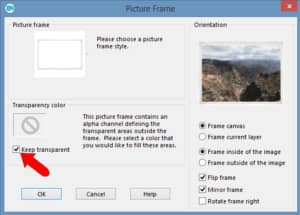
For an example of a frame with transparency options, choose the Platinum picture frame. When the Keep transparent box is unchecked, the frame background will be the color set in the Transparency Color swatch. You can click on the color swatch (blue in the example below) and select a different color for the frame background.
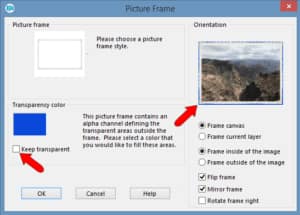
If the Keep transparent box is checked, the canvas background will show through.
We’ll look more at transparency in the next example.
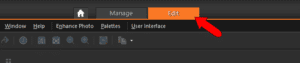
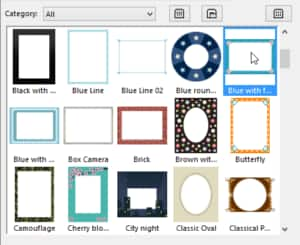
In addition to the preset frames provided in your PaintShop Pro installation, there are also many more you can download. At the top of the window, click the House icon to go to the Welcome window.

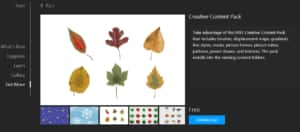
On the left side of the Welcome window, click on the Store or Get More tab. On the right, select the Creative Content filter and scroll down to find the free Creative Content Pack. Click the name or image of this pack to see more details.

The details page for this pack also includes a Download button, which enables you to automatically install.
After the installation process is complete, your selection of frames is many times larger.
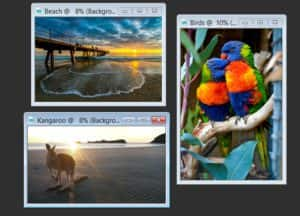
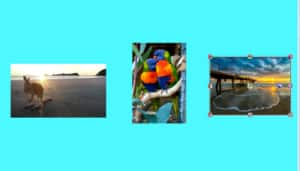
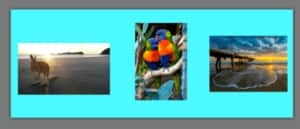
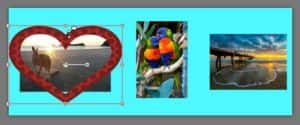
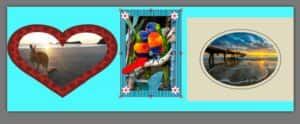
Now we can take a closer look at layers and transparency. Choose three photos you’d like to assemble into one collage image. Open all three photos in PaintShop Pro. In this example, two of our photos have landscape orientation, one has portrait orientation.
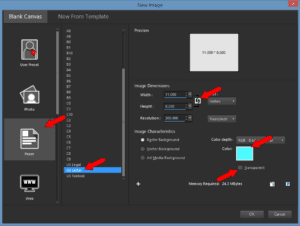
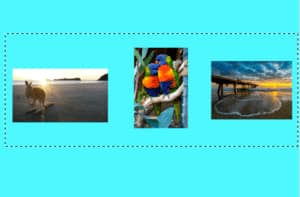
To create the collage canvas, go to File > New. In this example, the canvas comes from the Paper preset group, using the US Letter size. The width and height dimensions are reversed, for a landscape orientation. Transparent is unchecked, and a light blue background color is used.
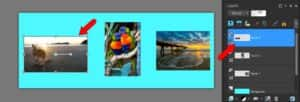
To bring a photo onto this canvas, make sure that photo is active (highlighted), which makes its background layer active.
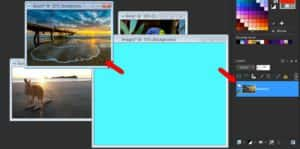
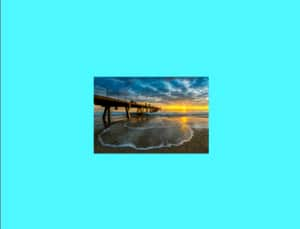
Drag that layer onto the empty canvas. The photo is placed at the center of the canvas. You can also use Edit > Copy (or Ctrl + C) to copy the photo, and Edit > Paste (or Ctrl + V) to paste the photo onto the collage canvas.
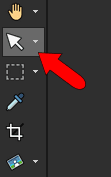
To move or resize the photo, activate the Pick tool, and place the photo where you want it to be in the collage.
Repeat these steps to bring in and arrange all three photos onto the canvas.
To crop the canvas to the size you need, activate the Selection tool and drag to mark the area you want to keep.
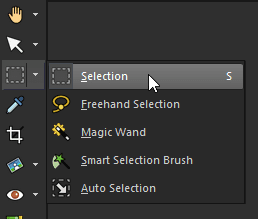
Go to Image > Crop to Selection to trim away the rest of the canvas.
To frame just one of the landscape-oriented photos – the kangaroo in this example – use the Pick tool to select it, which makes that photo’s layer active. (Or just select the photo’s layer, while any other tool is active.)
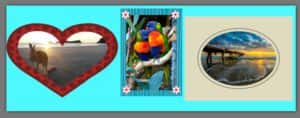
Go to Image > Picture Frame and choose the frame called Hearts01. If Frame canvas is checked, the frame goes around the entire collage.
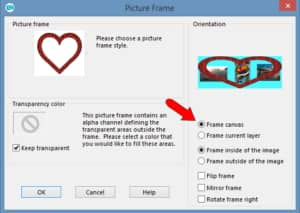
We want to frame just the kangaroo image, not the whole canvas so select Frame current layer, which applies the frame to only the active photo. The heart is meant to be oriented vertically, but widens to accommodate the image size.
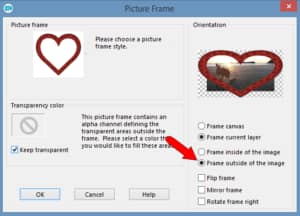
We want to keep the background transparent so the light blue canvas color will show through. Also, choose Frame outside of the image.
Because the image and its frame are on separate layers, each can be selected and adjusted separately. So you can adjust the photo to better fit the frame, or the frame to better fit the photo.
In this example of the kangaroo, the two lower corners of the photo extend past the frame. To clean this up, make sure the photo’s layer is active and activate the Eraser tool.
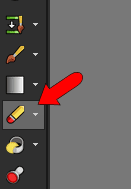
Sweep over the parts of the photo to remove. The frame is not affected, since its layer is not active.

For the next frame, choose the photo that has portrait orientation.
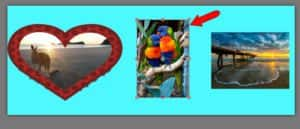
For the frame, choose one that has landscape orientation, such as this blue frame with flowers.
The frame automatically rotates to have the correct orientation.
For the last frame, choose the sunset beach photo, which has landscape orientation, and choose a portrait-oriented frame, such as Classic Oval.
As before, this frame rotated to match the photo’s orientation.
To move or adjust both a photo and its frame, both objects must be selected. You can do this with the Pick tool, by pressing the Shift key and clicking both the photo and its frame. Or press Shift and select both layers.
To move both objects, drag them by the center drag handle. You can also widen, enlarge, shrink, etc.
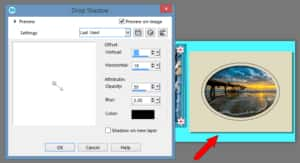
Finally, you can apply 3D effects to your frames. Select a frame, such as the oval frame in this example, and go to Effects > 3D Effects > Drop Shadow. The Drop Shadow option is shown here. All 3D effects have options you can adjust, such as depth, color, and angle.
Here are the three frames in this collage. The frame around the birds has a Chisel effect, and the heart frame has an Inner Bevel effect.

Download your FREE 30-day trial and make every shot your best shot with PaintShop Pro, your all-in-one photo editing and design software.
