Want to simplify the design process and speed up your workflow? Check out these top 10 CorelDRAW tips that will help you increase your productivity. These hidden gems from our CorelDRAW experts may surprise even the most experienced user!
Thanks for watching! We hope you found this tutorial helpful and we would love to hear your feedback in the Comments section at the bottom of the page. You will find a written version of this tutorial below, and a printable PDF copy to download on the Download Resources tab above.
Start your FREE 15-day trial and embark on a design journey with powerful tools for vector illustration, layout, photo editing, typography, and collaboration.
Download these free resources:
Written tutorial for Windows (PDF, 845 KB)
Written tutorial for Mac (PDF, 715 KB)
CorelDRAW Graphics Suite resources
Quick Start Guide (PDF, 2 MB)
Keyboard Shortcuts (PDF, 3.5 MB)
CorelDRAW and Corel PHOTO-PAINT user guides
For CorelDRAW Graphics Suite subscription and perpetual licenses (2018 to 2024), languages include English, Português do brasil, 简体中文, 繁體中文, Čeština, Deutsch, Español, Français, Italiano, 日本語, Polski, Русский
CorelDRAW Community
CorelDRAW learning center
Facebook
X (formerly Twitter)
YouTube
What’s New in CorelDRAW Graphics Suite
 CorelDRAW Graphics Suite
 Ultimate Vector Bundle Vol. 1
 CorelDRAW Standard 2021
 Ultimate Vector Bundle Vol. 2
 Corel Vector
10 Tips for Better Productivity in CorelDRAW
Do you know how to quickly create a frame around an image? Or how to align objects with a single keystroke? Check out these 10 CorelDRAW productivity tips, which may surprise even the most experienced users.
Click on any of the images below to view full-size.
Tip 1: Creating Complex Shapes with the Polygon Tool
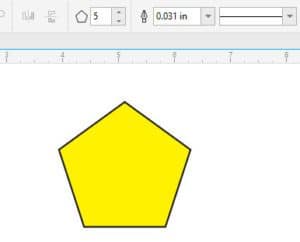
The Polygon tool is great for making, well, polygons. Here’s a simple pentagon, and you can hold the Ctrl key to constrain its aspect ratio.
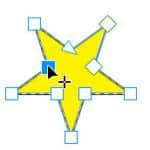
Activate the Shape tool and click and drag one of the nodes. If you keep Ctrl pressed again, you can drag out a nice, even star.
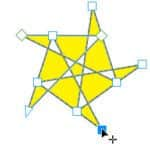
Without Ctrl pressed, you can twist things around. When you pull a handle all the way to the other side, you can get some very interesting shapes.
And it gets even better when you start with a polygon with more sides.
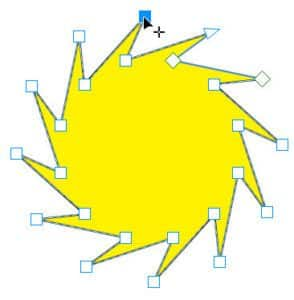
Double-click to add a node along any segment; whatever change you make to this new node happens at all the other points as well.
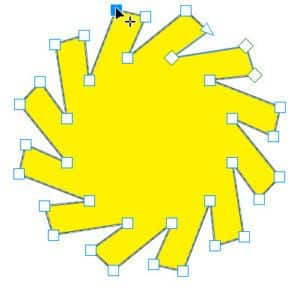
Making these nodes smooth, adding more nodes, and adjusting control handles, makes for even more possibilities.
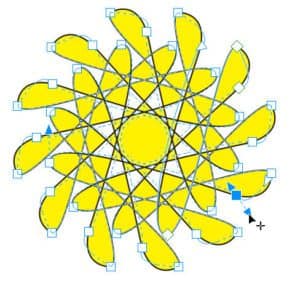
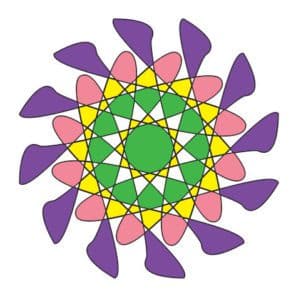
And these shapes are quite fun to color with the Smart Fill tool.
Tip 2: Easy Alignment
The Object / Align and Distribute menu lists all of the shortcuts for the various alignment commands: L for Align Left, R for Right, etc.
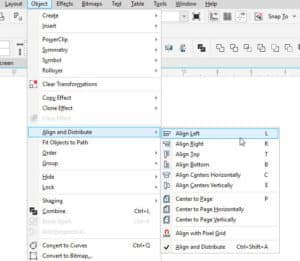
It’s easy to use these on selected objects. Press T to align tops, or B to align bottom. The last object selected stays in place, and the others move accordingly.
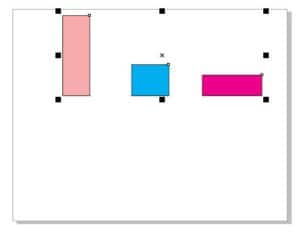
With the objects arranged vertically, you can use C to align centers horizontally.
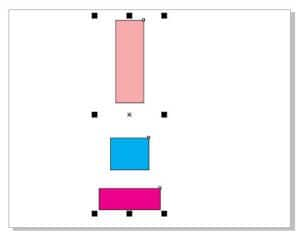
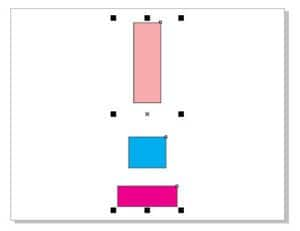
You can also group objects before aligning. P centers to the page.
Tip 2: Transform Docker
The Transform docker goes beyond simply moving or rotating objects. With an object selected, you can change its position, such as moving it 1” to the right and 1.5” up, then clicking Apply.
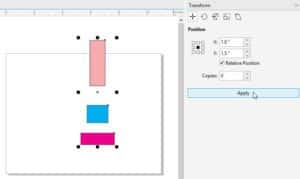
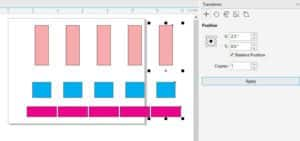
To get three of these objects spaced 3” apart, change X to 3, Y to 0, add 2 copies, and click Apply.
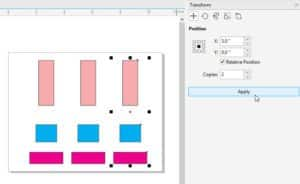
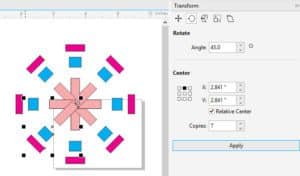
For rotating, try rotating 45 degrees about the center, or make 7 copies about the top point.
You can also mirror, or mirror copy. There are similar options for sizing and skewing.
You can also repeat operations, such as creating one copy at a time by clicking Apply repeatedly.
Tip 4: Math!
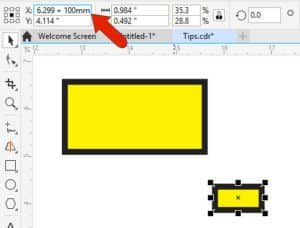
If you don’t feel like grabbing your calculator, let CorelDRAW do the math for you. For the rectangle in this example, here are its dimensions, and the document units are in inches.
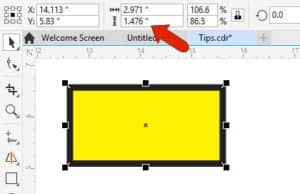
It’s easy to change a dimension to a clean number like 3”. But you could also enter a complex value like 3-3/16”, by entering 3+3/16.
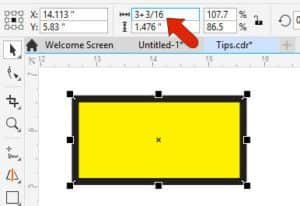
Or you can switch units, such as entering 1200 px or 75 mm.
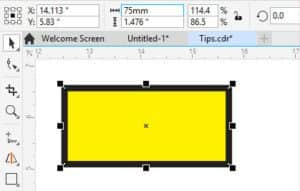
The unit conversion is done automatically.
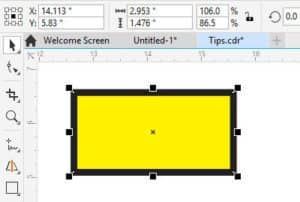
If you want another rectangle exactly ⅓ as wide as this one, duplicate it, and change its width to divide by 3.
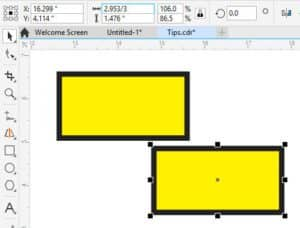
And you can use the Object X Position field to move the selected rectangle, by adding another 100mm to the right.
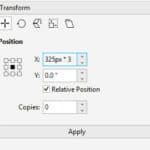
You can enter math symbols or units wherever there is a numerical field. For example, in the Transform docker, you can make a copy that’s 325 px * 3 to the right.
Tip 5: Navigator / Nano-Preview
If you’re zoomed in while working on one small part of a document, and want to move to another part, you don’t have to zoom out and back in again. Click the Navigator icon at the lower right corner.

Keep the mouse button pressed, and drag to the new spot you want to work on.
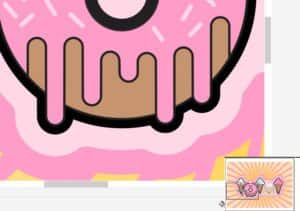
Or you can press the N key to open the Nano-Preview, where you can click a new spot.

To zoom back out, press F4 to see everything, including objects off the page. Pressing Shift + F4, or double-clicking the Zoom tool, zooms to just the page.
Tip 6: Frequently Used Commands
If there is a command you use all the time, you don’t have to always go to the menu for it. For example, if you want easy access to the document grid, open View / Grid / Document Grid.
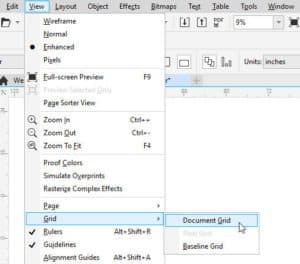
While pressing Ctrl + Alt, drag this command onto the workspace, or onto an existing toolbar.

Now you can click the icon to turn the grid on and off.

To remove the icon, press Alt while dragging it away.
Tip 7: Custom Color Palette
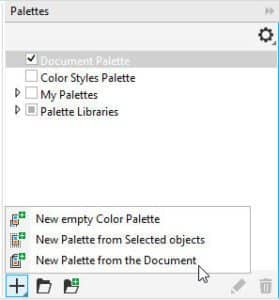
You can easily create a color palette from colors in a document. At the bottom of the Palettes docker, click the plus sign and choose New Palette from the Document.
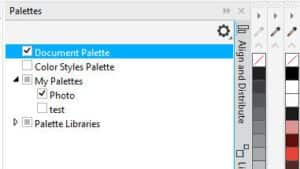
In this example, the new palette was named Photo. Now this palette appears under My Palettes, and the palette itself is displayed vertically to the right.
Tip 8: Quick Frame or Border
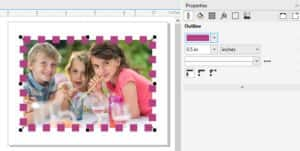
To put a simple frame or border around any rectangular shape, first select the object. Then press Shift while double-clicking the Rectangle tool.

This adds an outline, whose width and style and color you can adjust in the Properties docker. For the color, you can use the eyedropper to match a color in the image.
Tip 9: NDE Styles
NDE, or non-destructive effects, are effects you can add to an object that can be turned on or off, rearranged etc. These are listed in the Properties docker, by clicking the FX tab. The swimsuit in this example has a few effects added, and you could click the plus sign to add more effects.
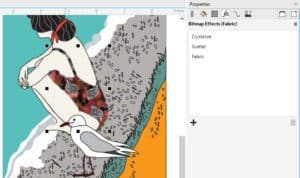
To save these effects as a style for use in other objects, right-click on the object and choose Object Styles / New Style from / Bitmap Effects. Assign the style a name.
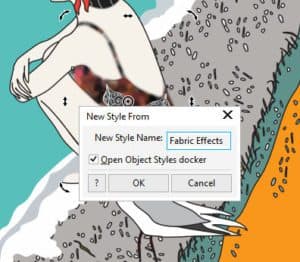
The new style will now be listed in the Object Styles docker. The effects can be applied to other objects, either by dragging the style name onto an object, or by selecting the object first then double-clicking the style name.
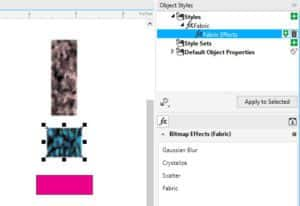
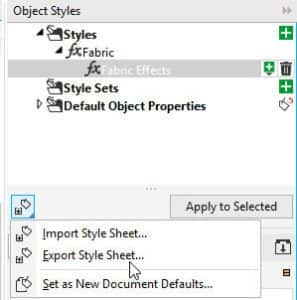
To save this style for use in other documents, use the Export Style Sheet option.
Tip 10: Page Sorter View
For any multi-page document, you can choose View / Page Sorter View. This provides an at-a -glance look at all pages.
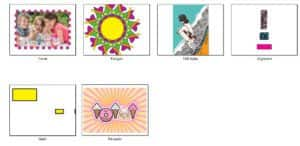
You can drag and drop to rearrange, and the context menu provides options for renaming, inserting, duplicating, etc.
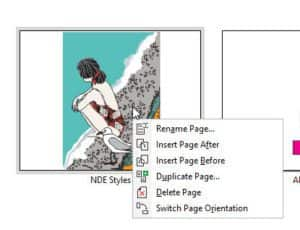
From here, you can double-click the page you want to open.
Start your FREE 15-day trial and embark on a design journey with powerful tools for vector illustration, layout, photo editing, typography, and collaboration.


Comments (2)
Reader Interactions
Comments
I am a subscriber of Corel Draw Graphics suite. I don’t know how to use this program. Could someone show me how to use Corel Draw Graphics suite?
there is no help in this program.
Hi Daniel,
There are some resources listed under the Help menu in CorelDRAW including product Help files, user guide, and quick start guide. We would also recommend watching this tutorial about the Learn docker where you can find tips, tutorials and practice projects to help you learn CorelDRAW.
Best regards,
The Discovery Center team