Exclusive to VideoStudio Ultimate 2022! Save time and streamline the editing process with newly added Face Indexing that analyzes video using facial recognition to automatically identify and extract footage for each person in your video. With this Ultimate-only feature, there is no need to manually search through hours of video content to select the scenes with specific people—Face Indexing will do that for you, quickly and easily.
Thanks for watching! We hope you found this tutorial helpful and we would love to hear your feedback in the Comments section at the bottom of the page. You will find a written version of this tutorial below, and a printable PDF copy to download on the Download Resources tab above.
Download a FREE 30-day trial and turn your best moments and life experiences into unique movies with this easy and fun video editor packed with intuitive tools and creative effects.
Download these free resources:
Written tutorial (PDF, 615 KB)
VideoStudio User Guides and Help files
For VideoStudio X9 to 2023, languages include English, Deutsch, Français, Italiano, Nederlands, 简体中文, 繁體中文, 日本語
What’s New in VideoStudio
Getting Started with VideoStudio
Featured products
 VideoStudio Pro 2023
 Studio Backlot Membership
 VideoStudio Ultimate 2023
 Vision FX 2.0
How to Index Faces in Video Clips
You can use the Face Indexing feature (exclusive to VideoStudio Ultimate) to analyze a video clip in your Library and identify segments of the video clip that include faces. You can then narrow the search to segments with specific faces. For example, in a longer video where people appear on camera periodically, running Face Indexing provides you with a list of different faces found in the video. The you can then select one or more of the faces listed and view the segments of the clips where the faces appear. The feature is non-destructive—the entire clip remains whole, but trim markers are used to help you easily identify where the faces appear. In addition, you can assign a name to each of the faces identified.
After you analyze a clip, the Face Indexing results are listed in the Library under the Media category, so you can easily see which clips you have analyzed and access the results quickly.
Click on any of the images below to view full-size.
Using Face Indexing to Find Faces in Video Clips
In the Library, click the Media button, right-click a video clip that contains people, and choose Face Indexing.
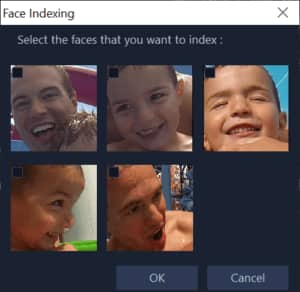
The clip is analyzed. If faces are detected, the results are displayed. In most cases, each person’s face displays more than once, representing different segments where the face appears.

Click all the face thumbnails that you want to include in the trim results and click OK.
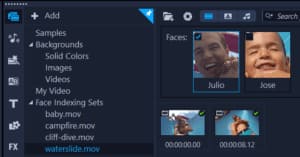
Thumbnails of each of the detected faces appear at the top of the Library, and thumbnails of each of the trim-marked segments appear below.
If you want to rename the faces, right-click a face thumbnail, choose Rename, and type a new name.

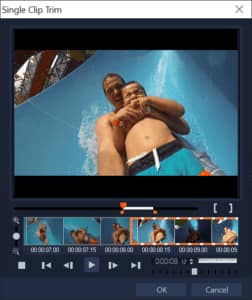
Double-click the thumbnail for the trimmed segment to preview or edit it in the Single Clip Trim window. To use the segment in a project, drag the thumbnail from the Library to the Timeline.

To access all Face Indexing sets
In the Library panel, click the Media button. Then, in the Gallery list, click Face Indexing Sets. All the thumbnails for previously indexed faces display in the Library panel.
Do one of the following:
- Click one or more face thumbnails to filter the trimmed clips by face.
- Under Face Indexing Sets, click a filename to display the segments associated with that clip.
Double-click the thumbnail for a trimmed segment to preview or edit it in the Single Clip Trim window. To use the segment in a project, drag the thumbnail from the Library to the Timeline.

Download a FREE 30-day trial and turn your best moments and life experiences into unique movies with this easy and fun video editor packed with intuitive tools and creative effects.

