
Learn how to merge videos by using transitions to blend smoothly from one video clip or image into the next. If you have a number of video clips or photos that you want to turn into a movie, adding transitions is a simple yet professional-looking technique that will keep your audience captivated. In this tutorial we’ll explore the transitions available in the VideoStudio media library and show you how easy it is to add transitions to merge videos.
Want to do more with transitions? Watch our tutorials on how to use various types of transitions:
Adding and customizing transitions
How to use Morph Transitions
How to use Seamless Transitions
Thanks for watching! You will find a written version of this tutorial below, and a printable PDF copy to download on the Download resources tab above.
Download a FREE 30-day trial and turn your best moments and life experiences into unique movies with this easy and fun video editor packed with intuitive tools and creative effects.
Download these free resources:
Written tutorial (PDF, 496 KB)
VideoStudio User Guides and Help files
For VideoStudio X9 to 2023, languages include English, Deutsch, Français, Italiano, Nederlands, 简体中文, 繁體中文, 日本語
What’s new in VideoStudio
Beginner VideoStudio tutorials
Effects, filters and transitions
Featured products
 VideoStudio Pro 2023
 Studio Backlot Membership
 VideoStudio Ultimate 2023
 Vision FX 2.0
How to merge videos in VideoStudio
This short tutorial will cover the basics of how to merge videos using transitions. Once you have your project set up, we will go through the simple steps to add transitions onto the timeline in between your video clips and/or images. We encourage you to browse through the Transitions library to see the wide variety of transition effects available in VideoStudio.
Setting up your project
- Open VideoStudio in the Edit
- In the Media Library, click on the Add icon to create a new folder for your project and give it a name (this step is optional but will help keep your project organized).
- Import your video clips and/or images:
- Drag and drop your clips from your desktop or folder into the Media Library; or
- Click the Import Media Files icon and browse to the location on your computer where your files are stored; or
- Go to File > Insert Media File to Timeline or Insert Media File to Library.
- Drag and drop your media from the Library onto the Timeline.

Tip: If your clips extend beyond what you can see in the timeline, you can use the Zoom In/Zoom Out slider or Fit project in Timeline window icon to adjust the timeline view.

Adding transitions to merge videos
Now that you have your media on the timeline, you are ready to merge videos with transitions, which will help you switch smoothly from one scene to the next. You can apply the same transition between each clip or use a variety of different transitions.
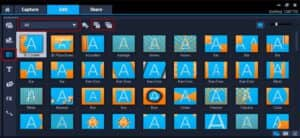
- Click the Transitions icon to see the selection of transitions available in the library.
- Click on the drop-down list to see the different categories of transitions available.
- Click on a transition if you want to preview it in the Preview
To add the transition to the timeline:
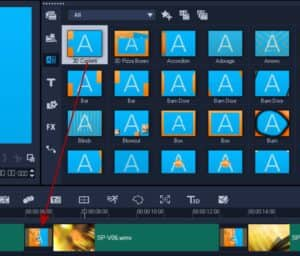
- With a transition selected in the library, click on the Apply Current Effect to Video Track icon in the library. This will add that transition in between each clip on the timeline.
- Or, to manually add transitions just click and drag the transition in between 2 clips on the timeline and it will snap into place.
- You can also use the Apply Random Effect(s) to Video Track icon and this will add a different transition between each clip on the timeline.
Now you can preview your video project to see what the transitions look like. If you want to change the transition you can simply drag and drop a different one right on top of it in the timeline.
If you want to delete a transition, select it in the timeline and press Delete. To learn more about editing and adjusting transitions, watch our tutorial on Adding and customizing transitions.
Download a FREE 30-day trial and turn your best moments and life experiences into unique movies with this easy and fun video editor packed with intuitive tools and creative effects.
