
Titles are a common element you’ll see in both videos and slideshows, from the opening title introducing your video, on-screen captions that highlight important scenes or more detailed subtitles that allow a user to follow along with a step-by-step project tutorial. In this tutorial, we’ll show you how to create and edit basic titles to add simple text to your images.
Thanks for watching! We hope you found this tutorial helpful and we would love to hear your feedback in the Comments section at the bottom of the page. You will find a written version of this tutorial below, and a printable PDF copy to download on the Download Resources tab above.
Download a FREE 30-day trial and turn your best moments and life experiences into unique movies with this easy and fun video editor packed with intuitive tools and creative effects.
Download these free resources:
Written tutorial (PDF, 2 MB)
Sample files (Zip folder, 1.1 MB)
VideoStudio User Guides and Help files
For VideoStudio X9 to 2023, languages include English, Deutsch, Français, Italiano, Nederlands, 简体中文, 繁體中文, 日本語
What’s New in VideoStudio
Beginner VideoStudio Tutorials
Working with Text and Titles
Featured products
 VideoStudio Pro 2023
 Studio Backlot Membership
 VideoStudio Ultimate 2023
 Vision FX 2.0
VideoStudio Pro is full of basic, but important, features. Titling is one of them.
Adding titles to your videos can make them easier to follow, add additional details and/or make them more accessible to the viewer. This tutorial covers the basics of adding titles.
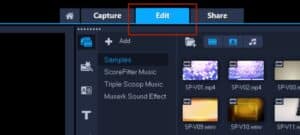
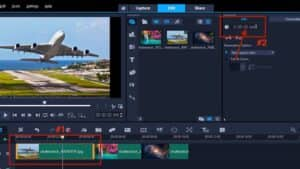
Let’s get started. Open VideoStudio into the Edit tab.
Although it’s obvious that you can add titles to videos, you can also add titles to a slideshow of still images. So that we can showcase several titles, that’s what we’ll do for this project.
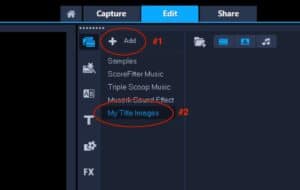
In the Media folder of your Library panel, click the + Add icon to create a new folder for your images. Name it My Title Images.
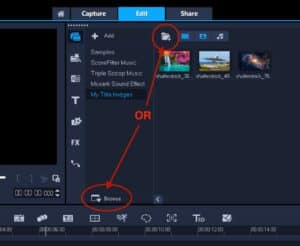
Using either the Import Media Files or Browse icons, import the 3 sample images into your new folder.
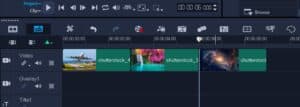
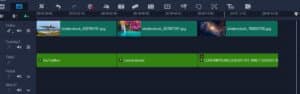
Place the 3 images into the video track of the timeline. Notice they will automatically be placed starting at the beginning of the track, with the rest dropped in sequentially after that. VideoStudio does not allow for any blank spaces on your video track.
Double-click on each image in the video track to bring up the Image Options panel. Making sure the Edit tab is at the front, set each clip’s duration from 3 seconds to 5 seconds. Hit Enter after each one to set it and to see each duration change in the timeline.
Let’s start with a basic title from scratch.
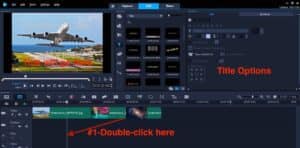
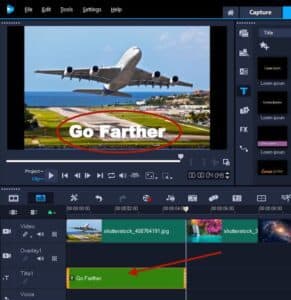
Double-click anywhere in the Timeline’s Title track under the first image (nothing will actually appear there yet). The Title gallery and title Options windows will open. In the Preview window, you will see the words Double-click here to add title.
Wherever you double-click in the Preview is where your title will be placed, but it can be moved afterwards.
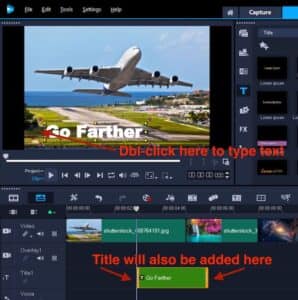
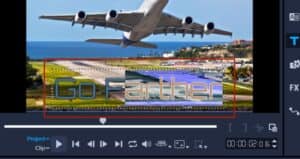
In the Preview window, double-click towards the lower left corner and type the words “Go Farther”. Your text format may vary. It’s okay, we’ll change it. Click outside the text container to set the text.
Around your text are various small yellow squares, pink dots and one green dot (handles).
- Grab the pink handles to rotate the text box around its center.
- Grab any of the yellow handles to resize your text.
- Grab the green handle to drag out a drop shadow.
Keep any changes you make, or undo.
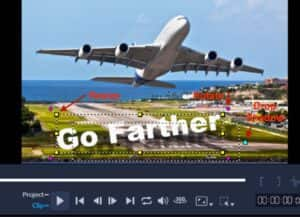
Center your text near the bottom center, but not all the way at the bottom. Your title will be centered once you see the vertical red dotted line appear.
Note: Avoid placing text at the very edges of your window as the final viewing screen might cut parts of it off.
In your timeline, make sure the length of each title matches that of the image. Grab the edges to stretch out the length. Grab inside the clip to move it along the timeline.
Format the text in the Title Options panel. If this panel is not open, double-click your title in the timeline. Expand the Options panel by clicking the Show Options panel icon.
Using the following screenshots as a guide, (you can use any values you like)
- Change the font to Orbitron
- Change the font size to 150
- Change the font color. (bottom row, 4th from left) You can also select a color from the Corel or Windows color picker in the same window.
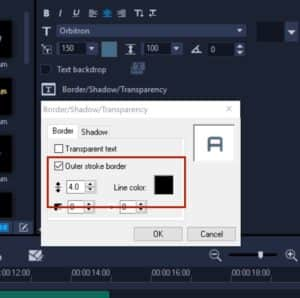
- Click Border, Shadow or Transparency. Check “Outer stroke border and set border to 4.0, Line color to black). Click OK.
Set Alignment. (bottom, center)
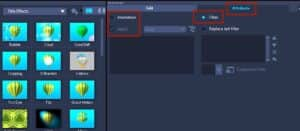
Click the Attributes tab adjacent to the Title Options Edit tab. Although we won’t cover these features in this tutorial, feel free to experiment with animation and filter effects.
- To add an animation, select the Animation radio button, check the Apply checkbox and choose an animation from the various dropdowns and lists.
- To add a filter, click the Filter radio button. The Title Effects library (FX) will appear to the left of the options panel. Drag and drop any of the Title Effects directly onto a title in your timeline.
- To turn them all off, select the Animation radio button and uncheck Apply.
Whenever you want to change the wording of your text, double-click on it in the Preview window and make any changes like you would do in a word processor.
Let’s now try a couple of the many animated title templates available.
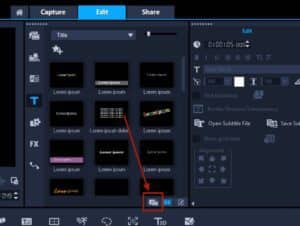
- Click the T to open the Title
- Choose Title from the Gallery drop-down.
- Click the Show Library Panel icon in the lower right of the library panel to close the options window and expand the Titles
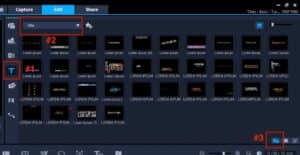
Click on the 13th title in the gallery into the Timeline (see screenshot below). You should see a preview of it animating in the Preview window.
Note: Titles are not actually numbered, so starting from the upper left, pick the 13th title.

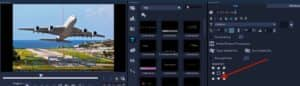
Drag and drop the title template directly underneath the 2nd image (see screenshot) and adjust it to fit the length of your image. For the third image, drag and drop the title that is 6th from the end (see screenshot).

Drag and drop the title template directly underneath the 2nd image (see screenshot) and adjust it to fit the length of your image. For the third image, drag and drop the title that is 6th from the end (see screenshot).
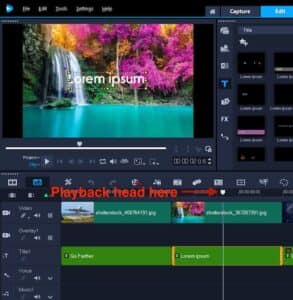
In the lower left of the Preview window, click Project. This will play all tracks and all clips on playback.
- Click the second icon to the right of Project (Rewind) to return the playback head to the start of your show.
- Click the Play icon (between Project and Rewind) to view what you have created.
Note: Be sure to click Project in the Preview window to play all tracks together. Selecting Clip will only play a selected track or clip.

Change the default text in your new titles. In the Timeline, place your playback head at about the 7 second mark and double-click the 2nd title.
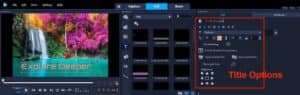
Double-click the text in the Preview window and change it to “Explore Deeper”. Click outside the text box to lock it in.
As we did previously:
- Change the font to Orbitron
- Change the font size to 100
- Change the font color to Orange
- Click to add a Border: (Outer stroke border to 4.0, Line color to black)
- Set the alignment to bottom, center
Preview this part of the video.
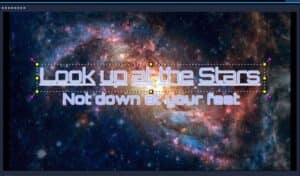
The 3rd title template is a 2-parter with two separate lines of text. Place your playback head in the center of the 3rd image on the timeline and select the title in the timeline. Double-click on the text in the Preview window and change the first line to, “Look up at the stars,”. Double-click on and change the 2nd line to, “not down at your feet”.
- Change the font of both lines to Orbitron.
- Change the font size of the first line to 100.
- Change the font size of the second line to 75.
- Leave all else as is.
- Place both of lines at the center of your screen, using the red lines as guides.
Preview the entire project.
Note: If you go to the Attribute tab, next to the Edit tab in the Options panel, you can see and edit any of the Animation and Filter attributes that were added to this title, so even though these are templates, they are customizable templates.
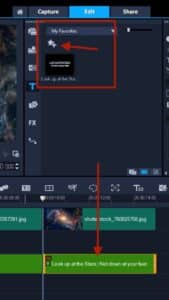
One last thing. You can save these as new titles to use later. Select any of your titles in the Timeline. In the Gallery pop down, choose My Favorites and click the Star-+ icon. Your new title is now saved!
Download a FREE 30-day trial and turn your best moments and life experiences into unique movies with this easy and fun video editor packed with intuitive tools and creative effects.

Comments (3)
Reader Interactions
Comments
One of the best and easiest-to-understand tutorials.
Thank you so much…. it is very helpful and so easy to understand .
Great learning video