With high-quality cameras available on virtually all cell phones these days, images with poor quality and low resolution aren’t very common. But if you are working with older digital photos, or printed photos that have been scanned onto your computer, you’ll run into all sorts of issues such as faded color, dark areas, graininess and blur. PaintShop Pro has a number of tools that can help greatly improve image quality and fix low resolution photos. This tutorial will demonstrate some of these tools, showing how to correct fade, add color and vibrancy, sharpen and remove digital noise.
Thanks for watching! We hope you found this tutorial helpful and we would love to hear your feedback in the Comments section at the bottom of the page. You will find a written version of this tutorial below, and a printable PDF copy to download on the Download Resources tab above.
Download your FREE 30-day trial and make every shot your best shot with PaintShop Pro, your all-in-one photo editing and design software.
What’s New in PaintShop Pro
Photo Restoration
Corrections and Enhancements
Download these free resources:
Written Tutorial and Sample Images (Zip, 12 MB)
PaintShop Pro resources
Keyboard shortcuts (PDF, 173 KB)
PaintShop Pro User Guides
Partner and User websites
PaintShop Pro User Forum
Scrapbook Campus (Tips and tricks, workshops, master classes, and more)
Creation Cassel (Scripts, picture tubes, and other PaintShop Pro tools, plus weekly freebies)
PaintShop Pro Maniacs (Facebook group)
PaintShop Pro (Facebook group)
Featured products
 PaintShop Pro 2023 Ultimate
 AI HDR Studio 3.0
 PaintShop Pro 2023
 Vision FX 2.0
Improving Quality in Low Resolution Images
In this tutorial, we’ll look at several tools you can use in PaintShop Pro to improve the quality of your images. We’ll get to know several tools in the Adjust menu that can accomplish tasks such as correcting faded colors, adding brightness and fill light to photos that are too dark, bringing out color and vibrancy in dull photos, and removing noise.
Open PaintShop Pro and open the Edit workspace.

For the first image, find and open the Lake Sunset image. The sunset and water appear relatively bright and well-balanced, but the foreground areas are extremely dark.

Looking through the available tools in the Adjust menu, one that looks to be suited for this task is Adjust > Brightness and Contrast > Brightness/Contrast. Be sure to check Preview on image, so that you can see the effects of the tool on the image itself. Moving the Brightness slider lightens the whole image without differentiating between light and dark areas, and the result is not what we want. So click Cancel and we’ll try a different tool.
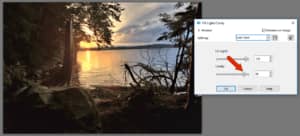
A better tool for this task is Adjust > Brightness and Contrast > Fill Light/Clarity. As the Fill Light increases, the darker areas become lighter, while areas that were already light are left alone. For this image, a value of 120 works well.
We can also increase the Clarity. For this image, a value of 95 reduces some of the haziness along the water line. Click OK to finish.
Another issue with this image is the speckled or dappled appearance along the rocks, and in other spots throughout the foreground.
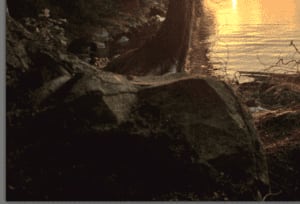
A good place to start here is Adjust > One Step Noise Removal. This smooths out the rock, as well as rest of the photo. If you zoom in closely, everything is a bit blurrier.
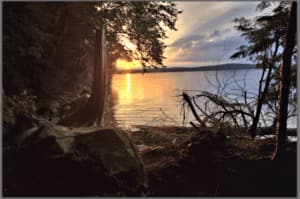
If the One Step Noise Removal doesn’t give you the results you want, click Undo so we can try a different tool. Choose Adjust > Digital Noise Removal. This gives us a side-by-side, before-and-after comparison.
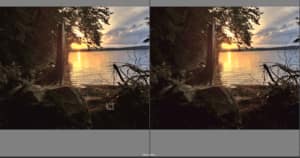
For this image, a Noise Correction value of 30 does a nice job of removing the speckles. And adjusting the Correction Blend to around 80 helps with smoothing.
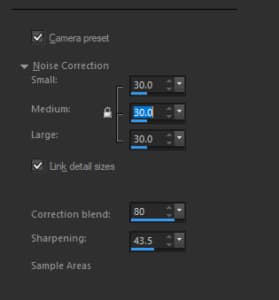
When finished, click OK at the bottom right corner. If you want to save the improved image, use File > Save As, so as not to overwrite the original image.
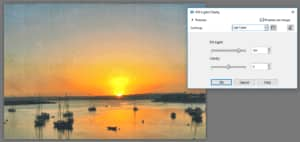
Next, open this image of boats set against a sunset. The problem here is similar to what we saw on the previous image: objects in the foreground are too dark to be seen clearly.

The Fill Light/Clarity tool is great for lightening the boats, while keeping the rest of the image as is.
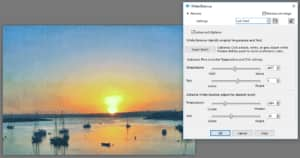
Another nice tool for this image is Adjust > White Balance. Reducing the temperature slightly tempers down the brightness of the sky. And if you click on Advanced Options you can expand the White Balance window to access a few more sliders, to adjust for fine-tuning temperature and tint, and enhancing the white balance.
Next, we’ll work on this waterfall image. The sky at the top looks about right, but the lower part of the image is too dark.
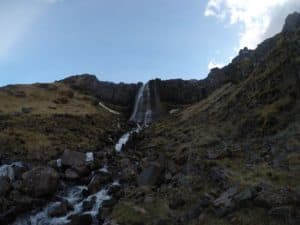
A good place to start with this sort of image is Adjust > One Step Photo Fix. This brightens the entire image, sky included. But the look is still rather dark and a bit ominous.
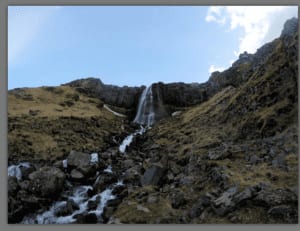
So Undo the last fix, and try Adjust > Smart Photo Fix. This is another side-by-side, before-and-after tool, with lots of parameters to play with.
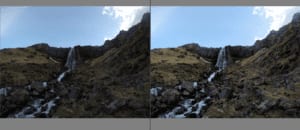
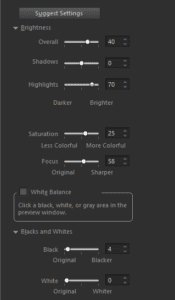
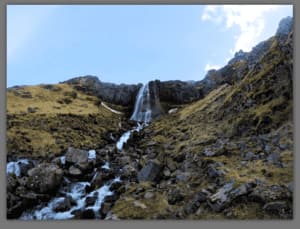
Click Suggest Settings for a good starting point. Then, for this image, increasing the Brightness and Highlights brings out more of the landscape. And increasing the Saturation adds some bright greens to the grassy spots.
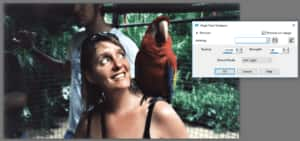
Next, open the Parrot image. The entire image appears faded, perhaps a result of overexposure or sitting in a box for too many years.

A wonderful tool to bring life back into a faded image is Adjust > Color > Fade Correction.

Using a correction value of 50 makes the colors more vibrant but there is still some graininess.

A quick and efficient fix for this is Adjust > One Step Noise Removal. The speckles are gone, and the overall image is slightly blurred.

To restore sharpness, try Adjust > Sharpness > High Pass Sharpen. For this image, a Soft Light blend has a nice effect, with a Radius value of 120 and a Strength value of 40.
For another photo with similar issues, open the First Birthday image.

Here is the same photo after Fade Correction, again using a correction amount of 50.

And again, after One Step Noise Removal. In this case, the slightly fuzzy appearance seems fitting – lending a soft light effect.

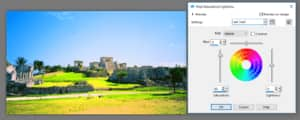
For the last example, open the Archaeology image. The look is a bit monochromatic.

For a first attempt, try Adjust > Hue and Saturation > Hue/Saturation/Lightness. Increasing Saturation brings out more color, but this is applied to the image as a whole, including parts of the sky that were already rather saturated. And too much saturation produces an exaggerated effect on some of the grassy areas.
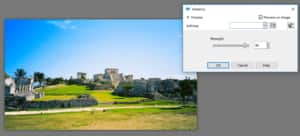
Undo, and for a second attempt, try Adjust > Hue and Saturation > Vibrancy. Increasing the strength brings out more color where needed, while leaving the more neutral areas untouched.
Download your FREE 30-day trial and make every shot your best shot with PaintShop Pro, your all-in-one photo editing and design software.

