With the Makeover tools in PaintShop Pro, it’s easy to touch up your portrait photos with just a few simple steps. Unwanted blemishes, wrinkles, moles, even stray hairs, can be removed with a click of your mouse. You can also whiten teeth and give skin an overall smoothing.
In this tutorial, you will see how to use two of the Makeover Tools: Blemish Fixer and Toothbrush. You will also learn how to use the Scratch Remover and Skin Smoothing tools.
Thanks for watching! We hope you found this tutorial helpful and we would love to hear your feedback in the Comments section at the bottom of the page. You will find a written version of this tutorial below, and a printable PDF copy to download on the Download Resources tab above.
Download your FREE 30-day trial and make every shot your best shot with PaintShop Pro, your all-in-one photo editing and design software.
Download these free resources:
Written Tutorial (PDF, 605 KB)
PaintShop Pro resources
Keyboard shortcuts (PDF, 173 KB)
PaintShop Pro User Guides
Partner and User websites
PaintShop Pro User Forum
Scrapbook Campus (Tips and tricks, workshops, master classes, and more)
Creation Cassel (Scripts, picture tubes, and other PaintShop Pro tools, plus weekly freebies)
PaintShop Pro Maniacs (Facebook group)
PaintShop Pro (Facebook group)
What’s New in PaintShop Pro
PaintShop Pro Tools
Corrections and Enhancements
Featured products
 PaintShop Pro 2023 Ultimate
 AI HDR Studio 3.0
 PaintShop Pro 2023
 Vision FX 2.0
Using the Makeover Tools in PaintShop Pro
Facial blemishes such as spots, wrinkles, or stray hairs, can distract from an otherwise beautiful photo. This tutorial demonstrates some easy techniques in PaintShop Pro to make your faces flawless.
You’ll learn how to:
- Use the Blemish Fixer to remove bumps or freckles
- Use the Toothbrush to lighten teeth
- Use the Scratch Remove to remove stray hairs and wrinkles
- Use Skin Smoothing for an overall touch-up
First, open your image in PaintShop Pro and make sure you are in the Edit workspace.

This is the sample photo that will be used in this tutorial. We’ll use the tools mentioned above to perform several touch-ups on the woman’s face.

This sort of photo editing involves a lot of zooming in and out, so that specific areas can be viewed close up. Zooming can be done with your mouse scroll wheel: scroll up to zoom in, and scroll down to zoom out. You can pan (slide) the view by dragging your mouse while keeping the Spacebar pressed.
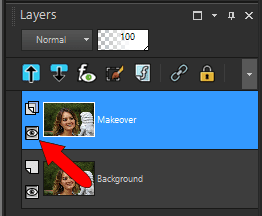
Before making any edits, it’s always recommended to duplicate the image and make your changes to the copy, rather than to the original image. In the Layers palette, right-click on the image and choose Duplicate. A new, identical layer is placed just above the original. To change the layer name, click its title and assign a new name, such as “Makeover.”

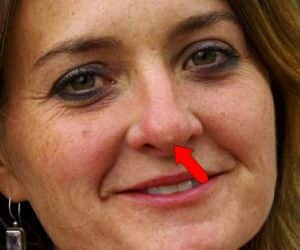
The first touch-up we’ll make is to cover this blemish at the end of her nose.
The perfect tool for this is Blemish Fixer, which is one of the Makeover tools. To open the Makeover tools, click the drop-down arrow next to the Red Eye tool. From the flyout, click Makeover.
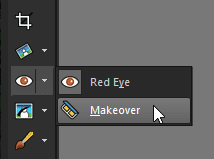
There are five Makeover tools, and they appear on the Interactive Property Bar: Blemish Fixer, Toothbrush, Eye Drop, Suntan, and Thinify. To activate Blemish Fixer, click the first icon. The brush size and strength appear just to the right of the tool icons.

Blemish Fixer works like a specialized Clone tool. The cursor has two circles: inner and outer. The outer circle contains the colors and textures that will be brought into the inner circle, covering the blemish. The brush should be sized so that the blemish fits just inside the inner circle. Brush size can be adjusted in the Interactive Property Bar, but it’s easier to size the brush by pressing the Alt key and dragging the mouse up or down. When the brush size and location are correct, just click, and the blemish is covered.
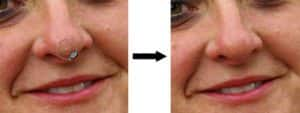
Next, we’ll use Blemish Fixer in some other spots, such as these freckles:
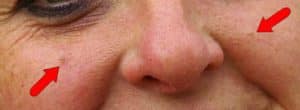
For each blemish, place the cursor over it, adjust the brush size as needed, and click.
The next tool we’ll use is Toothbrush, for lightening the teeth. This is the second icon on the Makeover tools. The only option that can be set here is Strength.

Toothbrush is another one-click tool. Simply click on the teeth and the tool lightens them. You may have to click more than once, to lighten the various shades within the teeth.
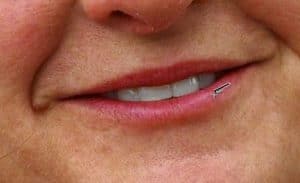
If the teeth turn out too light or dark, you can undo as needed (Ctrl + Z), adjust the strength, and click again.
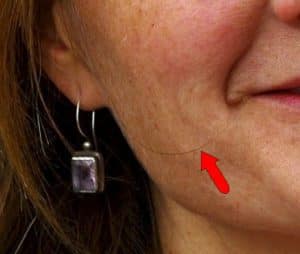
Now we’ll remove this stray hair from the photo, using the Scratch Remover tool.
Scratch Remove is a great tool for removing scratches from old, damaged photographs.
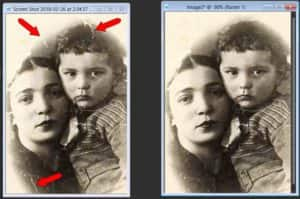
But this tool also has lots of other great uses, such as removing power lines from landscape shots, or erasing stray hairs, as we’ll show.
Open the Clone tool flyout and click the Scratch Remover icon.
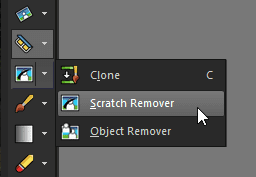
The options for this tool are brush width and shape. (Both shapes of brush are rectangular; the round option has rounded ends.) It’s best to use as narrow a width as possible, so that only the scratch, and not the surrounding area, will be covered.

Click and drag a rectangle along a straight part of the hair to remove. Like with the Blemish Fixer, the colors and textures from the two outer rectangles are brought into the middle rectangle, removing the hair.
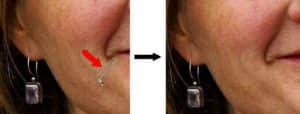
To continue removing the rest of the hair, drag more short rectangles as needed until the entire hair is gone.
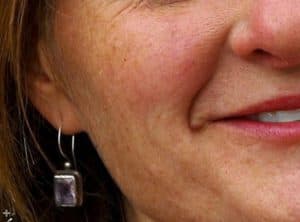
Wrinkles, such as these around the eyes, can be removed the same way.

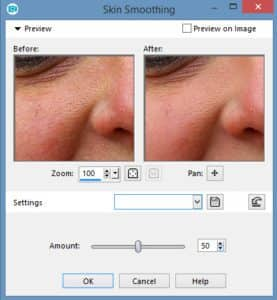
The area around the chin shows some slight blotchiness, and the pores above the cheeks can be made a bit smaller. These areas could be evened out with the Blemish Fixer, but the Skin Smoothing tool makes this even easier.
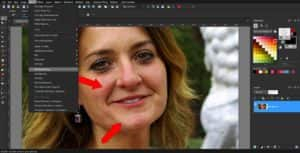
Choose Adjust / Skin Smoothing. The preview window shows a “before” and “after” view.
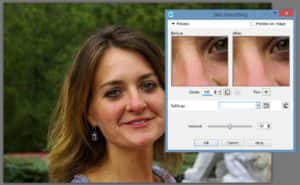
On either view, you can drag to pan to a different spot. With the current settings, the pores look much better.
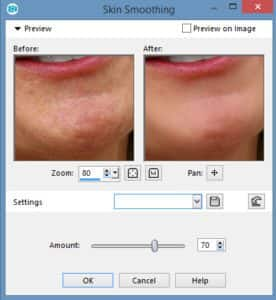
Panning down to view the chin, and zooming out a bit, we can see whether the current settings need adjusting. Increasing the amount, by moving the slider or entering a new value, increases the smoothing effect.
To see the smoothing effect on the entire photo, click Preview on Image.
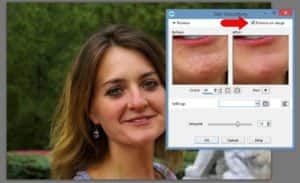
Close the Skin Smoothing window, to see the results of all our touch-ups.

Because all of these tools were used on their own layer, we can easily compare the new image to the original one. Clicking the Eye icon on the Makeover layer toggles it off.
Download your FREE 30-day trial and make every shot your best shot with PaintShop Pro, your all-in-one photo editing and design software.

