If you have old photos stored in boxes, or even albums, you’ll probably notice that many have become faded, discolored, or dull over time. In this tutorial we are going to look at a few different PaintShop Pro tools and techniques you can use to restore or adjust the color in older photos that have become faded or discolored. This process can also be applied to newer photos that just seem dull and need to be brightened up.
Thanks for watching! We hope you found this tutorial helpful and we would love to hear your feedback in the Comments section at the bottom of the page. You will find a written version of this tutorial below, and a printable PDF copy to download on the Download Resources tab above.
Download your FREE 30-day trial and make every shot your best shot with PaintShop Pro, your all-in-one photo editing and design software.
Download these free resources:
Written Tutorial and Sample Images (Zip, 625 KB)
PaintShop Pro resources
Keyboard shortcuts (PDF, 173 KB)
PaintShop Pro User Guides
Partner and User websites
PaintShop Pro User Forum
Scrapbook Campus (Tips and tricks, workshops, master classes, and more)
Creation Cassel (Scripts, picture tubes, and other PaintShop Pro tools, plus weekly freebies)
PaintShop Pro Maniacs (Facebook group)
PaintShop Pro (Facebook group)
What’s New in PaintShop Pro
Photo Restoration
Corrections and Enhancements
Featured products
 PaintShop Pro 2023 Ultimate
 AI HDR Studio 3.0
 PaintShop Pro 2023
 Vision FX 2.0
Restoring Faded and Discolored Photos in PaintShop Pro
In this tutorial we are going to look at a few different tools and techniques you can use to restore or adjust the color in older photos that have become faded or discolored. This process can also be applied to newer photos that just seem dull and need to be brightened up.
Open PaintShop Pro in the Edit workspace.

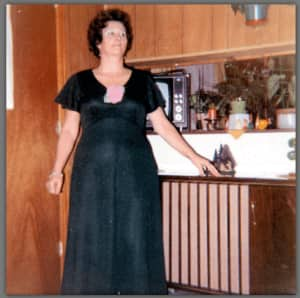
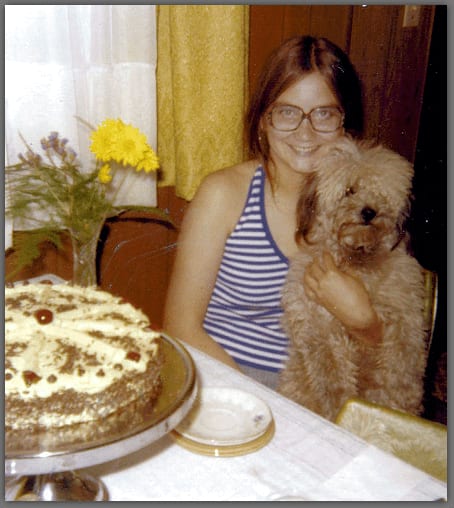
Here is the first photo we’ll restore, which has become faded over time.
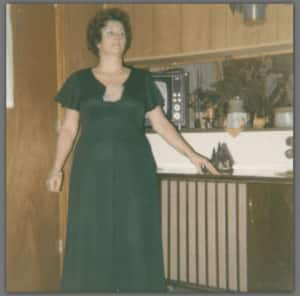
If you’d like to compare the restored version to the original, choose File> Save Copy As. This creates an identical image file, which you can then open in PaintShop Pro, and place the two images side by side in the workspace. To see your two images together, go to the Window menu and choose Tile Vertically. Then you can resize and reposition both image windows as you like.
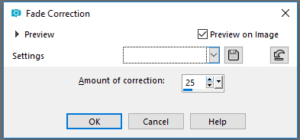
For the first fix, go to Adjust> Color> Fade Correction. Be sure to check Preview on Image, so that the effect of the tool can be seen on the image itself. Adjust the amount of correction; for this image, a value of 25 brings back a lot of the original color.
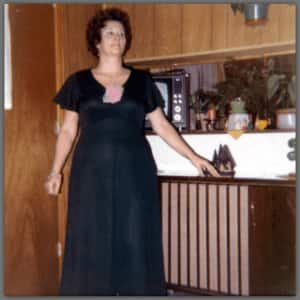
Next, go to Adjust> One Step Photo Fix. This tool performs several functions at once: increasing brightness, balancing color and saturation, and overall sharpening.
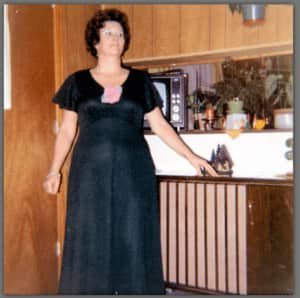
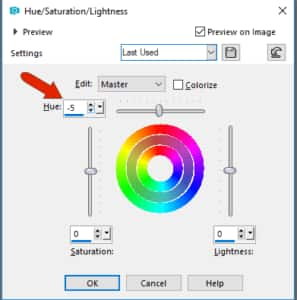
For the final step, go to Adjust> Hue and Saturation> Hue/ Saturation/ Lightness. In this example, the zero value for Saturation and Lightness seem fine. But you can carefully adjust the Hue – increasing this value by clicking the Up or Down arrow makes a significant difference. In this case, reducing the Hue to -5 produces a nice result.
Here is the final result:
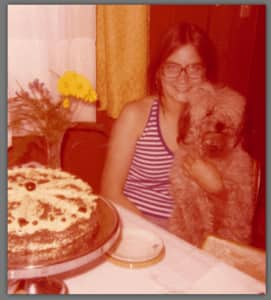
For the second example, we are going to use this image, which has become discolored over time.
We’ll perform the same three steps that were used on the previous image. First, we will use Fade Correction– a value of 50 does a nice job.
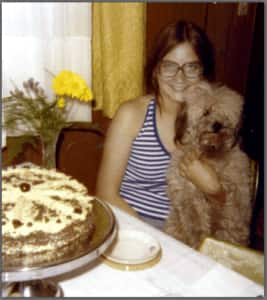
Next, we will apply One Step Photo Fix (found under the Adjust menu) and then open the Hue/ Saturation/ Lightness settings (also under the Adjust menu) and adjust the Hue to -8. This brings out some of the reds in the more neutral tones.
With these 3 tools we’ve been able to get rid of the red discoloration and brighten up the photo nicely.
Download your FREE 30-day trial and make every shot your best shot with PaintShop Pro, your all-in-one photo editing and design software.

