This tutorial will show you two methods for rotating video clips in Pinnacle Studio. Sometimes the photos or videos you’ve captured on your phone are not oriented properly and end up sideways or upside down. When this happens you need to rotate the video so it displays correctly. This process is very easy to do in Pinnacle Studio.

Download a FREE 15-day trial and discover all the essential and advanced video editing features that Pinnacle Studio delivers to make your videos look their best.
What’s New in Pinnacle Studio
Beginner Video Editing Techniques
Featured products
 Pinnacle Studio 26 Ultimate
 Studio Backlot Membership
 Pinnacle Studio 26
 Vision FX
Rotating Video Clips that are Upside Down
In this first example, our video is upside down and needs to be rotated 180 degrees.
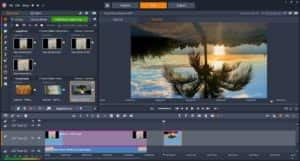
- Right-click on the clip in the timeline.
- Select Rotation > Custom.
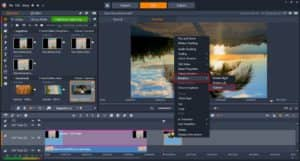
This opens the 2D-3D editor. In the Rotation setting, enter 180 in the numerical field or drag the slider to the right to 180.
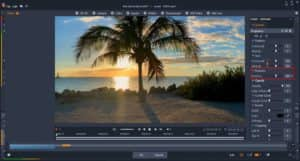
Click OK and your video clip will be flipped so it displays properly.
Rotating Video Clips that are Sideways
In this second example we have a video clip that appears sideways. This can happen if you start recording your video in portrait mode and then flip your phone horizontally partway through recording.
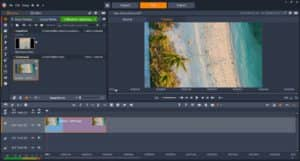
- Right-click on the clip in the timeline.
- Select Rotation and choose Rotate Right or Rotate Left to rotate 90 degrees.
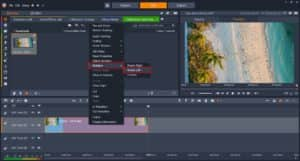
Your video is now oriented correctly, but with black bars on each side. Here is a very quick and easy way to remove the black bars by adding a background.
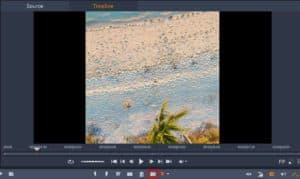
Click on the Snapshot icon on the timeline toolbar. This will create a photo from your video, and it will be added to a new “snapshots” collection in the media library.
Drag the snapshot onto the timeline under your video. Click and drag the right edge of the photo in the timeline to extend the length to match video.

The snapshot will not be visible in the preview pane, because the video clip is on top of it. Click on the visibility (eye) icon beside A/V Track 2 (or whatever track your video is on) to hide the video, so the snapshot is visible in the preview pane.
- Double-click on the snapshot in the timeline to open the Editor.
- Select Effect > 2D-3D > 2D Editor Advanced.
- In the Select preset dropdown list, choose No Preset.
- In the Size setting, first make sure the padlock icon is orange, which will preserve the aspect ratio.
- Then adjust the Horizontal setting to 200.
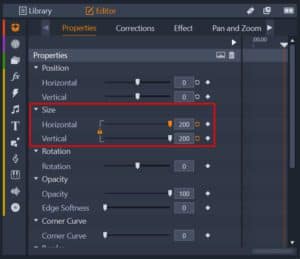
Now your snapshot will fill the screen and the black bars will no longer be visible. But there is one last step to enhance the appearance of the video – adding a blur effect to the snapshot background to differentiate from the video in the foreground.
In the Editor panel:
- Select Effect > Camera > Blur
- In the Blur Amount setting, use the sliders or enter a number to adjust the blur effect to your liking.
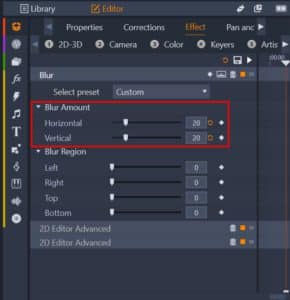
On the timeline, click on the visibility icon once again so that your video is now visible. And here is the result – a properly oriented video with an artistic blur effect in the background to remove the black bars.

Download a FREE 15-day trial and discover all the essential and advanced video editing features that Pinnacle Studio delivers to make your videos look their best.


Reader Interactions