
In Pinnacle Studio, there are several different editing modes you can switch to that will determine how trimming clips or adding media will affect other clips on the timeline. You can switch from different modes as you edit your project according to your needs at the time.
In this tutorial, you’ll learn how to use four of the different editing modes in Pinnacle Studio.
- Smart Editing Mode
- Insert Mode
- Overwrite Mode
- Replace Mode
Want to learn more about the NEW 3 and 4-point editing mode introduced in Pinnacle Studio 22 Plus and Ultimate? Watch this tutorial to see this advanced editing mode in action.
Thanks for watching! We hope you found this tutorial helpful and we would love to hear your feedback in the Comments section at the bottom of the page. You will find a written version of this tutorial below, and a printable PDF copy to download on the Download Resources tab above.
Download these free resources:
Written Tutorial (PDF, 464 KB)
Pinnacle Studio User Guide and Help Files
Studio Backlot
Pinnacle learning center
YouTube
Download a FREE 15-day trial and discover all the essential and advanced video editing features that Pinnacle Studio delivers to make your videos look their best.
What’s New in Pinnacle Studio
Beginner Video Editing Techniques
Featured products
 Pinnacle Studio 26 Ultimate
 Studio Backlot Membership
 Pinnacle Studio 26
 Vision FX 2.0
How to Use the Different Editing Modes in Pinnacle Studio
In Pinnacle Studio, there are several different editing modes you can switch to that will determine how trimming clips or adding media will affect other clips on the timeline. You can switch from different modes as you edit your project according to your needs at the time.
In this tutorial, you’ll learn how to use four of the different editing modes in Pinnacle Studio.
- Smart Editing Mode
- Insert Mode
- Overwrite Mode
- Replace Mode
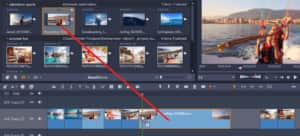
To change the edit mode, go to the right of your screen and click on the drop-down menu.
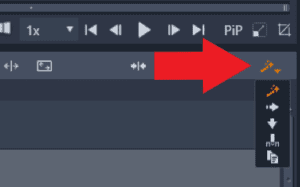
1. Smart Editing Mode
The default mode for Pinnacle Studio is Smart Edit mode which is the Magic Wand icon.
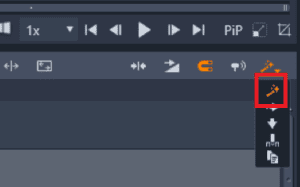
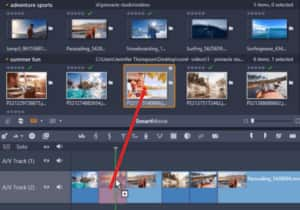
Smart Editing mode intelligently decides when to move clips positioned after that point on the timeline based on how and where you drag your clips.
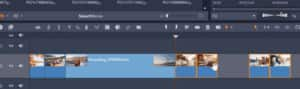
- If you have several media clips on your timeline and a gap between them, you can fill that gap without pushing everything else down on the timeline.
- Drag the image or video you want to fill into the gap down onto your timeline.
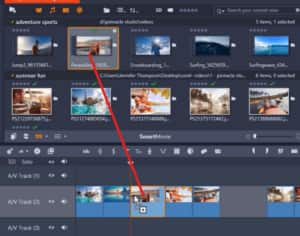
The gap will be perfectly filled using Smart Editing mode and Pinnacle will automatically trim the excess part of the video so it fits this space.
2. Insert Mode
Click on Insert Mode which is the Arrow icon pointing to the right.
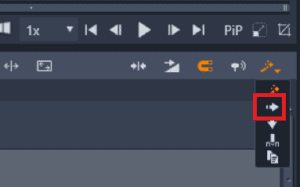
With Insert mode, clips to the right of a trimmed clip and on the same track will shift left or right to make room for the new length of the clip.
Drag your media clip onto the timeline. Insert mode will push down all the media to the right so that the entire video will fit.
The gap will remain in place so to eliminate it, highlight the clips to the right and drag them to the left so there’s no gap between media.
Also, in Insert mode, when we delete a clip, the media is automatically pushed together so there is no gap between clips.
3. Overwrite mode
Click on the Overwrite Mode icon which is the Arrow icon pointing downwards.
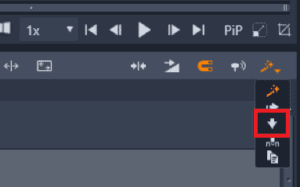
With overwrite mode, if you drag a clip onto the timeline, it will literally overwrite all media that is in its path.
Drag your media from the Project Bin over top of the media you want to overwrite.

The gap will be filled and all of the following media will be overwritten in the path of the new clip.
4. Replace Mode
Click on the Replace Mode icon.
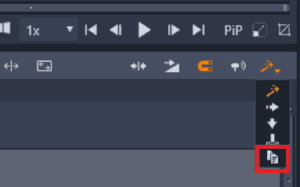
This is a great editing mode to use if you’re making a slideshow and want to make some quick changes to the photos you’ve chosen.
Drag your media from the Project Bin and drag it over top of the clip on the timeline that you want to replace.
The image or video will be completely replaced with your new photo or video and you don’t have to make any other changes.
Remember that you can also switch between editing modes as you need to, which makes editing even easier with this program!
Note: There is a new 3 and 4-point editing mode that was introduced in Pinnacle Studio 22 Plus and Ultimate versions. Watch this tutorial to learn more about this new advanced editing mode.
Download a FREE 15-day trial and discover all the essential and advanced video editing features that Pinnacle Studio delivers to make your videos look their best.

Comments (2)
Reader Interactions
Comments
Estaria bien que los tutoriales con video estubieran en español ya que no todos dominamos el ingles lo suficiente como para seguir las explicaciones.
Hola Gema,
Para ver subtítulos en tu idioma:
– Haga clic en el ícono “Settings” en la esquina inferior derecha del reproductor de video.
– Haz clic en “Subtitles” y selecciona tu idioma.
– Si su idioma no aparece en la lista, haga clic en “English (auto-generated)”, luego haga clic en “Auto-translate” y seleccione su idioma.
Saludos
Discovery Center team