
In this tutorial, you’ll learn how to export a video project from your timeline to the file format, resolution, and frame rate of your choice. You’ll also learn how to export your video as a format specifically for social media sites such as YouTube, Box, or Vimeo.
Thanks for watching! We hope you found this tutorial helpful and we would love to hear your feedback in the Comments section at the bottom of the page. You will find a written version of this tutorial below, and a printable PDF copy to download on the Download Resources tab above.
Download these free resources:
Written Tutorial (PDF, 377 KB)
Pinnacle Studio User Guide and Help Files
Studio Backlot
Pinnacle learning center
YouTube
Download a FREE 15-day trial and discover all the essential and advanced video editing features that Pinnacle Studio delivers to make your videos look their best.
What’s New in Pinnacle Studio 25
Beginner Video Editing Techniques
Capture, Import and Export
Featured products
 Pinnacle Studio 26 Ultimate
 Studio Backlot Membership
 Pinnacle Studio 26
 Vision FX 2.0
How to Export Videos
In this tutorial, you’ll learn how to export a video project from your timeline to the file format, resolution, and frame rate of your choice. You’ll also learn how to export your video as a format specifically for social media sites such as YouTube, Box, or Vimeo.
When your video project is ready to be exported, click on the Export tab at the top.
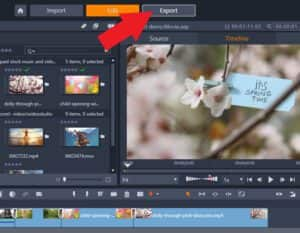
In the Preview pane on the right, you can click on the Play button to preview your video one last time before exporting.
In the Export Settings pane on the left, you can choose to export either to File or to Disc.
- Choosing the File option means you can create a new video file that you can view on your computer, upload to a website or transfer to a flash drive.
- Choosing the Disc option means you can burn your video or project onto a DVD or Blu-ray disc.
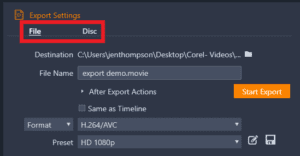
For this project, I want to export it to a new file so I’ll click on File.
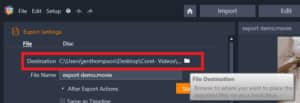
- Now under Destination, click on the folder icon to select the File Destination where you want to save the new exported file on your computer. Then change your File Name.
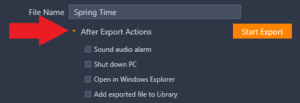
- Under this, there’s a drop-down arrow you can click beside After Export Actions.
- Select Sound Audio Alarm so an alarm alerts you when the export is finished.
- Select Shut Down PC to shut down your computer after the file finishes exporting which is especially useful if you are exporting a very large file.
- Select Open in Windows Explorer so the file will be ready for you to preview in the destination folder once it’s done exporting.
- Click Same as Timeline to export the file using the same settings used on the timeline.
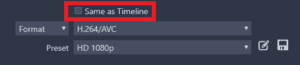
- If you want to view other output format options, uncheck Same as Timeline and select Format from the dropdown menu on the left.
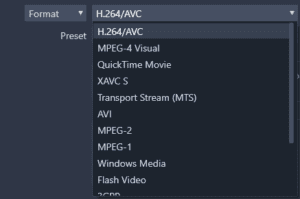
- Then click on the dropdown menu on the right to see all the different file formats to export as.
- Click Extension from the dropdown menu on the left to export as a specific file extension.
- Then click on the dropdown menu to the right and select which extension you want such as .mp4 or .avi.

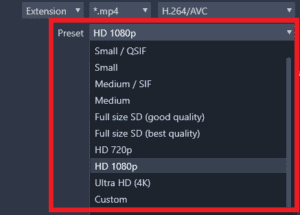
- Underneath, you can select a Preset which will determine the quality and size of the file such as HD or 4K.
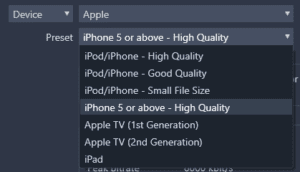
Under Device, you can export as a file for a specific device.
- if you select Apple under the Preset menu, you can select to export as a file to watch on your iPad or iPhone.
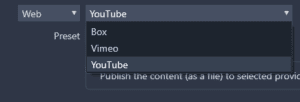
Select Web to export as a new file for YouTube, Vimeo or Box.
For this tutorial, I’m going to click on Format and select HD 1080p as my preset. After doing this, the video and audio specs will be locked in:
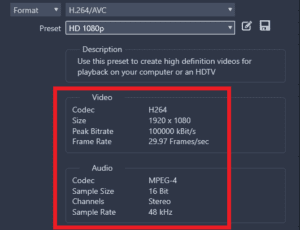
If you have specific export requirements, click on the Customize icon to the right. From here, you can change the video size, or make any other needed adjustments.
You can also save all your custom changes as a new preset by clicking this icon on the far right. You’ll be able to find this custom preset under the Preset dropdown menu.

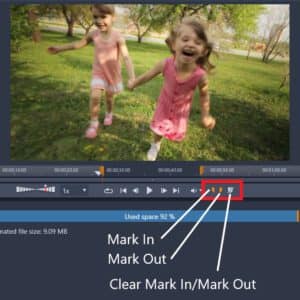
To export just a small portion of your video, go to the Preview pane, then drag the little playhead to a point in the video where you want the export to start.
- Click on the Mark In
- Now drag the playhead to an ending point and click the Mark Out
- If you click Start Export, it would only export this small section of video between the mark in and mark out markers to a new file.
- To export the entire video, make sure there are no marks set or click the Clear Mark In/Mark Out icon.
Once happy with your settings, click on Start Export to export your project as a new file.
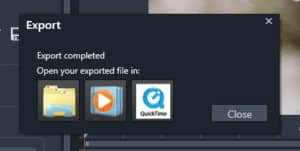
Once the file has exported, you can click to open your exported file in the file location in Windows Explorer, or preview it in Windows Media Player or with QuickTime.
And it’s just that easy to export your videos for any device or as any format you need!
Download a FREE 15-day trial and discover all the essential and advanced video editing features that Pinnacle Studio delivers to make your videos look their best.

Comments (2)
Reader Interactions
Comments
Me gustaria que me indicaran como puedo visionar los vidios en español
Hola Mercedes,
Para ver subtítulos en tu idioma:
– Haga clic en el ícono “Settings” en la esquina inferior derecha del reproductor de video.
– Haz clic en “Subtitles” y selecciona tu idioma.
– Si su idioma no aparece en la lista, haga clic en “English (auto-generated)”, luego haga clic en “Auto-translate” y seleccione su idioma.
Saludos
Discovery Center team