
Author DVDs with customizable themed menus, chapters, and music. Select your template and begin importing your finished videos. Set chapters, menus, customize music and more. Just ‘drag and drop’ and bring your videos to the big screens – giving your videos the professional polish and packaging they deserve.
Thanks for watching! We hope you found this tutorial helpful. You will find a written version of this tutorial below, and a printable PDF copy to download on the Download resources tab above.
Download these free resources:
Written tutorial (PDF, 688 KB)
Pinnacle Studio User Guide and Help Files
Studio Backlot
Pinnacle learning center
YouTube
Download a FREE 15-day trial and discover all the essential and advanced video editing features that Pinnacle Studio delivers to make your videos look their best.
What’s new in Pinnacle Studio
Beginner video editing techniques
Capture, import, and export
Featured products
 Pinnacle Studio 26 Ultimate
 Studio Backlot Membership
 Pinnacle Studio 26
 Vision FX 2.0
How to burn your movies to disc with MyDVD
MyDVD by Pinnacle is an easy disc-creation program that lets you turn your videos into professional-looking multimedia disc projects, complete with image-rich menus and music. In this tutorial we will review the workspace and show you the basics of creating a DVD project.
Click on any of the images below to view full-size.
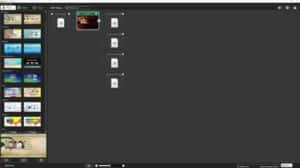
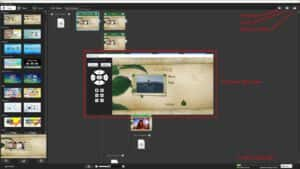
The MyDVD workspace
MyDVD has two different modes that let you organize (Tree mode) and edit (Menu Editor) your projects. In Tree mode, you can choose a theme and organize your media.
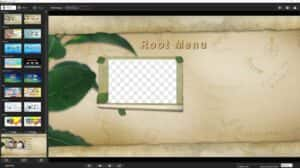
In Edit mode, you can reposition menu text, choose different music, and change the background imagery for the selected menu.
MyDVD lets you create and customize your project in a number of ways. The basic steps for creating a project are:
- Choose a template.
- Add submenus to organize your videos.
- Add media, renaming your content in Tree mode.
And with optional customizations you can:
- Add chapter points to videos (which is helpful for longer videos).
- Change the background picture used for the template.
- Edit the menu layout.
- Change the menu background music.
You can save your project in the .MyDVD file format so that you can work on it later, or output it to a different format.
How to set up the menu structure
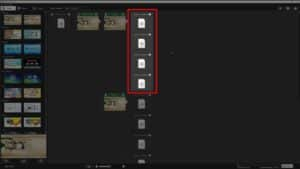
In this example project, we are creating a movie entitled Summer Vacation, which will be divided into submenus for different activities such as surfing, poolside and beach. Each submenu will have 3 video clips.
Select a template from the Theme tab, one that can accommodate the number of items you have per menu and submenu. In the example, the main menu template we are using can accommodate up to four items per menu – and submenus follow the same structure.
NOTE: Some templates accommodate a maximum of two items per menu, others accommodate three or four items. The number is predetermined, so choose a template that works for your content needs.
Click on the icon in the top right corner of the menu thumbnail to add a title for your main menu, and to add submenus. Do the same to add a title for each of the submenus you create.
NOTE: if you have more media clips that will fit into the menu structure, you can create an additional level of submenus.
Adding media and chapters
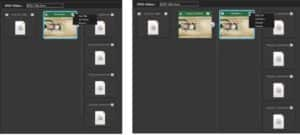
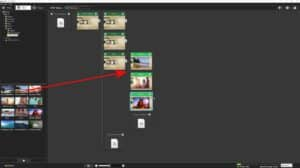
When your structure is set and you have named your menus and submenus, drag your media from the Media Browser on the left to a media placeholder in the menu structure, and rename it as you want.
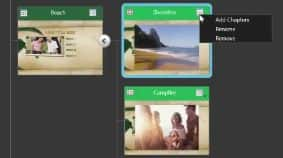
You can add chapters to individual media clips by clicking the dropdown box for the clip and choose Add Chapters.
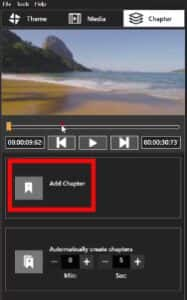
Then on the left panel, simply scrub to the location of the chapter, and click the Add Chapter button. This is useful for longer media clips, so viewers can easily skip ahead or backwards if they need to.
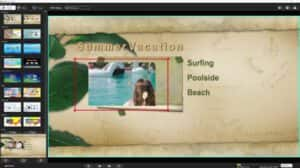
How to edit the menu template
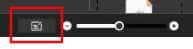
The theme can be edited with the Menu Editor. First click on the thumbnail of the menu you want to edit, then click the Menu Editor button down on the bottom toolbar (beside the slider).
To change the layout of the menu, click an object and drag it to a new position, or drag a corner of the selected object to resize it.
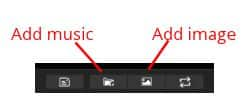
You can add background music with the Add Music button or change the background photo image with the Add Background button. When finished, click the Tree Mode button to return to the tree (these buttons can be found along the bottom of the MyDVD window).
Finalizing your DVD project
You can check the disc capacity for the project from the Project size bar at the bottom of the window and by checking the Disc size drop-down menu to the right of the bar.
To verify that the DVD is working as intended, we can use the Preview button.
When you are happy with your project, you can either save the project as an ISO file – this is a single file that functions like a disc. Or burn the project to a DVD – please ensure there is a writable disc in your disc drive.
Now that you have seen how easy it is to use MyDVD you can try it for yourself and create professional-looking multi-media disc projects.
Download a FREE 15-day trial and discover all the essential and advanced video editing features that Pinnacle Studio delivers to make your videos look their best.

Comments (1)
Reader Interactions
Comments
salom