In this tutorial, you’ll learn how to blur faces or objects to censor a video using two different motion tracking methods. The first method is ideal for a face or object that has a fairly consistent size or shape throughout the video clip. The second method is used for a face or object that changes in size or shape during the video, for example a license plate that grows in size as the vehicle approaches the camera.
Using motion tracking to censor a video is helpful if you want to publish a video that includes a child, but you don’t want to show their face, or if you don’t want to show sensitive information such as a license plate on a vehicle.
Thanks for watching! We hope you found this tutorial helpful and we would love to hear your feedback in the Comments section at the bottom of the page. You will find a written version of this tutorial below, and a printable PDF copy to download on the Download Resources tab above.
Download a FREE 30-day trial and turn your best moments and life experiences into unique movies with this easy and fun video editor packed with intuitive tools and creative effects.
Download these free resources:
Written tutorial (PDF, 603 KB)
Sample videos (Zip file, 26 MB)
To download the sample videos, click on the link to open, it’ll automatically be downloaded. Then right-click on the zip file and click “extract here”.
VideoStudio User Guides and Help files
For VideoStudio X9 to 2023, languages include English, Deutsch, Français, Italiano, Nederlands, 简体中文, 繁體中文, 日本語
Intermediate and Advanced Techniques
What’s New in VideoStudio
Overlays and Templates
Featured products
 VideoStudio Pro 2023
 Studio Backlot Membership
 VideoStudio Ultimate 2023
 Vision FX 2.0
How to Blur Faces or Objects in Videos
In this tutorial, you’ll learn how to blur or censor faces or objects in your videos using two different motion tracking methods. The first method is ideal for a subject or object that has a fairly consistent size and fixed shape throughout the video clip. The second method is used for a subject or object that changes in size or shape during the video, for example a license plate that grows in size as the vehicle approaches the camera.
Click on any of the images below to view full-size.
How to Blur Faces or Objects with a Fixed Size
In this first example, we will blur the face of a baby playing with his mum. In this clip, the baby remains at a constant distance from the camera, so the size of his face does not change.
Open VideoStudio with the Edit tab active and drag the video of the baby onto the Video track on your timeline. With your clip selected, click on the Track Motion icon on the toolbar.
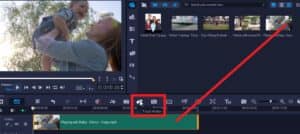
In the Track Motion dialog box:
- Drag the red tracker over the boy’s face.
- Click on Apply Mosaic and click on the arrow beside it to adjust the mosaic shape to either Rectangle or Circle.
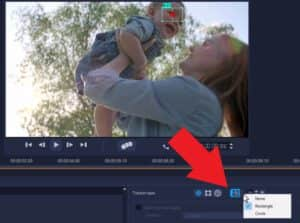
Click and drag the nodes on the preview pane to adjust the size manually to better cover the boy’s face with the circle. Then click the Track Motion icon.
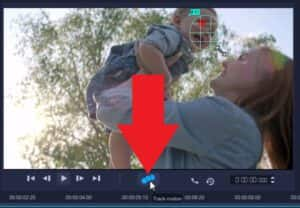
NOTE: You can increase or decrease the mosaic size. The lower the mosaic size, the more pixelated the effect will be, and the higher the mosaic size, the blurrier it will become.
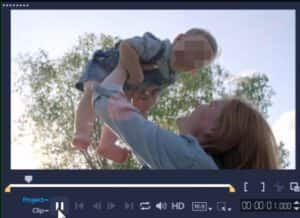
Once tracking is done, click OK. Press play to preview and see how easily we’ve blurred out the boy’s face throughout the video.
How to Blur Faces or Objects that Change in Size
This is a more advanced method using multi-point motion tracking which you would use to track objects that change in size or angle as they move closer to, or further from the camera.
In this example, we will use multi-point tracking to blur a license plate.
- With your clip selected on the Video track on the timeline, click the Track Motion icon on the toolbar.
- Under Tracker Type, select Set Multi-Point Tracker.
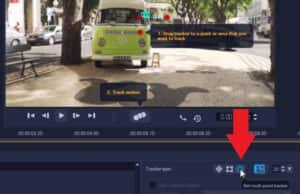
- On the preview pane, click and drag the tracker over top of the license plate.
- Click and drag on the nodes to adjust them so they fit exactly over the plate.
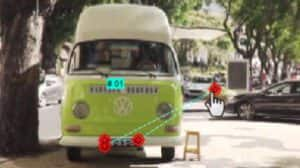
Note that the multi-point tracker automatically applies a mosaic blur. You can increase or decrease the size of the mosaic blur as we did in the previous example.
Click Track Motion and make sure to track the entire clip.
In the event one of the nodes comes off its original position while tracking the motion of your object or subject:
- Drag the scrubber back or click on the Previous Frame button until you find the point where the node begins to trail off.
- Re-adjust the nodes to get back to the original position.
- Then click Track Motion once again.
- Once you’re finished tracking, click OK.
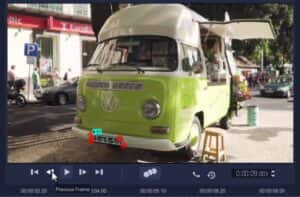
NOTE: You may have to do this a few times depending on the complexity of your video clip.
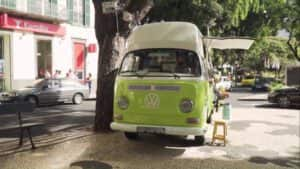
If you preview the video, you’ll see we’ve successfully blurred out the license plate so we can publish this video without worrying about sharing any private information!
Download a FREE 30-day trial and turn your best moments and life experiences into unique movies with this easy and fun video editor packed with intuitive tools and creative effects.

