
Learning how to use the print merge feature in CorelDRAW can save you a lot of time and effort when you are working on a project that incorporates data such as names, addresses, and other individualized information. For example, a batch of invitations with unique names and mailing addresses, a set of numbered room signs, or personalized certificates for a group of people. Rather than manually entering all of this information yourself, Print Merge will automatically create the number of copies that you need and enter each new piece of data on the individual pages.
NOTE: The print merge workflow was enhanced in the September 2023 Subscriber Update and now includes support for QR codes, images, and .xlsx data. To learn more, watch our tutorial on Creating variable data printing files.
Thanks for watching! You will find a written version of this tutorial below, and a printable PDF copy to download on the Download resources tab above.
Thanks for watching! We hope you found this tutorial helpful. You will find a written version of this tutorial below, and a printable PDF copy to download on the Download Resources tab above.
Start your FREE 15-day trial and embark on a design journey with powerful tools for vector illustration, layout, photo editing, typography, and collaboration.
Download these free resources:
Written Tutorial (PDF, 2 MB)
CorelDRAW Graphics Suite resources
Quick Start Guide (PDF, 2 MB)
Keyboard Shortcuts (PDF, 3.5 MB)
CorelDRAW and Corel PHOTO-PAINT user guides
For CorelDRAW Graphics Suite subscription and perpetual licenses (2018 to 2024), languages include English, Português do brasil, 简体中文, 繁體中文, Čeština, Deutsch, Español, Français, Italiano, 日本語, Polski, Русский
CorelDRAW Community
CorelDRAW learning center
Facebook
X (formerly Twitter)
YouTube
What’s new in CorelDRAW Graphics Suite
Importing, exporting and printing
Customization and automation
 CorelDRAW Graphics Suite
 Ultimate Vector Bundle Vol. 1
 CorelDRAW Standard 2021
 Ultimate Vector Bundle Vol. 2
 Corel Vector
Creating a certificate with Print Merge in CorelDRAW
By Daniel Paiz, CorelDRAW Master
Print Merge is a powerful tool that allows you to merge text from a data source with a document to produce personalized documents such as certificates, mailing lists, and targeted marketing documents. The Print Merge tool has been available in CorelDRAW for Windows for many years, and now we can explore and exploit it to the maximum in CorelDRAW for Macintosh.
In this tutorial, you will learn how to use the Print Merge tool to create customized certificates with personalized information like names, dates, and folios.
Before you start your project, here are a few things to consider:
- The Print Merge tool is included natively in CorelDRAW.
- It can work with two types of data: numbers or text.
- You can create the fields manually or automatically by importing a database.
- There are no restrictions on how many data fields you can have.
- You can create a single file with each variation on its own page, or new documents from the Print Merge tool automatically.
- Text fields act like any other text in terms of their justification settings, size, color, etc.
Now that that is covered, let’s start using this tool.
To demonstrate the Print Merge tool, we will be creating a customized certificate using the following fields:
- Name
- Course name
- Certificate number
- City
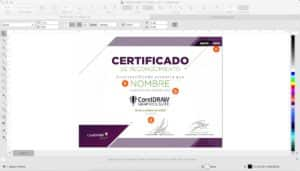
Setting up your design file
The first step will be to determine the design and location of the data fields in our certificate. Keep in mind that your document must be configured to the final print size; in this case we are using a half letter size (8.5×5.5”) with the 4 fields mentioned above.
Creating a text file for your data
Now that we have the design, let’s look at how to create the database file. You will need a basic text processor for Mac such as TextEdit.
CorelDRAW recognizes text that is separated by a comma (,) as different columns. For this certificate example you will need to set it up in the following way:
NAME, COURSE NAME, CITY
I recommend the first line of our text file has the names that we need the merge fields to have, so I left them as in the example and save as TEXT WITHOUT FORMAT (* .txt).
Next is to add the records, one per line with a comma (,) separating each field. As for the Certificate number, we are going to have the Print Merge feature automatically add those to the records.
George Slate, Basic Computers 101, Pomona
Merial Blade, Advanced Typing, Sicily
Once you have all the records created, save the file as plain text and then you can go ahead to Print Merge.

Merging data into your document
To merge our data into our certificate design, we go to File > Print Merge. This brings up the Print Merge dialog box.
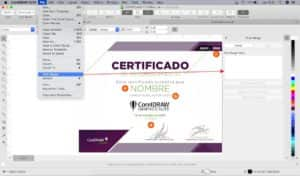
Click on the Create button in the dialog box and the Print Merge window will be displayed.
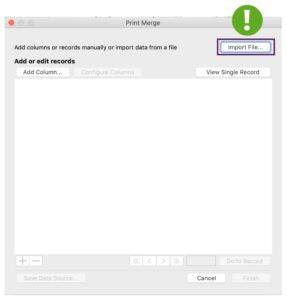
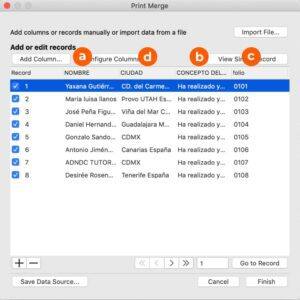
Here you can either create your records from scratch by entering the column headers and the data or by importing your records from a text-based file. To import your data, click the Import File button. Browse to the file that you have created. Importing your data will save you a lot of time so you can concentrate on the fun part – the creative design.
Once the file has been imported, you will see the fields and associated data.
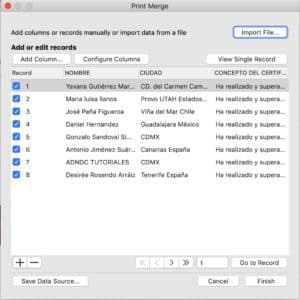
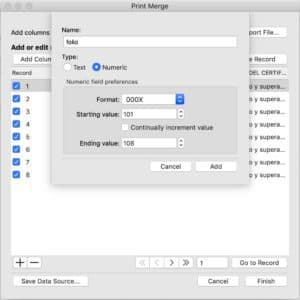
The next step is to add the Certificate Number field by clicking on the Add Column button. Select the Numeric type and set up the format that you want your data to be displayed in. Also, you can decide the Starting value (it can be whatever you want) and the final value. When you are ready click the Add button. Once this is done, you can disable any of the numbers created if necessary.
Once your fields are ready, click on the Finish button.
Formatting your document
You now see the list of fields that you created in the Print Merge dialog box. One by one you will select the fields and click on Insert Selected Field to place them into your document.

Once all the fields have been inserted, you can format the text just as you would any other text, by changing the color, font, and size to suit your needs.
If you have used placeholder text, before the print merge, you can use the attribute dropper to copy the text characteristics of the placeholders and apply them to the merge fields quickly.

Don’t forget that since they are text fields, they will expand depending on the amount of information contained, so in this case I am going to center align my text to prevent the content from spilling off the page.

Performing a print merge
Once you have completed the editing and placement of the fields, you have a couple of options.
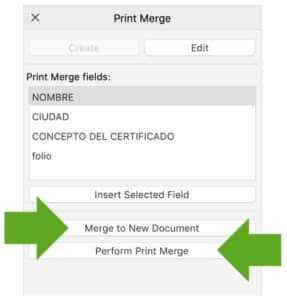
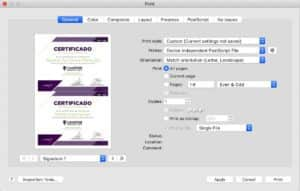
- Perform Print Merge will bring up the print dialog box, allowing you to set your printing preferences and print.
- Merge to New Document will create a new CorelDRAW document containing the certificates, 1 on each page, which you can then save as .CDR file or any other format that you may need. I highly recommend this choice because you can easily view each certificate and make edits as needed before printing.
Working with large files
In this exercise we have no problem merging into a new document because it is only a few pages, but what if we had 500 or 1000 certificates? The file could become uncontrollably heavy. In such a case, I recommend that you move the elements of the design to a Master Layer and leave only the fields if possible, before merging to a new document. This will ensure that the content is repeated throughout the document but does not add additional weight to the file.
The print merge process may seem tedious the first time, but in reality, it is something that with a little practice can be finished in a couple of minutes. You can also import the database directly from Excel if it is saved in a CSV format and CorelDRAW will recognize each column as a merge field.
The more you learn about the tools available to you, the more processes you will be able to automate. Leaving you free to focus on the design, which is what we do best.
Start your FREE 15-day trial and embark on a design journey with powerful tools for vector illustration, layout, photo editing, typography, and collaboration.
