Learn how to work with projected drawings in Corel DESIGNER. This video will demonstrate how to draw in Parallel Perspective in order to create objects with a 3D appearance.
Thanks for watching! We hope you found this tutorial helpful. You will find a written version of this tutorial below, and a printable PDF copy to download on the Download resources tab above.
Download your FREE 15-day trial and expand what’s possible in visual communication with this comprehensive collection of software for high-impact technical design and documentation.
Download these free resources:
Written tutorial (PDF, 578 KB)
CorelDRAW Technical Suite resources
Corel DESIGNER User Guide (PDF, 22 MB)
CorelDRAW User Guide (PDF, 28 MB)
PHOTO-PAINT User Guide (PDF, 26 MB)
Technical graphics tutorials
What’s new in CorelDRAW Graphics Suite
 CorelDRAW Technical Suite
 Ultimate Vector Bundle Vol. 1
 CorelDRAW Graphics Suite
 Ultimate Vector Bundle Vol. 2
Drawing in Parallel Perspective
This tutorial provides an introduction to drawing in Parallel Perspective in Corel DESIGNER, so that you can easily create objects with a 3D appearance.
Click on any of the images below to view full-size.
Perspective drawing – the basics
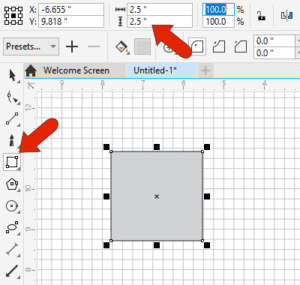
To demonstrate the difference between 2D drawing and parallel perspective drawing, go to View > Grid > Document Grid. The default drawing mode is Orthographic, or 2D, and the grid is the familiar square blocks. When you activate the Rectangle tool and draw a rectangle, it is a 2D rectangle in orthographic view. And when you assign dimensions in the Transform toolbar (View > Toolbars > Transform), equal X and Y dimensions will produce a square.
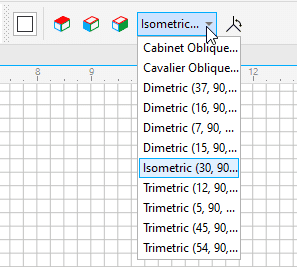
To switch to parallel perspective drawing, we’ll be using the red Top, blue Front, and green Right icons in the Drawing Planes toolbar (View > Toolbars > Drawing Planes). The default drawing profile is the commonly used Isometric, but you could switch to other preset profiles including several Dimetric and Trimetric, or you can create and save your own profile.
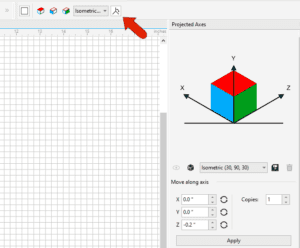
Clicking the Projected Axes docker icon opens that docker, which has the same options as the Drawing Planes toolbar as well as some additional features.
We’ll now draw a box in parallel perspective.
To draw the left, or front, side of the box, click the blue front plane, either on the toolbar or in the docker. The document grid updates to reflect this plane, and when you create a rectangle and set its dimensions, the rectangle adheres to this plane at the correct size.
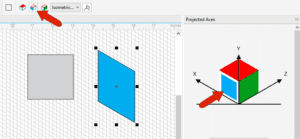
If you return to Orthographic view by clicking the Orthographic icon in the Drawing Planes toolbar, or by clicking away from the cube in the Projected Axes docker, the dimensions of the rectangle update to reflect the size of its bounding box in 2D.
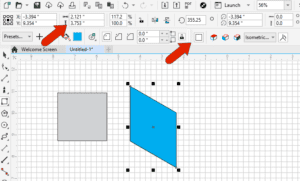
To continue with the right size of the box, click the green plane, and start a new rectangle at the lower right corner of the first rectangle. To match the height, you could enter a value in the Transform toolbar, or you can hover over a corner node whose position you want to reference (the top right corner of the first rectangle), and use the dotted guideline to set the rectangle height.
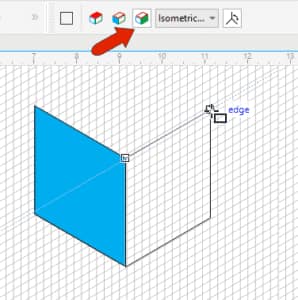
To complete the box, switch to the top plane and fit the rectangle to its opposite corners.
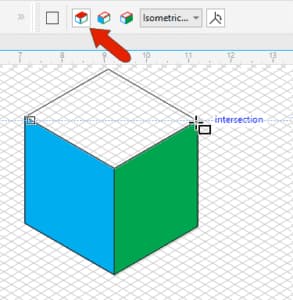
And to clear the display, turn off the document grid (under the View > Grid menu).
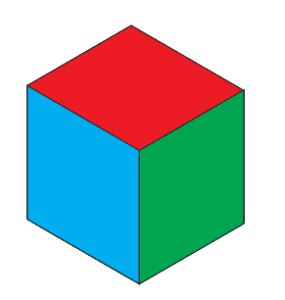
Projecting 2D objects onto a 3D plane
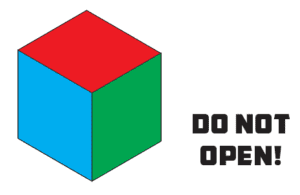
Objects drawn in 2D can be projected onto any of the three planes. In this example, the view is Orthographic, and there is a text object that is to be placed on the right side of the box.
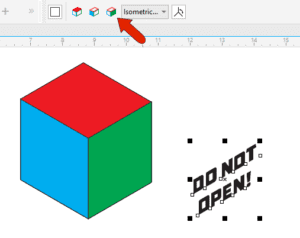
Select the text with the Pick tool, and while holding the Shift key, click the green plane in the toolbar or docker.
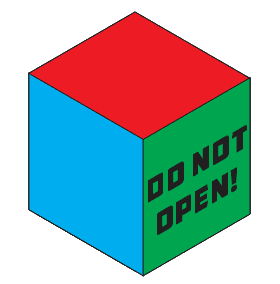
Now that the text is projected onto the correct plane, you can move it into place.
Drawing in perspective
Activate the 2-point line tool and set the green plane for drawing. As you add line segments, when you move the mouse, guidelines appear so that you can follow the orientation of the plane you’re drawing in.
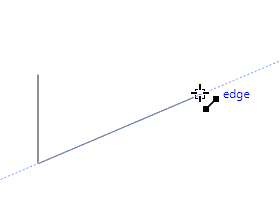
As we saw earlier, you can reference other nodes by hovering over them first. Locating the intersection of guidelines makes it easy to find the exact point you need.
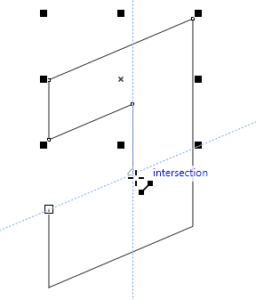
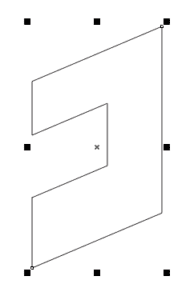
This is the front of the object, and the back will be along the X axis.
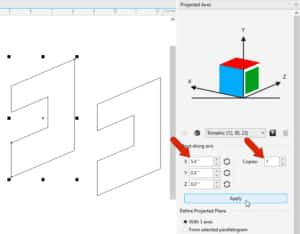
With the object selected, in the Move along axis section of the docker set the copy distance along X, set the number of Copies to 1, and click Apply.
Now you can connect the two objects by adding lines between corner nodes. This is how the solid object would look in wireframe view.
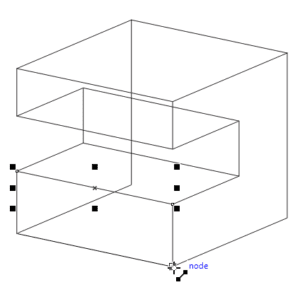
To get the appearance of a solid object, you can use the Virtual Segment Delete tool to remove segments of lines that wouldn’t be visible in a solid.
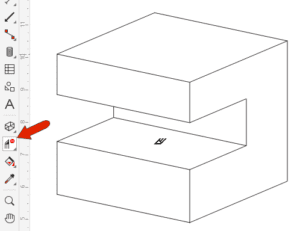
To learn more, watch the tutorial How to Use the Virtual Segment Delete Tool.
You can then use the Smart Fill tool to fill in the curves.
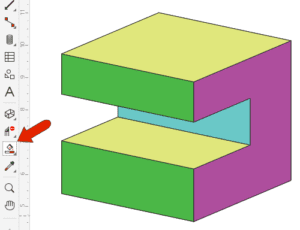
Thick and thin lines
A common technique in classic technical illustration is to assign thick lines to outer edges and thin lines to inner edges. Think of a worm crawling around an object – everywhere the worm would disappear from view should have a thick edge.
The properties of these two types of edges are set in the Object Styles docker.
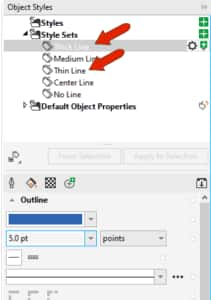
Objects including lines and curves, rectangles, circles, ellipses, and the tools in the Thread tool group, support thick and thin lines.
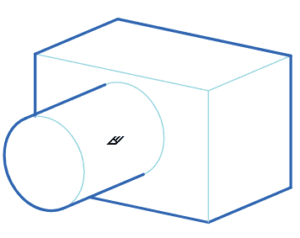
We’ll draw a simple object to demonstrate how to use thick and thin lines.
1. With the Rectangle tool, draw a rectangle in the red (top) plane and click the Thick and thin lines icon in the property bar.
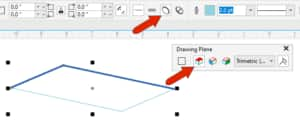
This rectangle will be the bottom of the box, so the thick lines should be in front. To switch thick and thin, click the Reverse line width icon.
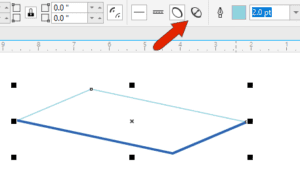
NOTE: If you were to assign a fill color to the rectangle, the thick and thin lines will disappear, so leave the rectangle unfilled.
2. Use the Projected Axes docker to make one copy of this rectangle 5.0” in the Y direction and switch thick and thin since the back edges will be the outside edges. This will be the top of the box.
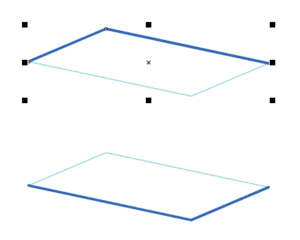
3. Use the 2-point line tool to draw the connecting lines to complete the box. The two outer lines should be thick. You can either use the Reverse line width icon for a selected line, or go back to the Object Styles docker, and apply the style you want to the selected object.
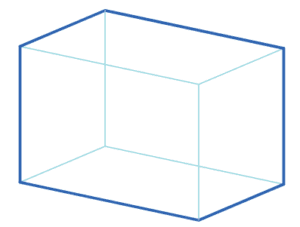
4. To add a new object to the front of the box, activate the blue front plane and use the Circle tool to draw a circle.
5. Use the Projected Axes docker to make one copy of the circle, -5.0” in the Z direction.
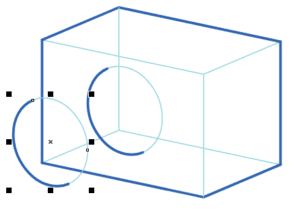
6. Use the 2-point line tool to draw lines that connect the two circles between the points where thick and thin meet. Make these new lines thick.
7. Use the Virtual Segment Delete tool to delete all unseen segments.
Download your FREE 15-day trial and expand what’s possible in visual communication with this comprehensive collection of software for high-impact technical design and documentation.

