High Dynamic Range (HDR) photography is a technique that combines different exposure settings to create unique and truly stunning photos. Usually you would need to combine 3 different versions of the same photo in order to create an HDR effect but with this tutorial we will show you how you can achieve the same look with just one photo, using PaintShop Pro.
Thanks for watching! We hope you found this tutorial helpful. You will find a written version of this tutorial below, and a printable PDF copy to download on the Download Resources tab above.
Download your FREE 30-day trial and make every shot your best shot with PaintShop Pro, your all-in-one photo editing and design software.
Download these free resources:
Written tutorial (PDF, 537 KB)
PaintShop Pro resources
Keyboard shortcuts (PDF, 173 KB)
PaintShop Pro User Guides
Partner and User websites
PaintShop Pro User Forum
Scrapbook Campus (Tips and tricks, workshops, master classes, and more)
Creation Cassel (Scripts, picture tubes, and other PaintShop Pro tools, plus weekly freebies)
PaintShop Pro Maniacs (Facebook group)
PaintShop Pro (Facebook group)
What’s new in PaintShop Pro
HDR photo editing
Photo effects
Featured products
 PaintShop Pro 2023 Ultimate
 AI HDR Studio 3.0
 PaintShop Pro 2023
 Vision FX 2.0
How to create an HDR effect
In this tutorial I’m going to demonstrate how you can bring out the brilliance of your photos using a technique I like to call Single Shot HDR.

Now, if you’ve seen our tutorial on HDR Photo Merge you’ll probably remember that the idea behind an HDR merge is that you can combine three similar photos, each shot with different exposure settings, and combine them to get one “Super” photo.
Today we’ll learn a similar process, but I’ll take you through the extra steps needed to use this technique on images where only one photo was taken of the scene. If you’ve ever shot photos of scenes outdoors and moving objects, people or animals, you know the image changes in a fraction of a second so you simply don’t have the time to take the three shots needed for a usual HDR photo.

In this scenario you ideally want to have your camera set to a medium exposure or simply use the automatic mode.
Let’s take this image as an example. It’s a decent photo. You can get a good idea of what kind of day it was, the colors of sky are visible, the foreground isn’t too dark or overexposed either. It’s average, but we want to make it outstanding.
So first of all, let’s save a copy of this file on the desktop and I’ll call it “Medium”.

I always like to save copies of files when working on projects like this so as to make sure that nothing touches the originals. You always want to have those raw files backed up.
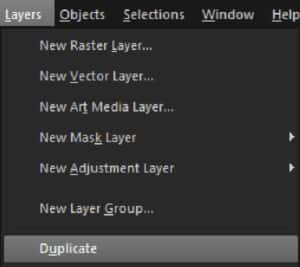
Next thing I’m going to do is create a version of this photo that looks like it’s under exposed. So to do that, right-click on the background layer in the Layers palette or click on the Layers menu at the top of the screen, and select Duplicate.

Set the Duplicate layer to Multiply in the Blend Mode dropdown list. This darkens the image and creates a stunning contrast.

Go to File > Save As and name this file “Dark”.

Now we’re going to create an over-exposed image so simply go back to the Blend Mode and change it back to Normal.
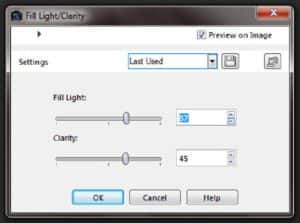
Next, from the Adjust menu, select Brightness and Contrast and then Fill Light/ Clarity.

As you increase these numbers, more light will be placed on the foreground subjects of your image. If the image looks a little washed out you can tweak it by going back to the Adjust menu, selecting Brightness and Contrast and then Brightness/Contrast and increasing these values as well.
Next, save this copy as “Light”

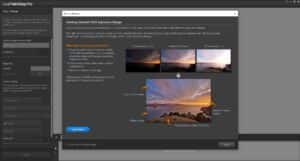
From the File menu select HDR and then Exposure Merge. This will launch the Merge application in a separate window. If this is the first time you’ve used HDR Merge, the Getting Started Window will pop up and provide a brief overview of how to use the feature.

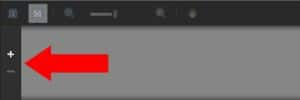
If the Merge application has loaded photos you don’t want you use, you can remove them from the tray by selecting them and then clicking the minus sign. To add photos, click on the plus sign and then browse to the folder containing your images.

To import multiple photos at once, hold the CTRL key down on the keyboard while selecting the images, then click Open. The image thumbnails will appear at the bottom of the screen in the tray.
Usually at this point you would align the photos, and you can do this if you like but it shouldn’t actually make a difference since these are all duplicate images. To begin the merge, click Process in the bottom left corner of the screen.
When the processing is complete the HDR Adjustment window will pop up and display a large version of the merged photo on the right, and thumbnails of various presets on the left, which you can use to give touch up the image.
When the image looks just right, click the process button to complete the merge. At this point you will be presented with an even larger variety of options to continue further touch-ups. After you’re finished up here just save the file and you’re done.
Let’s take a look at the before and after.

So as you can see, this technique can make a huge difference, even if you’re using only a single photo.
Download your FREE 30-day trial and make every shot your best shot with PaintShop Pro, your all-in-one photo editing and design software.


Comments (2)
Reader Interactions
Comments
Can this be done starting with a tiff file?
Hi Richard, yes you can use a TIFF file.
Best regards,
The Discovery Center team