Capturing images of people or objects in motion can be difficult. And even if you manage to get a great shot it often doesn’t have the sense of speed and movement you want to convey. This tutorial will show you how to create the illusion of high speed in your photos, using a motion blur effect with PaintShop Pro. In just a few easy steps you can transform your photos from static and flat to truly sensational.
Download a PDF copy of this tutorial and follow along with the video to create your own motion blur effect.
Thanks for watching! We hope you found this tutorial helpful and we would love to hear your feedback in the Comments section at the bottom of the page. You will find a written version of this tutorial below, and a printable PDF copy to download on the Download Resources tab above.
Download your FREE 30-day trial and make every shot your best shot with PaintShop Pro, your all-in-one photo editing and design software.
Download these free resources:
Written Tutorial (PDF, 544 KB)
PaintShop Pro resources
Keyboard shortcuts (PDF, 173 KB)
PaintShop Pro User Guides
Partner and User websites
PaintShop Pro User Forum
Scrapbook Campus (Tips and tricks, workshops, master classes, and more)
Creation Cassel (Scripts, picture tubes, and other PaintShop Pro tools, plus weekly freebies)
PaintShop Pro Maniacs (Facebook group)
PaintShop Pro (Facebook group)
What’s New in PaintShop Pro
Artistic Tools and Projects
Adding Effects
Featured products
 PaintShop Pro 2023 Ultimate
 AI HDR Studio 3.0
 PaintShop Pro 2023
 Vision FX 2.0
How to Add a Motion Blur Effect to your Photos
Your athletes deserve to be at the head of the pack, not left in the dust! This PaintShop Pro tutorial will show you how to add a motion blur effect to give the illusion of speed and movement in your photos.

It can be such a challenge to show off athletes in photos. Their blazing speed, power, and intensity just doesn’t come across. Thankfully you’ve come to the right place. Today I’m going to show you how to make your athlete look like a gold-medal winner with motion effects in Corel PaintShop Pro.
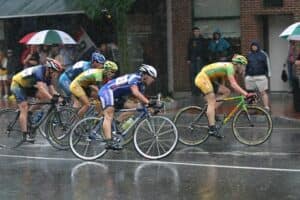
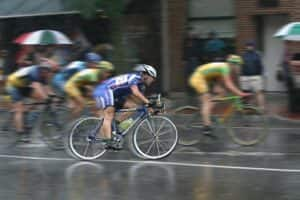
The first thing you’re going to need is an image where your subject at least appears to be moving in some capacity. Preferably this shot will be from a side view. In this example, this bicycle race has one particular cyclist I want to showcase. I’m going to make him appear to be moving way faster than anybody else.
My first step is making a copy of the background. Right-click on the Background layer and select Duplicate.
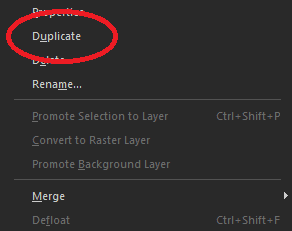
Now if you don’t see the Layers palette open on the right side of your screen, simply hit the F8 key on your keyboard and it will pop up.

This extra layer we’re creating isn’t going to be used yet – but we’ll save it for later. Just click Visibility toggle ![]() to hide it from view and then select the Background layer.
to hide it from view and then select the Background layer.
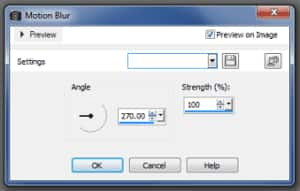
Now that we have our background ready to go so now let’s transform our image. From the Adjust menu select Blur > Motion Blur.

Set the Angle to 270 degrees and the Strength to 100%. Depending on the size of your image, you might have to repeat that step a few times to get the effect you want. In this case I’ll do it one more time.
Next, hide the Background layer and select the Duplicate layer. This layer we want to keep un-blurred. Select your subject and carefully remove the background. You can do this with any tools you see fit; Selection tool, Eraser or Background Eraser would be the most common options.
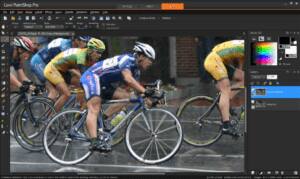
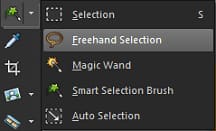
In this case, I traced around the subject with the Freehand Selection tool.
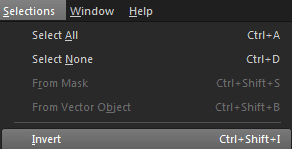
Next, go to Selections > Invert and then click the Delete key on your keyboard to remove the background.
Our cyclist is now clear of the background.
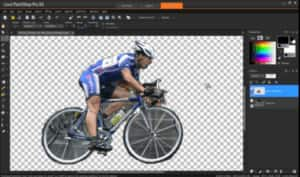
The background removal is pretty much done; simply use the Eraser tool to touch up the edges. Set the Hardness to 0, to create a nice smooth edge.

We’re basically done! Go back to the Layers palette and click the Visibility icon. You can check the background to make sure it’s blending in with your subject. Any final touch ups you can do with the Eraser. To make the back blend a little more you can also use the Push brush.
Download your FREE 30-day trial and make every shot your best shot with PaintShop Pro, your all-in-one photo editing and design software.

