PaintShop Pro is full of amazing effects features that cannot be duplicated by a camera. Selective Focus is one of them. With Selective Focus, you can create a quick miniature effect, also known as tilt-shift, so that the scene in a photo resembles a miniature model or toy.
In this tutorial, you will learn how to create this miniature object effect quickly and easily, and it’ll be fun!
Thanks for watching! You will find a written version of this tutorial below, and a printable PDF copy to download on the Download resources tab above.
Download your FREE 30-day trial and make every shot your best shot with PaintShop Pro, your all-in-one photo editing and design software.
Download these free resources:
Written Tutorial and Sample Images (Zip, 6 MB)
PaintShop Pro resources
Keyboard shortcuts (PDF, 173 KB)
PaintShop Pro User Guides
Partner and User websites
PaintShop Pro User Forum
Scrapbook Campus (Tips and tricks, workshops, master classes, and more)
Creation Cassel (Scripts, picture tubes, and other PaintShop Pro tools, plus weekly freebies)
PaintShop Pro Maniacs (Facebook group)
PaintShop Pro (Facebook group)
What’s new in PaintShop Pro
Artistic tools and projects
Adding effects
Featured products
 PaintShop Pro 2023 Ultimate
 AI HDR Studio 3.0
 PaintShop Pro 2023
 Vision FX 2.0
Using Selective Focus to create a tilt-shift effect
PaintShop Pro is full of amazing effects features that cannot be duplicated by a camera. Selective Focus is one of them. In this tutorial, you’ll learn how to use the Selective Focus feature to create a miniature object effect, known as tilt-shift, so that the scene in a photo can, among other results, resemble a miniature model or toy.
First, remember to use your Navigator window to easily access all your photos without having to leave PaintShop Pro.
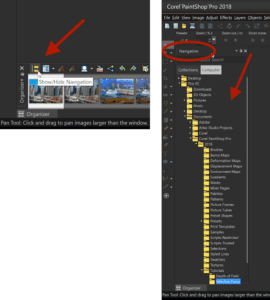
Open a photo into the Edit tab, as shown by the tab at the top of your window.

Here is my example of a city scene that I will be working with:

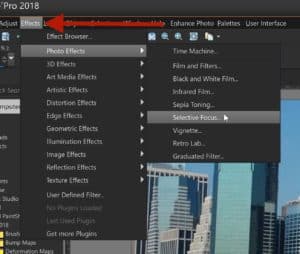
Go to Effects > Photo Effects > Selective Focus
You should see a Before window (left) and an After window (right). Both may look the same or the After window may already have some effects applied to it. The controls for Selective Focus are in the upper right.
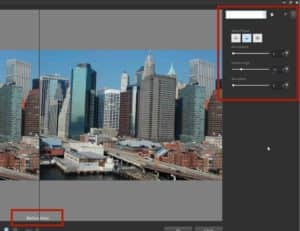
Starting with the three Area of focus icons, pause your cursor over each one to see their names (tool tip). The choices include:
- the Planar Selection tool, which lets you control focus in both the upper and lower areas of your photo;
- the Half Planar Selection tool, which effects either the upper or lower half of what the previous tool does; and
- the Radial Selection tool, which creates a circular area of focus rather than a rectangular one.
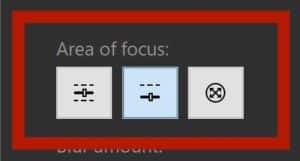
Half Planar Selection tool
Select the Half Planar Selection tool (middle tool). For now, move all the three sliders below it all the way to the left.
In the After window, you should see a horizontal line stretching the length of your window., which is then bisected by a short vertical line with a small node on top.
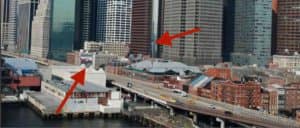
The horizontal line represents the division between clear and blurry. (clear below it, blurry above it). The length of the vertical line denotes the extent of the feathered portion of your focus, while the node at the top is used to adjust rotation of your horizontal line of focus. Pausing your cursor over the node will change your cursor to the rotate indicator. Click and pull to the right to rotate clockwise. Pull to the left to rotate counter clockwise.
You can move the entire selection area by grabbing anywhere below the horizontal line and moving it around.
Let’s now set some effects.
Set the Blur to 10, using either the slider and/or entering/adjusting a numerical value.
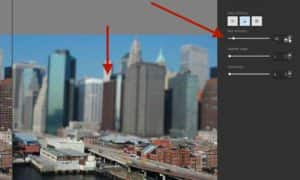
Move the Feather edge slider to 15
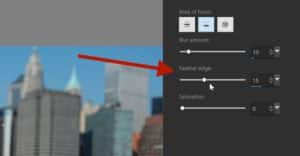
After setting Feather edge, you’ll see a new node near the center of the After window. That’s the manual Feather edge adjustment node. You can grab it and move it up and down to increase or decrease the Feather edge. This method might be easier to see the results.
Next, grab the node atop the small vertical line and move it gently to the right (I’m using it to line up my selection with the roadway). This will rotate your selection clock-wise. Click anywhere below the horizontal line and move the entire selection up a bit.
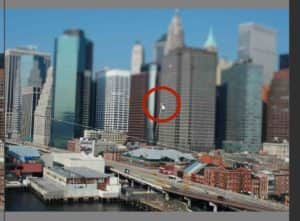
Adjust the Saturation value to around 50.
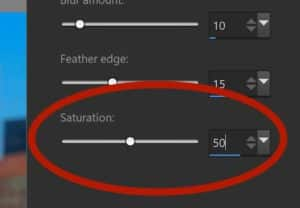
Click OK to return to the main window and view your results.

Click Undo, the Redo to see your dramatic changes.
Planar Selection tool
Let’s try the full Planar Selection tool. I’ll use this photo of a cruise ship at dock. Go to Effects > Photo Effects > Selective Focus window.
Click the Planar Selection icon (far left) under Area of focus.
Click the Reset to Default icon in the upper right to reset the planar location and settings.
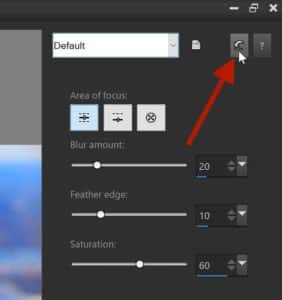
In the After window, you’ll now have 5 horizontal lines (by grabbing the middle of your selection, move the entire selection up if you don’t see all 5 lines).
The middle line denotes the center of your selection. The lines directly above and below that denote the extent of your selection that will be clear. The outer two lines denote the area of gradual feathering. You also still have the rotate node on the end of the small vertical line near the center.
Any of these lines can be repositioned using the nodes in the center of each line. Only the outer most lines can be numerically adjusted (Feather edge).
I’ll widen these lines enough to get an effect that looks good for this photo. In this case I want the cruise ship to be in a clear area, as you can see in the screenshot below.
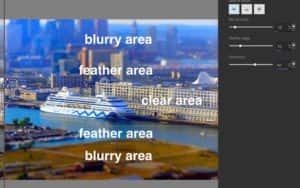
Rotate the selection so it lines up with the dock.
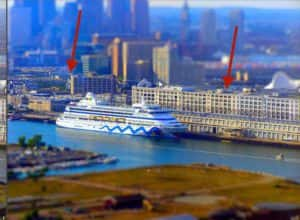
Set Blur to 10
Set Feather edge to 10
Set Saturation to 60
Click OK to return to the main window and see the results. Again, you can click Undo and Redo to see the differences.

Radial Selection tool
Choose a photo where you desire the area of clarity to be either curved or in the center of your photo.

Return to the Selective Focus window.
Click the Reset to Default icon in the upper right.
Select the Radial Selection tool.
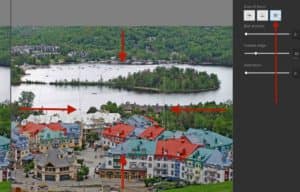
The control lines have turned to circles, but still work the same way.
- Move the entire selection by grabbing within the center circle.
- Grab any of the four nodes around the circle to skew the selection.
- Grab any of the four nodes in the corners of the square to resize the selection.
- Grab the node at the top of the short vertical bar in the very center to rotate the selection.
Use the Feather edge slider to adjust the feather area represented by the circle inside the square and the far outside circle. Depending on the current feather edge, the outer circle may be out of view. Either move your selection and/or lower the slider setting to see it.
Use a combination of all these nodes and settings to size and place your selection.
- Set Blur to 10
- Set Feather edge to 10
- Set Saturation to 75
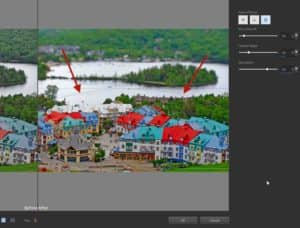
When you are pleased with your settings, click OK.

The Selective Focus settings I’ve shown in each of the photos do NOT need to be done in the order I’ve shown. You can adjust any settings in any order you like. You can easily set your blur, feather and saturation sliders first and then position them in the photo afterwards.
Note: Once you’re back in the main window, if you want to make changes to this effect or redo the effect over again, it’s best to first undo (Ctrl + Z) the entire effect from the main Edit window, otherwise you’ll apply a second effect over the previous effect when returning to the Selective Focus window.
Download your FREE 30-day trial and make every shot your best shot with PaintShop Pro, your all-in-one photo editing and design software.

