The colors of Fall provide some incredible landscapes and photo opportunities. But sometimes those photos could use a little improvement to fix some common photography issues. In this tutorial we’ll cover some of PaintShop Pro’s best tools for enhancing your Fall photos, including:
- How to straighten and crop photos.
- Removing imperfections and unwanted objects.
- Adjusting color and lighting.
- Adding effects.
Thanks for watching! You will find a written version of this tutorial below, and a printable PDF copy to download on the Download resources tab above.
Download your FREE 30-day trial and make every shot your best shot with PaintShop Pro, your all-in-one photo editing and design software.
Download these free resources:
Written tutorial (PDF, 1.8 MB)
PaintShop Pro resources
Keyboard shortcuts (PDF, 173 KB)
PaintShop Pro User Guides
Partner and User websites
PaintShop Pro User Forum
Scrapbook Campus (Tips and tricks, workshops, master classes, and more)
Creation Cassel (Scripts, picture tubes, and other PaintShop Pro tools, plus weekly freebies)
PaintShop Pro Maniacs (Facebook group)
PaintShop Pro (Facebook group)
What’s new in PaintShop Pro
Holiday project tutorials
Artistic tools and projects
Featured products
 PaintShop Pro 2023 Ultimate
 AI HDR Studio 3.0
 PaintShop Pro 2023
 Vision FX 2.0
Enhancing Fall photos in PaintShop Pro
Fall is a beautiful season full of stunning landscapes and colorful photo opportunities, but you may not have the time or photography knowledge to set up each shot perfectly. Here are 6 tips to fix some common photography issues and enhance Fall photos to make them look more professional.
Tip #1: Straighten your photo
Before you start adjusting or adding effects, it’s important to have a good base photo. If your photo is crooked, it really takes away from what could be a professional-looking shot. Luckily, it’s easy to straighten photographs in PaintShop Pro.
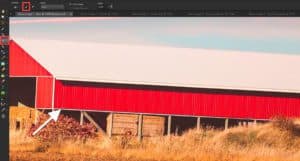
- Select the Straighten tool from the Tools toolbar on the left.
- A straightening bar with end handles will pop up on the image.
- Drag each handle of the straightening bar to align it with a horizontal reference. In this case, the walls or roof of the barn are good references to use.
- Click the Apply icon (check mark) to apply the changes.
Tip #2: Crop your photo
Another important step to get a good base photo is cropping. You can crop out any unwanted objects or people at the edges of your photo, but you can also use cropping to improve the overall image composition.
- Select the Crop tool from the Tools toolbar on the left and the crop rectangle will appear on the image.
- If you want a standard photo size, select from the Presets dropdown list on the Tool Options palette or on the floating toolbar at the bottom of the crop rectangle.
- Drag one of the corner boxes to resize or use the handle in the center to reposition the crop rectangle. If you have selected one of the presets, the aspect ratio will be automatically maintained.
- You can also select Free Form and enter your own custom width and height dimensions on the Tool Options. If you want to maintain the aspect ratio, you will need to check this option on the Tool Options palette.
- Click the green check mark to apply the crop to the current image or select Crop as New Image to preserve your original image.
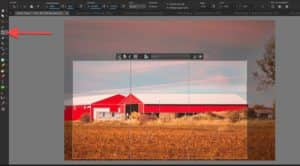
You can also use a composition guide such as the Rule of Thirds grid to improve the image composition. As a general rule of composition, horizons should align with a horizontal grid line and important objects or subjects at one of the horizontal or vertical intersections.
On the Crop toolbar you can click on the Composition Guide button to toggle it on or off and choose a guide such as Rule of Thirds from the dropdown list.

Tip #3: Remove imperfections and unwanted objects
With PaintShop Pro it’s easy to make touch ups to your photos, whether it’s removing a small blemish from a portrait or an unwanted object that you couldn’t crop out. The Blemish Fixer is a great tool for small touch ups.
- Click the drop-down arrow next to the Red Eye icon and select Makeover.
- Select the Blemish Fixer on the Tool Options palette. Your cursor will change to a crosshair symbol with an inner and outer circle. The Blemish Fixer samples color and texture from the outer circle and uses it to cover the inner circle area.
- Adjust the brush size so that the blemish fits just inside the inner circle. You can adjust the brush size in the Size box on the Tool Options palette, or by dragging your mouse with the Alt key held down.
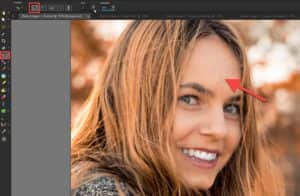
- Place your cursor over the blemish, click, and the blemish will be covered.
For larger objects that need to be removed, you can use the Magic Fill tool. In this example we want to remove the sewer drain and “STOP” lettering from the street. Click the Selection tool on the left toolbar, then click and drag to create a selection around the object you want to remove.
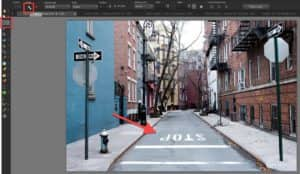
- Then click on the Magic Fill icon on the Tool Options palette and the selection area will be filled with color and texture sampled from adjacent areas in the photo.
- Repeat this process as necessary to remove other unwanted objects from your photograph.

Tip #4: Adjust the lighting
Another common issue with Fall photos is the lighting. If it’s a rainy or cloudy day, your photos may end up looking too dark. Plus, the daylight hours are shorter and the sun isn’t as high in the sky.
There are several ways to adjust the lighting in PaintShop Pro.
- Under the Adjust menu, use One Step Photo Fix or Smart Photo Fix to automatically adjust the brightness and saturation.
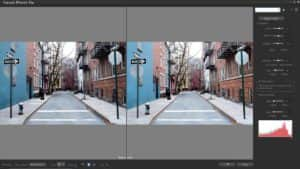
For photos that are too dark, go to Adjust > Fill Flash and adjust the settings to your liking.
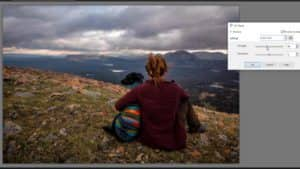
- Or try Adjust > Brightness and Contrast > Fill Light and Clarity and make adjustments to make your photo brighter and crisper.
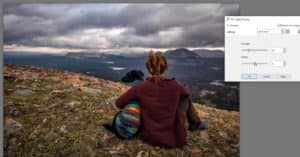
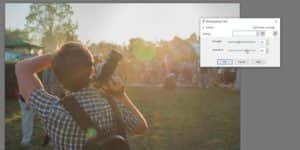
For photos that are too light or washed out, go to Adjust > Backlighting and play around with these settings until you’re happy with the result.
Tip #5: Adjust the color
There are also many ways to adjust color in PaintShop Pro, here are the two most common and easy methods.
1. Click on Adjust > White Balance and adjust the Temperature slider to your liking. In addition to fixing color issues, the white balance setting can be used to alter the mood of an image by making it warmer or cooler.
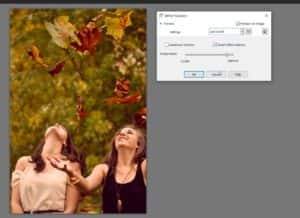
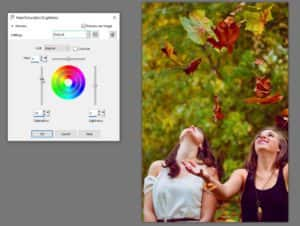
2. Click on Adjust > Hue and Saturation > Hue/Saturation/Lightness. Adjust the Saturation slider to make your photos more vibrant and colorful – just don’t go too far!
Tip #6: Adding effects
PaintShop Pro has a wide variety of effects to choose from. Here are a few of our favorites.
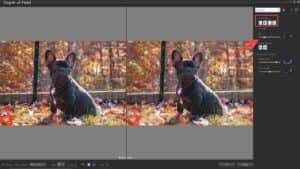
Depth of Field is used to create an area of focus that draws attention to a subject or object in your photo.
- Go to Adjust > Depth of Field
- Choose a Selection tool (circular, rectangular or freehand) and drag to create an area of focus around an object or area of your photo.
- Use the Blur Intensity slider to adjust the amount of blur applied to the area outside the selection.
- Use the Feather Edge slider to adjust the transition between the area of focus and blurred background.
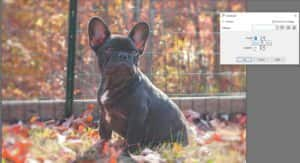
PaintShop Pro has a number of photo and artistic Effects to choose from. For example, try Effects > Art Media Effects and choose an effect such as Charcoal.
Then adjust the settings or use one of the presets from the dropdown menu to transform your photograph.
Plus there are the Instant Effects you can experiment with, including new AI styles in PaintShop Pro 2021.
- Go to Palettes > Instant Effects.
- Select a category, such as AI-Powered, from the dropdown list and browse through the variety of effects available.
- Click once on an effect to see how it looks in the preview pane.

- Adjust the Strength slider to your liking and then double-click on the effect to apply it to your photo.
These are just a few of the many ways you can edit your Fall photos before sharing them with your friends and family!
Download your FREE 30-day trial and make every shot your best shot with PaintShop Pro, your all-in-one photo editing and design software.

