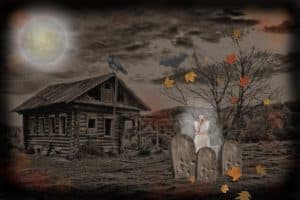
Here’s a fun Halloween project! This tutorial will take you through the step-by-step process starting with an ordinary photo of a house and turning it into a haunted house collage. You will learn a lot about working with layers, as well as using Picture Tubes and brushes, and applying a variety of photo effects.
If you want more Halloween images, check out the Halloween Clipart available for purchase on the Store tab of the PaintShop Pro welcome screen.
Download your FREE 30-day trial and make every shot your best shot with PaintShop Pro, your all-in-one photo editing and design software.
Download these free resources:
Written tutorial (PDF, 1.4 MB)
Clipart (Zip file, 700 KB)
Stock photos (download from Shutterstock.com)
Cabin
Gravestone
Girl
PaintShop Pro resources
Keyboard shortcuts (PDF, 173 KB)
PaintShop Pro User Guides
Partner and User websites
PaintShop Pro User Forum
Scrapbook Campus (Tips and tricks, workshops, master classes, and more)
Creation Cassel (Scripts, picture tubes, and other PaintShop Pro tools, plus weekly freebies)
PaintShop Pro Maniacs (Facebook group)
PaintShop Pro (Facebook group)
What’s new in PaintShop Pro
Holiday projects
Artistic tools and projects
Featured products
 PaintShop Pro 2023 Ultimate
 AI HDR Studio 3.0
 PaintShop Pro 2023
 Vision FX 2.0
Creating a haunted house collage
In this tutorial we’ll learn how to start with a photo of a harmless looking house and turn it into a spooky Halloween collage.
You can use your own images but if you would like to follow along with this tutorial, check the Download resources tab above to download the clipart and stock photos we used. We’ll start by opening the photo of a cabin in PaintShop Pro’s Edit workspace.
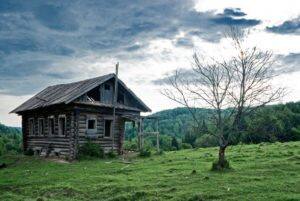
To prepare the scene, you’ll want to remove anything that looks modern. There’s not much in this photo that reveals modern touches, but say you want to remove the top of the lonely-looking pole next to the house. The Clone brush is great for this.
- Select the Clone brush on the left toolbar and adjust the brush size if needed – either by entering a number in the Size box in the Tool Options palette that appears along the top, or by dragging the mouse while holding the Alt key.
- Right-click on the image to sample the background for your clone source.
- Then left-click or click and drag over the area you want to cover (clone target).
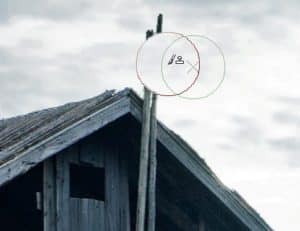
By sampling and dragging over a few separate sections, you can completely the remove the tops of the poles.
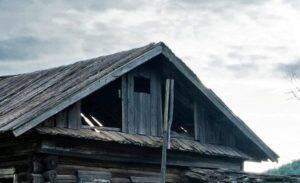
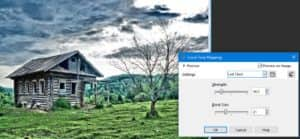
Now let’s make the overall tone more menacing.
- Click on Enhance Photo in the top menu and choose Local Tone Mapping.
- In the Local Tone Mapping window, make sure that Preview on Image is checked.
- Adjust the Strength and Block Size sliders to get the look you want.
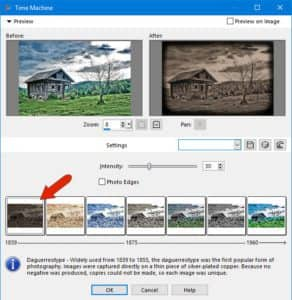
To take this house back in time, go to Effects > Photo Effects > Time Machine. There are several options from 1839 to the present, each with a short description of that era’s photography techniques. Daguerreotype looks like a good choice, though later we’ll still want to reduce the overall brightness.
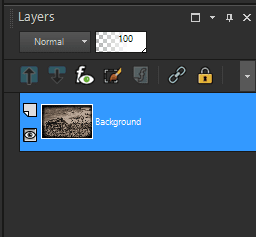
Before adding collage images, make sure the Layers palette is open. If not, press F8 or go to View > Palettes >Layers to open it. The cabin photo is the only layer so far, named “Background.”
The first collage element to add is a gravestone image, which has a white background and green grass. To isolate just the stone, use the Background Eraser. Set a high Tolerance on the Tool Options palette, then click and drag around to remove most of the background.
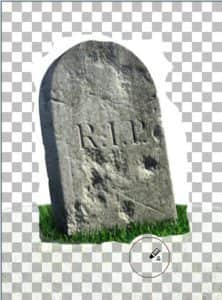
Then lower the Tolerance, set the Sampling to Once and Limits to Discontiguous, and remove the rest of the background and grass.
Now we need to add the gravestone image to the cabin photo. Copy the gravestone image (Ctrl + C or Edit > Copy), switch to the cabin photo and paste it in (Ctrl + V or Edit > Paste as New Layer).
Alternatively, you can grab the gravestone’s “Background” layer from the Layers palette and drag it right onto the cabin photo. It’s added as a new layer, and now with the Pick tool you can move, rotate, or resize the grave.
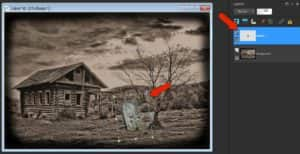
If you want to create a little graveyard, simply copy and paste the gravestone image as many times as you like. Each will be added as a new layer.
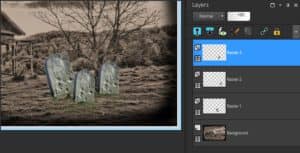
The next step is to apply the Daguerreotype effect to the gravestones but before we do that let’s merge these layers so we can apply the effect to all of them at once.
- Click on one of the gravestone layers in the Layers palette.
- Hold down the Shift key and select the rest of the gravestone layers.
- Right-click and choose Merge > Merge Selected.
Just keep in mind that once you merge these layers you won’t be able to resize or move any of the gravestones individually.
To keep your Layers palette well organized, it is helpful to rename the layers. Just click once to select the layer in the Layers palette then click a second time and you will see the layer name becomes an editable field where you can type in a new name such as Graves (you can also right-click on a layer and choose Rename).
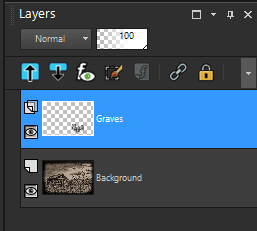
Now to make the gravestones blend with the rest of the image, apply the Daguerreotype effect to the merged Graves layer (Effects > Photo Effects > Time Machine).
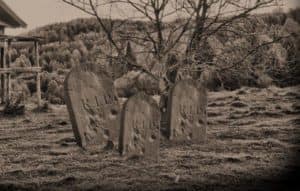
The graveyard ghost in this example will come from an image of a woman all in white with the background already removed. Copy and paste the ghost image (or drag her “Background” layer from the Layers palette onto the cabin photo) and use the Pick tool to resize and reposition.
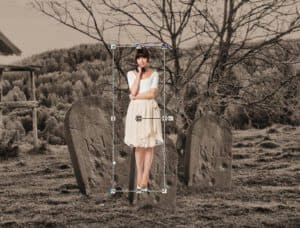
Rename the layer to “Ghost,” and use the Opacity slider to reduce the layer opacity.
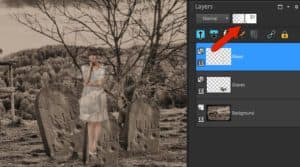
For a ghostly glow, add a new raster layer and name it “Glow.” You can add a new raster layer either by clicking on the New Layer icon at the bottom of the Layers palette or by clicking on Layers in the top menu and selecting New Raster Layer.
Activate the Airbrush tool on the left toolbar (you will find it in the Paintbrush toolgroup flyout), and on the Tool Options palette set a white color, large brush, and about 15% opacity. Clicking around the ghost a few times brings out the glowing effect.
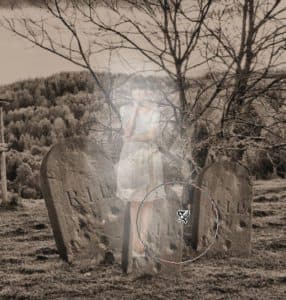
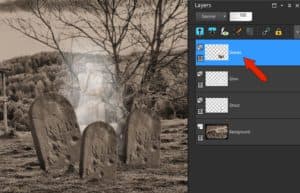
Our glowing ghost is currently placed in front of the gravestones, but we would like to have her behind them. We can do this easily by changing the layer order. In the Layers palette, drag the Graves layer above the Ghost and Glow layers to hide the ghost behind the graves.
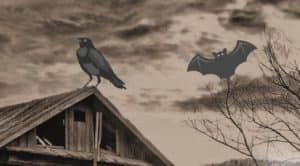
Next, open some Halloween clipart images and add them to the cabin photo the same way you did with the gravestone and ghost images. Most of these already have transparent backgrounds so you won’t need to use the Background Eraser. Be sure to rename each layer. In this example, a raven and bat were added. With each layer active, one at a time you can use Adjust > Hue and Saturation > Hue Saturation Lightness to wash out these collage elements.
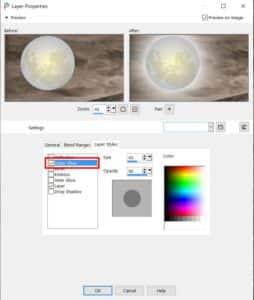
Add an image of a full moon next. To add a shine around the moon:
- Right-click on its layer in the Layers palette and choose Properties.
- In the Layer Properties window click on the Layer Styles tab.
- Add a check beside Outer Glow and click OK.
- In the Layers palette, reduce the layer opacity if you wish.
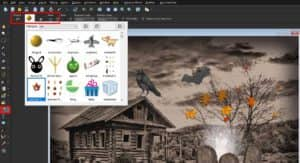
To lighten the mood with a splash of color, let’s add some leaves around the scene using the Picture Tube tool.
- First, add a new raster layer for the leaves.
- Activate the Picture Tube tool on the left toolbar and select the Autumn Leaves tube in the Picture Tube dropdown list.
- Dot some leaves around the bare tree, adjusting the Scale in the Tool Options palette to create leaves of different sizes.
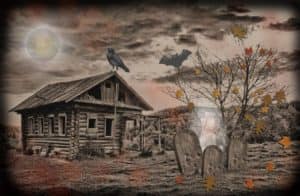
While the picture tube layer is still active, use the Time Machine again, choosing the Early Color setting to blend the leaves into the collage.
For the final effect, add one more raster layer, called “Mist”, with 50% opacity. Activate the Airbrush tool, pick an orange color in the Materials palette and dot some wispy mist around. By adding some darker shades, the mist can look even more sinister.
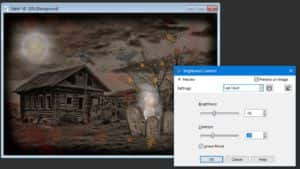
The original cabin image could still be a bit darker. So make that layer active, and choose Adjust > Brightness and Contrast > Brightness/Contrast. Reducing both sliders adds to the overall evil look.
With a well-organized set of layers, you can easily make adjustments to each element of the collage, such as making the ghost a little less opaque, or the mist more opaque and therefore more intense.
When the collage is complete, choose File > Save As. Be sure to save one version as a .pspimage file, so that the layers will be maintained, and you can make further adjustments later. For an image you can share or post online, save as a JPG, which means merging all layers into a single layer.
Download your FREE 30-day trial and make every shot your best shot with PaintShop Pro, your all-in-one photo editing and design software.

