
In this tutorial, you’ll learn how to use the Pen tool in PaintShop Pro to create lines and curves, how to use the three different line modes, and explore various settings on the Tool Options palette.
Thanks for watching! We hope you found this tutorial helpful and we would love to hear your feedback in the Comments section at the bottom of the page. You will find a written version of this tutorial below, and a printable PDF copy to download on the Download Resources tab above.
Download your FREE 30-day trial and make every shot your best shot with PaintShop Pro, your all-in-one photo editing and design software.
Download these free resources:
Written Tutorial (PDF, 1 MB)
PaintShop Pro resources
Keyboard shortcuts (PDF, 173 KB)
PaintShop Pro User Guides
Partner and User websites
PaintShop Pro User Forum
Scrapbook Campus (Tips and tricks, workshops, master classes, and more)
Creation Cassel (Scripts, picture tubes, and other PaintShop Pro tools, plus weekly freebies)
PaintShop Pro Maniacs (Facebook group)
PaintShop Pro (Facebook group)
What’s New in PaintShop Pro
PaintShop Pro Tools
Artistic Tools and Projects
Featured products
 PaintShop Pro 2023 Ultimate
 AI HDR Studio 3.0
 PaintShop Pro 2023
 Vision FX 2.0
How to Use the Pen Tool in PaintShop Pro
In this tutorial, you’ll learn how to use the Pen tool to create lines and curves, how to use the three different line modes, and explore various settings on the Tool Options palette.
What is the Pen Tool?
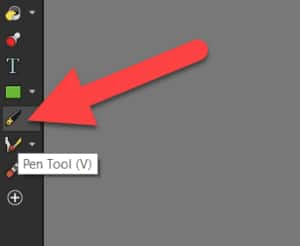
We use the Pen tool to draw straight lines, freeform lines and connected line segments. To use the Pen tool, click on the Pen Tool icon on the Tools toolbar or press V on your keyboard.
Using the Lines/Polylines Mode
- On the Tool Options palette, select the Lines/Polylines mode.
- Mark the Create on Vector check box if you want to draw a line segment on the current vector layer. If no vector layer exists, marking this check box creates one for the line segment.
- If this check box is unmarked, the line segment is placed on a raster layer. Placing a line segment on a vector layer makes it easier to edit, so I recommend keeping this enabled.

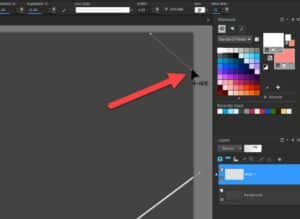
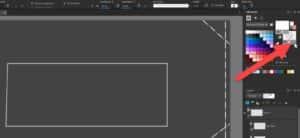
- Select your line color from the Materials palette.
- To draw a line, simply click and drag your starting and ending point. Alternatively, you can click and release your mouse to create your line starting point, and click and release where you want the line to end.
TIP: hold down the Shift key while dragging to constrain to a straight horizontal, vertical or 45-degree line.
There are many customization options on the Tool Options palette. You can change the Mode, Line Style, and the Width of the line.
We also have the Apply checkmark at the beginning of the Tool Options palette.

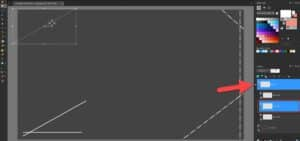
NOTE: If you draw a series of multiple line segments and don’t click Apply, all of the lines will be grouped together onto the same path when you click on the dropdown arrow beside the Vector layer in the Layers palette. When using the Pick tool, you will move all of the lines simultaneously.
However, if you click Apply after drawing each individual line segment, a new path layer will be created for each line segment. You can use the Pick tool to individually, resize, reposition, or rotate any of the line segments you have drawn.
- Mark the Show Nodes check box if you want to view the object’s nodes while drawing.
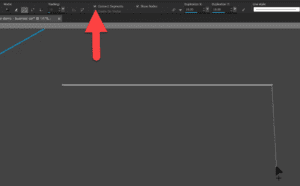
- The Connect Segments option allows you to draw connected lines. Simply click your starting point, and keep clicking to create connected lines.
NOTE: Make the background swatch transparent by clicking on the Transparent square under the Background Properties swatch in the Materials palette if you wish to avoid having a fill between lines.
- Change the shape of the corners of connected segments by selecting either Miter join, Round join, or Bevel join.

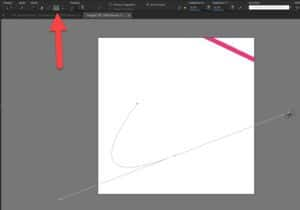
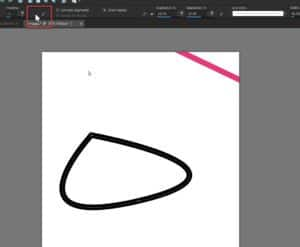
Using the Point-to-Point Mode
- On the Tool Options palette, select the Point-to-Point mode.
- To create a straight line, click once, and then click again where you want the next node.
- To create a curved line, click once to create your starting point, and then click and drag to create a curved shape. Release the mouse button once you’re happy with the curve.
Choose to Start a New Contour on the Tool Options palette to create an open shape where the first and last segments are not connected or click the Close Selected Open Contours button to create a closed shape where the first and last segments are connected.
Using the Draw Freehand Mode
- On the Tool Options palette, select the Draw Freehand mode to draw a free-form line.
- Click and drag out your line on the image window.
- Mark the Show Nodes check box to display the curve’s nodes. Then type or set a value in the Tracking control to set the distance in pixels between nodes.
- A higher Tracking value will create smoother, less precise lines with fewer nodes, while a lower value will create more segmented, precise lines with more nodes.
- Drag to create the freehand line or curve and click the Apply button.
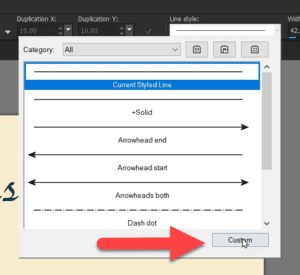
How to Create a Custom Stylized Line
You can create your own stylized line by clicking on the dropdown menu from the Line Style category on the Tool Options palette and choosing Custom.
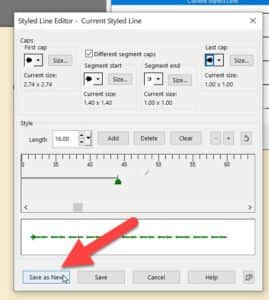
This opens the Styled Line Editor window. First, clear what’s there by pressing the Clear button.
- Add segments, adjust their lengths, and add any desired segment caps.
- When finished, click Save as New, assign a name, and now your new custom style will appear on the list ready for you to use.
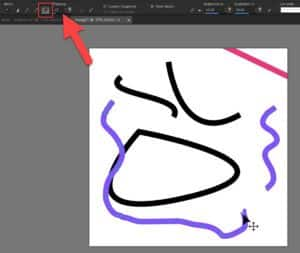
Using the Edit Mode
- Click on the Edit Mode on the Tool Options palette to make customizations.
- Click on an existing line and then change the various options on the Tool Options palette such as adjusting the width, style, color, and moving the nodes.

Using the Knife Mode
Click on the Knife Mode on the Tool Options palette to cut a line segment. Simply drag across the line where you want to cut it.
Then click and drag a node to separate the line segment into two.

Have fun experimenting using the Pen tool to create designs and vector graphics in PaintShop Pro!
Download your FREE 30-day trial and make every shot your best shot with PaintShop Pro, your all-in-one photo editing and design software.
