
Learn how to apply, modify, combine and experiment with effects in Corel PHOTO-PAINT™, with the new Effects docker that lets you work non-destructively. Add multiple effects, reorder them, toggle them on or off and make quick adjustments, all while keeping the original object or image intact.
NOTE: In CorelDRAW Graphics Suite 2024 the Effects docker has been reorganized to serve as your one-stop shop for non-destructive effects. In both applications, you can apply multiple special effects to the same object, toggle individual effects on or off, and reorder effects. With a single click, you can reset an effect, or flatten all effects.
Thanks for watching! We hope you found this tutorial helpful. You will find a written version of this tutorial below, and a printable PDF copy to download on the Download resources tab above.
Learn how to apply, modify, combine and experiment with effects in Corel PHOTO-PAINT™, with the new Effects docker that lets you work non-destructively. Add multiple effects, reorder them, toggle them on or off and make quick adjustments, all while keeping the original object or image intact.
NOTE: In CorelDRAW Graphics Suite 2024 the Effects inspector has been reorganized to serve as your one-stop shop for non-destructive effects. In both applications, you can apply multiple special effects to the same object, toggle individual effects on or off, and reorder effects. With a single click, you can reset an effect, or flatten all effects.
Thanks for watching! We hope you found this tutorial helpful. You will find a written version of this tutorial below, and a printable PDF copy to download on the Download Resources tab above.
Start your FREE 15-day trial and embark on a design journey with powerful tools for vector illustration, layout, photo editing, typography, and collaboration.
Download these free resources:
Written tutorial for Windows (PDF, 676 KB)
Written tutorial for Mac (PDF, 614 KB)
CorelDRAW Graphics Suite Resources
Quick Start Guide (PDF, 2 MB)
Keyboard Shortcuts (PDF, 3.5 MB)
CorelDRAW and Corel PHOTO-PAINT user guides
For CorelDRAW Graphics Suite subscription and perpetual licenses (2018 to 2024), languages include English, Português do brasil, 简体中文, 繁體中文, Čeština, Deutsch, Español, Français, Italiano, 日本語, Polski, Русский
Introduction to PHOTO-PAINT
What’s new in CorelDRAW Graphics Suite
 CorelDRAW Graphics Suite
 Ultimate Vector Bundle Vol. 1
 CorelDRAW Standard 2021
 Ultimate Vector Bundle Vol. 2
 Corel Vector
Using effects in Corel PHOTO-PAINT
PHOTO-PAINT comes with an array of effects, which can be applied to an image or object. And new to PHOTO-PAINT 2020 are non-destructive effects, which make it easy to apply, modify, combine, and experiment with effects on an object or image, while keeping original objects intact.
Click on any of the images below to view full-size.
How to apply non-destructive effects
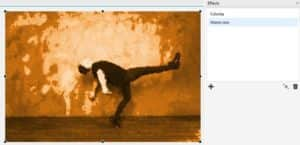
In this tutorial we are using a composite image based on a photo. There are three objects placed above the photo: a blue translucent overlay on the wall, a translucent splatter object, and at the top is another copy of the man in the photo.
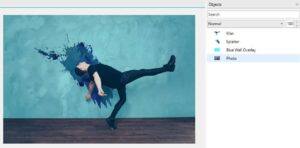
In the Objects docker, we’ve used the Visibility (eye) icon to hide the top 3 objects and focus on the photo itself.
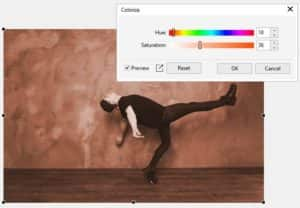
Like in previous versions of PHOTO-PAINT, there are a wealth of effects in the Effects menu. In this example, Effects > Camera > Colorize was chosen and we’ve enabled Preview to see changes in real time on the photo.
If you apply an effect from the Effects menu, it changes the object to which it’s applied.
However, in PHOTO-PAINT 2020 you can use the Effects docker to apply one or more non-destructive effects. This means that you can add as many effects as you like, or turn effects on and off, and original objects always remain intact. You can also edit effects after they’re applied and change the order of combined effects.
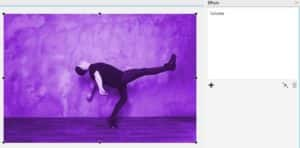
Returning to the original photo without any effects applied, open the Effects docker (Window > Dockers > Effects).
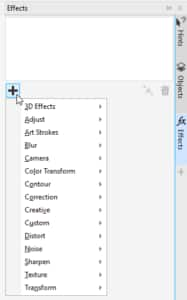
Clicking the Plus sign in this docker opens a menu that has all the effects from the Effects menu, as well as all the Adjust options.
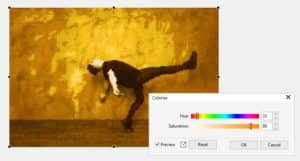
From the docker, we’ll start with Camera > Colorize as before, and apply a dramatic purple color change. The effect is now listed in the docker.
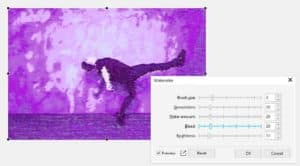
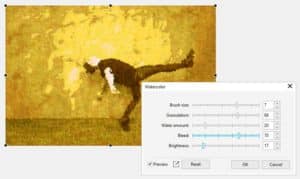
Next, we’ll add an Art Strokes > Watercolor effect and use relatively low settings for each option.
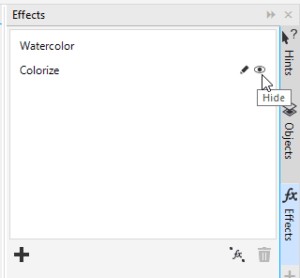
This effect was applied to both the photo itself and to the previous Colorize effect we applied. Either effect can be toggled off and on when you hover over it and click the Visibility icon.
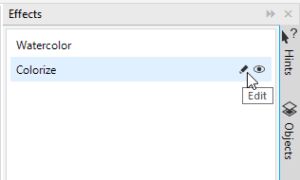
To adjust an effect, you can double-click on it, or click its Edit icon.
For example, editing the Colorize effect to have a different color changes the look of both effects.
Or you can edit the Watercolor effect to have a higher brush size, granulation, and bleed.
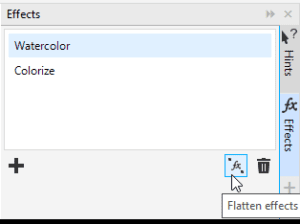
You can delete a selected effect with the Delete icon or combine effects with the Flatten icon. Keep in mind that once a set of effects are flattened, they become destructive. This means that any edits applied after this would be applied to the object with the flattened effects, not the original object.
You can also drag effects to re-order them in the list. This is how the photo changes if we drag the Colorize effect above the Watercolor effect.
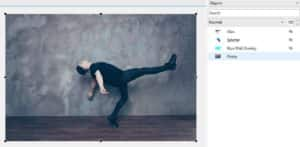
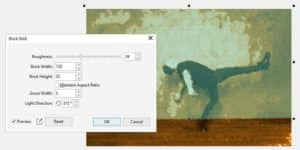
Back in the Objects docker, we’ll use the Visibility icon to turn the wall overlay back on and select it with the Pick tool. In the Effects docker, we’ll add a Texture > Brick Wall effect. This effect is applied only to the overlay, so the bricks stop at the floor.
Now we’ll turn on the splatter object, which is translucent, so the objects below and their effects show through a bit.
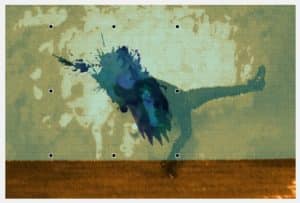
Finally, we’ll display and select the man at the top of the list and return to the Effects docker. We’ll add a Blur > Motion Blur effect, which is applied only to the selected object.
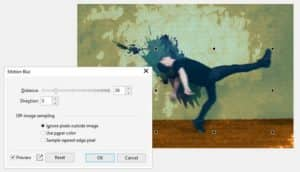
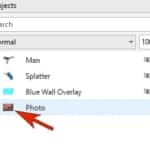
In the Objects docker, the three objects that have effects now have the FX icon. Clicking this icon toggles off all effects applied to that object and brings back the intact original objects. This gives you the flexibility to see which effects to keep and which to hide.

Now that you have learned how to use the new Effects docker, give it a try to see how easy it is to combine and experiment with different effects to create your own unique looks, while preserving your original objects and images.
Start your FREE 15-day trial and embark on a design journey with powerful tools for vector illustration, layout, photo editing, typography, and collaboration.
