Learning how to add transparency will open up a new world of creative possibilities in your photo editing projects. This tutorial will demonstrate the three transparency tools in PHOTO-PAINT: Object Transparency, Color Transparency, and Object Transparency Brush.
Thanks for watching! We hope you found this tutorial helpful and we would love to hear your feedback in the Comments section at the bottom of the page. You will find a written version of this tutorial below, and a printable PDF copy to download on the Download Resources tab above.
Start your FREE 15-day trial and embark on a design journey with powerful tools for vector illustration, layout, photo editing, typography, and collaboration.
Download these free resources:
Written tutorial for Windows (PDF, 1.7 MB)
Written tutorial for Mac (PDF, 1.5 MB)
CorelDRAW Graphics Suite resources
Quick Start Guide (PDF, 2 MB)
Keyboard Shortcuts (PDF, 3.5 MB)
CorelDRAW and Corel PHOTO-PAINT user guides
For CorelDRAW Graphics Suite subscription and perpetual licenses (2018 to 2024), languages include English, Português do brasil, 简体中文, 繁體中文, Čeština, Deutsch, Español, Français, Italiano, 日本語, Polski, Русский
CorelDRAW Community
CorelDRAW learning center
Facebook
X (formerly Twitter)
YouTube
Introduction to PHOTO-PAINT
What’s New in CorelDRAW Graphics Suite
 CorelDRAW Graphics Suite
 Ultimate Vector Bundle Vol. 1
 CorelDRAW Standard 2021
 Ultimate Vector Bundle Vol. 2
 Corel Vector
Using the Transparency Tool in PHOTO-PAINT
Learning how to add and work with transparency will open up a new world of creative possibilities in your photo editing projects. This tutorial will demonstrate the three transparency tools in PHOTO-PAINT: the Object Transparency tool, the Color Transparency tool, and the Object Transparency Brush tool.
The Object Transparency Tool – Uniform Transparency
We’ll start with the Object Transparency tool. In this example, the object selected with the Pick tool is the ghostly woman cutout.
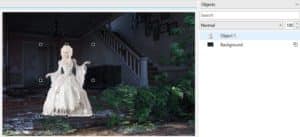
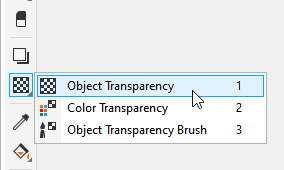
She stands out a bit too much for a ghost, so open the Transparency tool group and activate the Object Transparency tool.
On the property bar, there are five transparency modes, the simplest of which is Uniform Transparency.

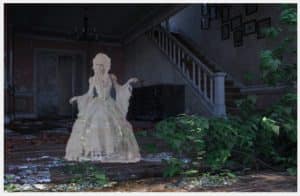
You can choose a preset from the Transparency Picker dropdown or use the Transparency slider to adjust the percentage of transparency – a higher percentage makes the object more transparent and a lower percentage makes the object more opaque. In this example, a percentage around 45 works well.

All transparency options can used with a clip mask. A clip mask is simply a layer that floats above an object, which allows you to make changes to the object transparency without permanently modifying the object. Click the Apply to clip mask button on the property bar and a link icon will appear beside the object in the Objects docker.
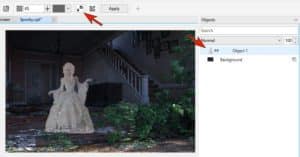
If you decide to remove the transparency later, you can right-click on the object and choose Clip Mask > Disable or Remove.
The Object Transparency Tool – Fountain Transparency
In this example we’ll demonstrate another type of transparency with the Object Transparency tool – Fountain Transparency. Fountain transparency makes the object fade from one transparency value to another, like a gradient. A fountain transparency can be linear, elliptical, conical, or rectangular.
In this example, the text object is selected.

Activate the Object Transparency tool and choose Fountain transparency on the property bar. This is a gradient transparency, which in this example has a black node on the left end of the slider transparency bar and a black node on the right end as well. This indicates that it is fully transparent at both ends.
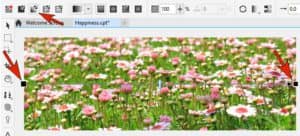
From the Color palette along the right side, drag a white swatch onto the black node on the left end. Now the transparency goes from zero (opaque) on the left to full transparency on the right.
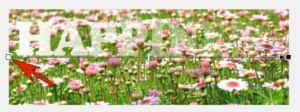
You can drag the nodes so that the gradient is vertical, adjust where the gradient starts and ends, and adjust the transparency midpoint. You can also change the transparency Acceleration, which controls how quickly the fountain transparency blends from one transparency to another.
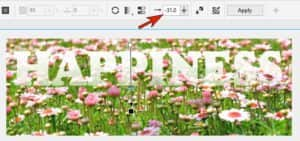
On the property bar, you can also reverse the transparency direction, or choose Repeat or Repeat and Mirror.
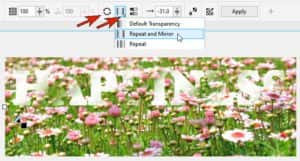
Opening the Edit Transparency window provides options for more exact control.
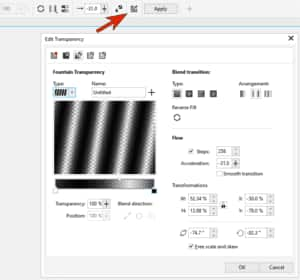
You can remove any transparency by clicking on the No Transparency icon on the property bar.

In this example, we’ve created a second version of the background image and applied a Sketch Pad effect to it (Effects > Art Strokes > Sketch Pad). When a fountain transparency is applied to this object, you can get a nice transition from sketch to realistic.
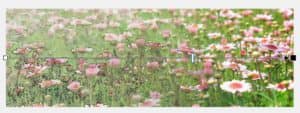
If we switch to an Elliptical fountain transparency, now the transparency gradient radiates from the center.
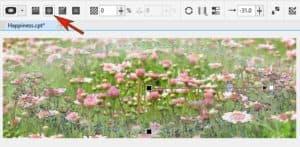
Fountain transparency is also nice for creating reflections. In this example, we want to enhance the reflection of the lighthouse on the water below.

The first step is to select the lighthouse. From the Mask tool group, activate the Smart Selection mask tool. Click and drag over the area…
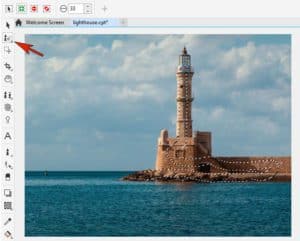
… and when you release your mouse button the selection will expand to include all of the object.

TIP: if your selection is not quite perfect, first try going to Mask > Apply Smart Selection to Mask. If there are still some corrections to be made, use Add or Subtract mode on the property bar to add or remove any bits.
Once you have the object – in this case the lighthouse and rocks – masked, go to Object > Create > Copy from Mask.
Select this new object with the Pick tool then drag the top middle node down to the bottom of the image. This will cause the new object to be flipped, like a reflection.

Now you can apply a fountain transparency to this object. Reposition and adjust the nodes and transparency slider to achieve the look of a reflection fading into the water.

The Object Transparency Tool – Bitmap Pattern Transparency
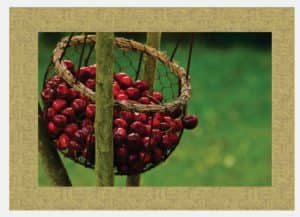
In this example, we’ll use Bitmap pattern transparency to create a textured border around the photo. Our file consists of a photo (Background 2), and 2 filled rectangles (Object 2 and Object 3). When we apply a bitmap pattern transparency to the yellow rectangle on top, the brown rectangle below will show through the transparency pattern. First, use the Show/Hide (eye) icon beside the photo Background 2 in the Objects docker to hide the photo while we apply and adjust the transparency.
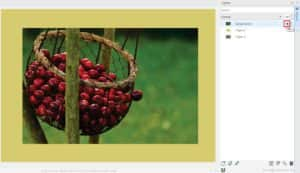
Select the yellow rectangle to make it the active object, activate the Object Transparency tool and click on the Bitmap pattern transparency icon on the property bar.
With the Transparency Picker dropdown, you can browse through different categories of bitmap patterns. Use the slider in the bottom right corner to increase the size of the thumbnail preview images. Click on any thumbnail to apply it to the object and see what it looks like. The darker areas of the bitmap are where the selected object (yellow rectangle) is more opaque, and the lighter areas have higher transparency, allowing the object below (brown rectangle) to show through.
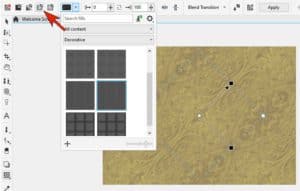
You can also use the search bar along the top of the Transparency Picker window to search for a keyword, such as “straw”.
TIP: if you click on the Get More icon in the top right corner, this will bring up a list of free content packs available for you to install. Here you’ll find hundreds of bitmap pattern fills plus free fonts and images.
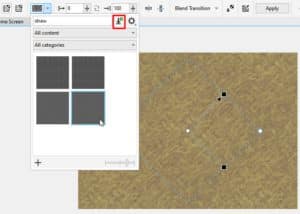
Once you have selected and applied a bitmap pattern transparency, you can use the nodes to adjust the pattern. The white circular node will rotate the pattern, and the black nodes will skew or stretch the pattern in both directions. And on the property bar you can adjust the amount of Foreground transparency and Background transparency.
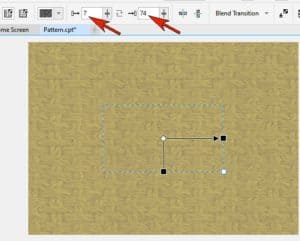
As before, you can use the Edit Transparency window to fine tune settings, or to replace the source bitmap.
The photo border is much more interesting now, with a bitmap pattern transparency applied to it.
The Object Transparency Tool – Texture Transparency
In this example, we want to add a texture transparency to the text. With a texture transparency you can use existing textures, such as water, minerals, and clouds, or you can edit a texture to create your own texture transparency.
First, select the object that you want to apply the transparency to, in this case the “Pool Party” text. Activate the Object Transparency tool and click on the Texture transparency icon on the property bar.
In the Transparency picker dropdown window, there are different patterns to choose from. The patterns are in color, but their grayscale versions are used for transparency.
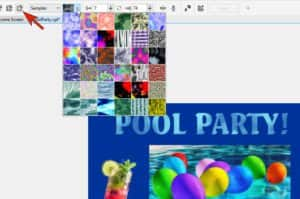
For this example, we’ll choose a texture that looks like water, and then adjust its angle and size.

The Color Transparency Tool
The Color Transparency tool can be used to make all pixels of a certain color or color range transparent, thereby removing specific colors from a selected object.
We’ll use the photo of the lighthouse again, this time to demonstrate how to remove the colors of the sky.
In the Objects docker we’ve selected the background object. Since we only want to remove the colors of the sky, we can mask that area first before applying the transparency. Activate the Rectangle Mask tool and use it to create a mask around the sky area. This will ensure that any matching colors in the water below are not removed.
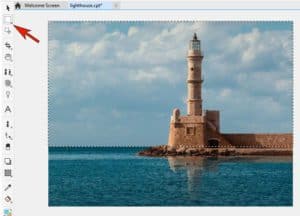
Then activate the Color Transparency tool and click on different colors in the sky to remove one color at a time. On the property bar, you can adjust the Tolerance setting to specify the range of colors that will be affected.
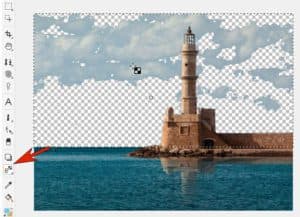
Once all the colors in the sky have been removed, you can remove the mask by going to Mask > Remove Mask. And now that the sky is removed, we can replace it with a different background.

The Object Transparency Brush Tool
Finally, we’ll look at the Object Transparency Brush tool. This tool is used to make object areas transparent by applying brushstrokes. In this example, we have a photo of a couple (Background) with a solid white rectangle (Object 1) on top. Select the white rectangle to make it the active object and then activate the Object Transparency Brush tool.
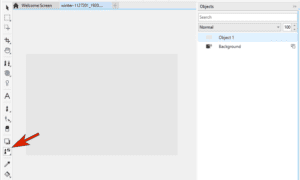
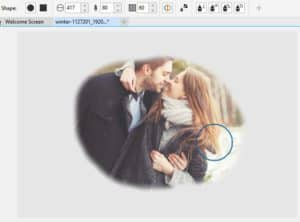
On the property bar you have settings to choose the brush shape, adjust the nib size, add feathering to soften the edges of the brushstrokes, and adjust the level of opacity.
We’ll start with a basic round brush and add some feathering and opacity. The nib size can be changed on the property bar, or you can resize it by holding down the Shift key and dragging up or down with your mouse. Once you have the brush settings to your liking, brush over the white rectangle to reveal parts of the photo below.
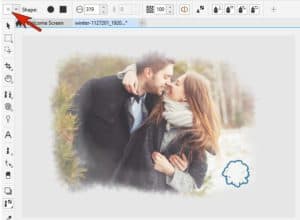
You can create even more interesting transparency effects by using one of the textures or shapes available in the Nib shape dropdown window.
Now that you know how to use the various transparency tools, how will you use them in your PHOTO-PAINT projects?
How to use the Transparency tool in CorelDRAW

Removing backgrounds from images in CorelDRAW and PHOTO-PAINT

Using masks in Corel PHOTO-PAINT
Start your FREE 15-day trial and embark on a design journey with powerful tools for vector illustration, layout, photo editing, typography, and collaboration.

