Learning how to add weather effects to a video can help you by setting a more obvious mood in a scene. If you were making a video slideshow of your Christmas holidays for instance, still images could be brought to life by adding a simple snow effect. Wind, rain, clouds, lightning and snow effects can be used in any number of styles of video making to add a natural, or even supernatural visuals to your project. All of the weather effects available in VideoStudio are fully customizable through various settings so feel free to experiment!
In this tutorial you will learn:
- How to apply weather filters to your media.
- How to customize weather filters.
- How to modify the Rain filter to create a snow effect.
Thanks for watching! You will find a written version of this tutorial below, and a printable PDF copy to download on the Download resources tab above.
Download a FREE 30-day trial and turn your best moments and life experiences into unique movies with this easy and fun video editor packed with intuitive tools and creative effects.
Download these free resources:
Written Tutorial and Sample Media (zip, 15 MB)
VideoStudio User Guides and Help files
For VideoStudio X9 to 2023, languages include English, Deutsch, Français, Italiano, Nederlands, 简体中文, 繁體中文, 日本語
What’s new in VideoStudio
Effects, filters, and transitions
Beginner editing techniques
Featured products
 VideoStudio Pro 2023
 Studio Backlot Membership
 VideoStudio Ultimate 2023
 Vision FX 2.0
Adding weather effects to your videos
In this tutorial, you’ll learn how easy it is to add and customize weather effects like clouds, wind, lightning, rain and snow to your video projects. These weather elements are customizable in a variety of ways, depending on if you’re looking for a natural or a supernatural effect.
Click on any of the images below to view full-size.
Adding weather effects
Open VideoStudio in the Edit tab and add your media to the Video track on the timeline. In this first example we will add a cloud and wind effect to the Flying a Kite image.
In the media library, click on the FX tab. Then select the Special category from the dropdown menu to view the various weather effects.
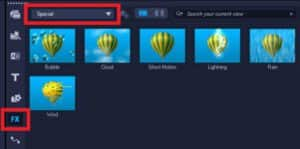
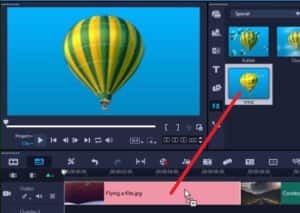
Select the Wind filter and drag it onto the flying kite clip in the timeline. The default wind effect will be added to your video.
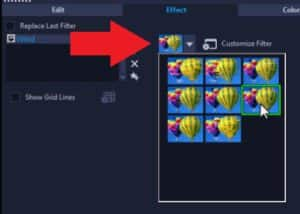
Double-click on the clip on the timeline to open the Options panel. On the Effect tab you can click on the dropdown arrow beside the thumbnail of the hot air balloon to preview various presets for the Wind filter.
To add a second effect, click on the Show Library Panel icon in the bottom right corner of the Options panel to access the FX tab again.

Select the Cloud filter and drag it onto your flying kite clip in the timeline. Once again, double-click on clip in the timeline to access the Edit tab in the Options panel.
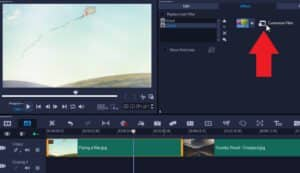
To customize the size of the cloud effect, click on Customize Filter.
To make adjustments to the size of the clouds, select the first key frame.
Click on the Advanced tab and switch the Motion type to Emitter. From here, click on the small box on the preview pane and adjust where you want the starting position of the cloud effect.
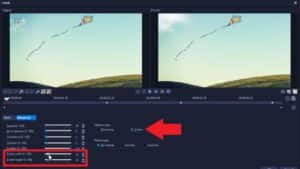
Then adjust the Emitter Width and Emitter Height sliders to get the starting size you would like.
Play around with these settings on the various key frames until you’re happy with them and then click OK.
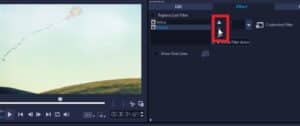
NOTE: When there is more than one video filter applied to a clip, you can change the order of filters by clicking the Move filter up or down arrows.
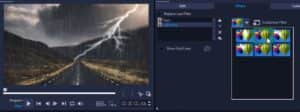
In this next example, we used the same process to add a rainstorm to the sample image Country Road, using the Rain and Lightning filters.
Adding a snow effect
We can also alter the Rain filter to add a snow effect to the sample clip Deer in Winter. Add the clip to the timeline and then drag and drop the Rain filter onto. Double-click on the clip to open the Options panel as before, then click on the Customize Filter button. In this example we applied the following set of attributes to the starting keyframe:
- On the Basic tab, change the Density=1000, Length=1, Width=25, Background Blur=0, Variance=85, Body=0, and Opacity=75.
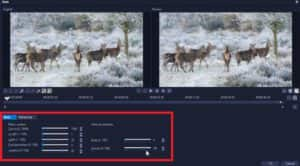
- On the Advanced tab, change the Speed=20, Wind Direction=270, Turbulence=20, and Vibration=20.
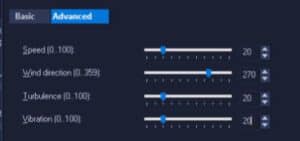
- Then, move to the ending keyframe and apply the same values that you applied to the starting keyframe.
You can experiment with different settings to adjust the density, speed or other parameters to create a gentle, light snowfall or a heavy, swirling snowstorm. Click OK when done to go back to the timeline editor.
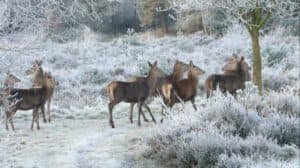
Now press play to preview your video and you’ll see a nice snowy effect has been added to your media clip!
Download a FREE 30-day trial and turn your best moments and life experiences into unique movies with this easy and fun video editor packed with intuitive tools and creative effects.


Comments (2)
Reader Interactions
Comments
Apakah bisa membeli corel x7 yang original?
Corel dan distributor software kami tidak lagi menjual VideoStudio X7.